Mahogany Military Saber Display Case
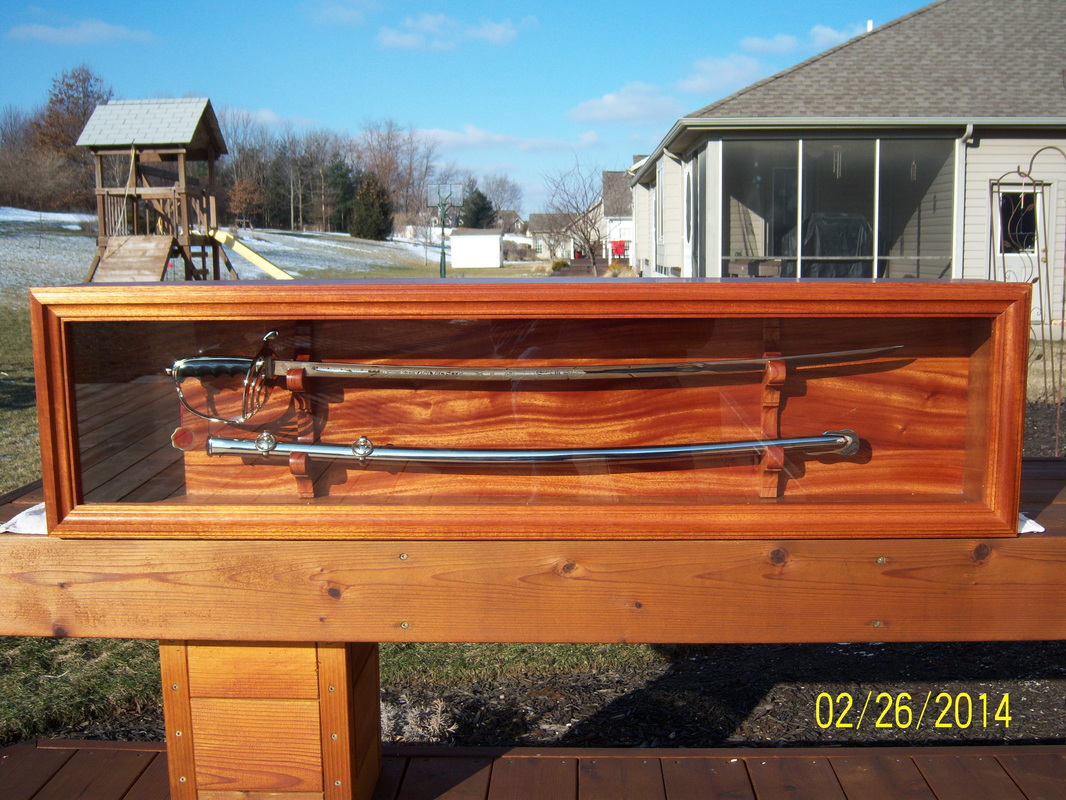
A very good friend of mine gave me the honor of making a case for his son's Norwich University saber. The tricky part of this build was not necessarily the construction of the case, but the solid wood back panel - mainly because I was unsure of how the floating back panel would attached to the wall.
Mahogany Saber Case
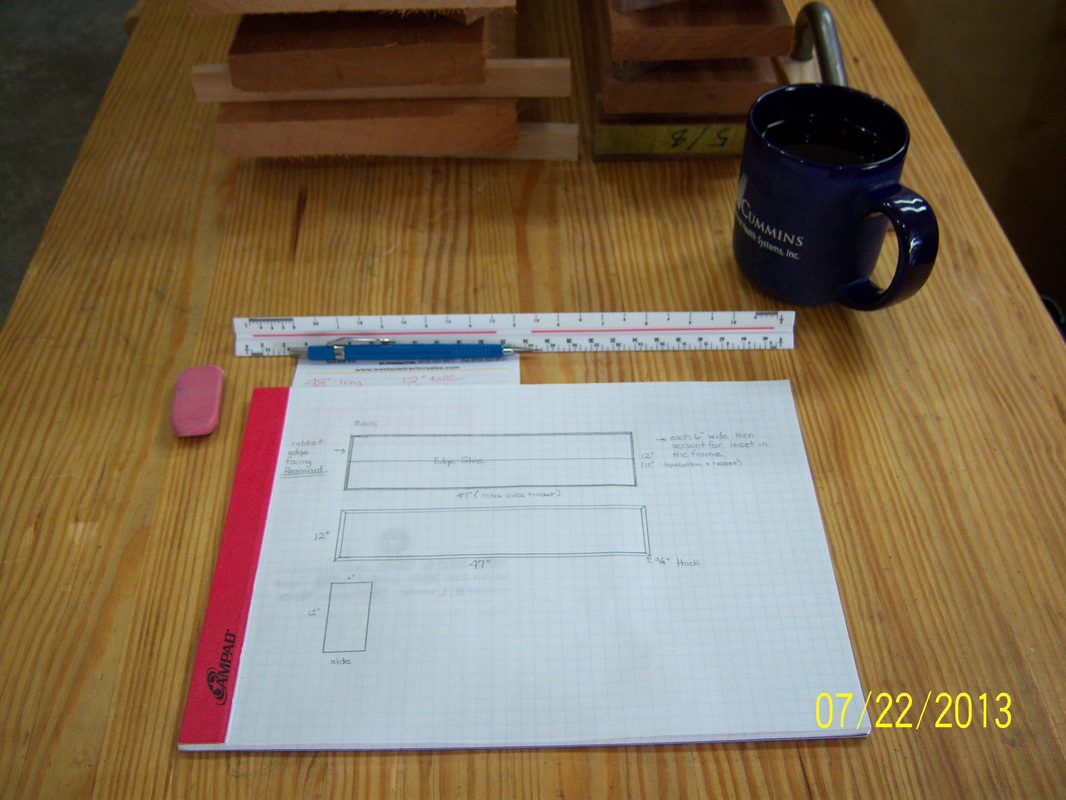
I spent some time drawing to scale how I thought the case should be constructed.
Mahogany Saber Case
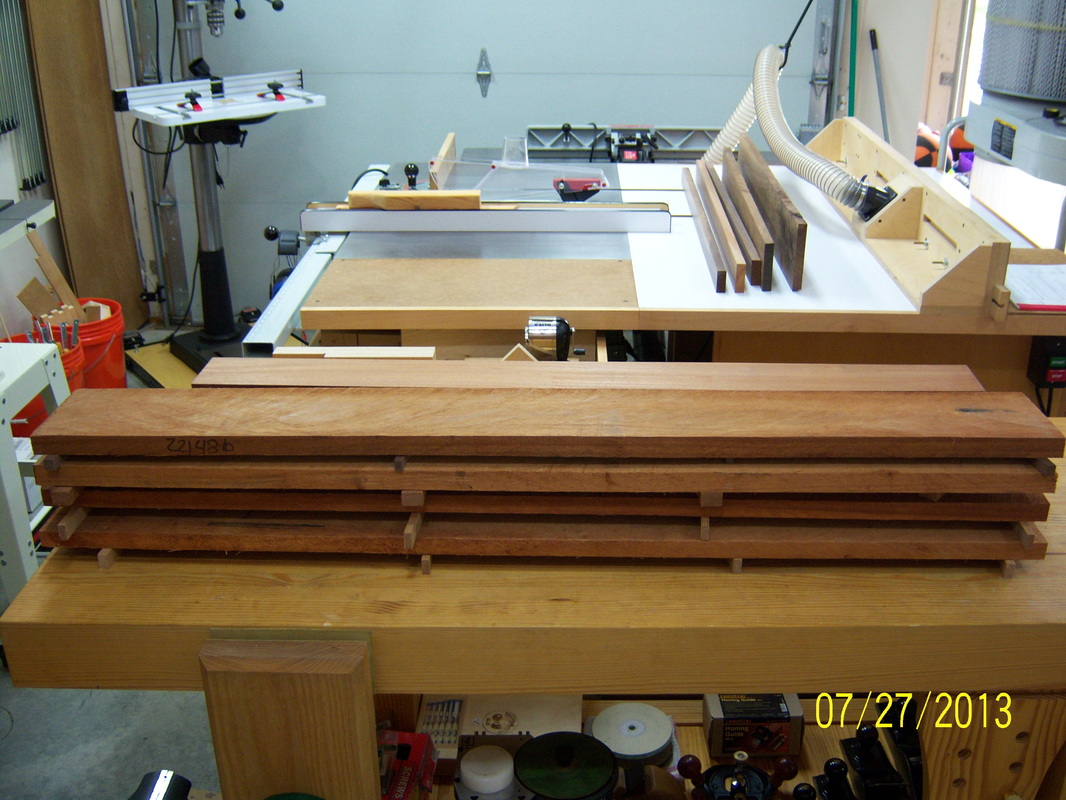
Mahogany was selected as the wood of choice which I was very pleased with since this will be my first time using mahogany. Two stacks of boards were stickered and allowed to acclimate in my shop for a period of time.
Mahogany Saber Case
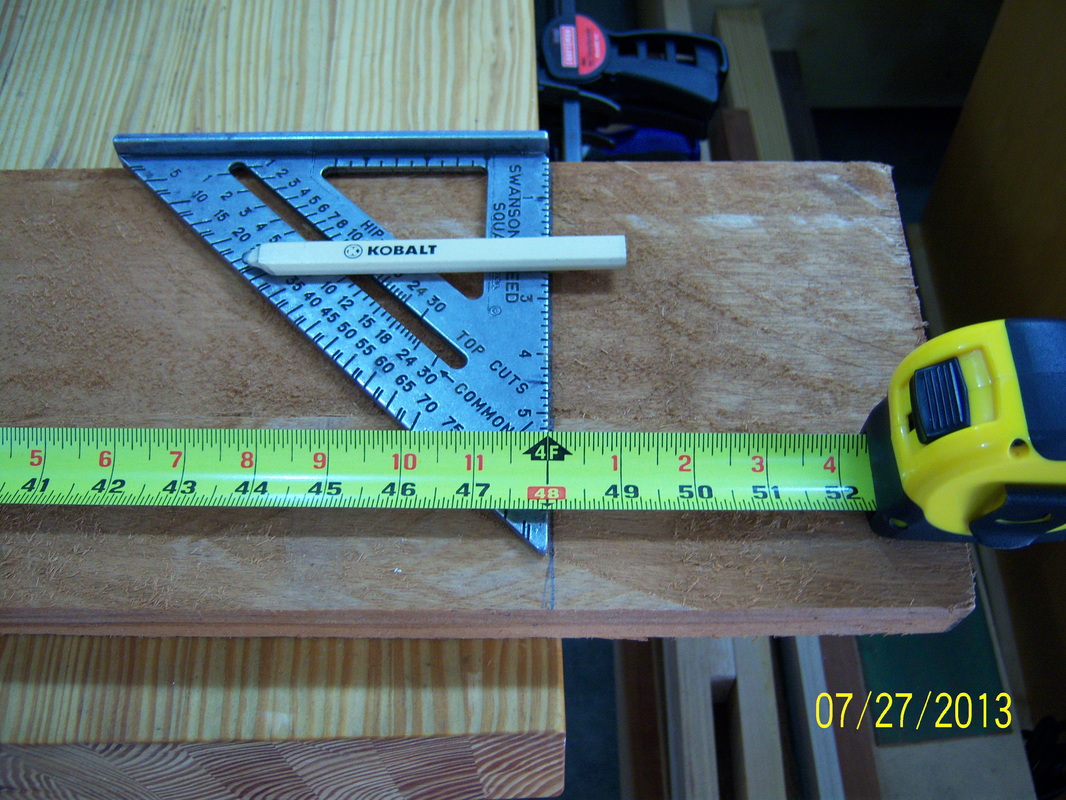
Each board was cut to 48" in length.
Mahogany Saber Case
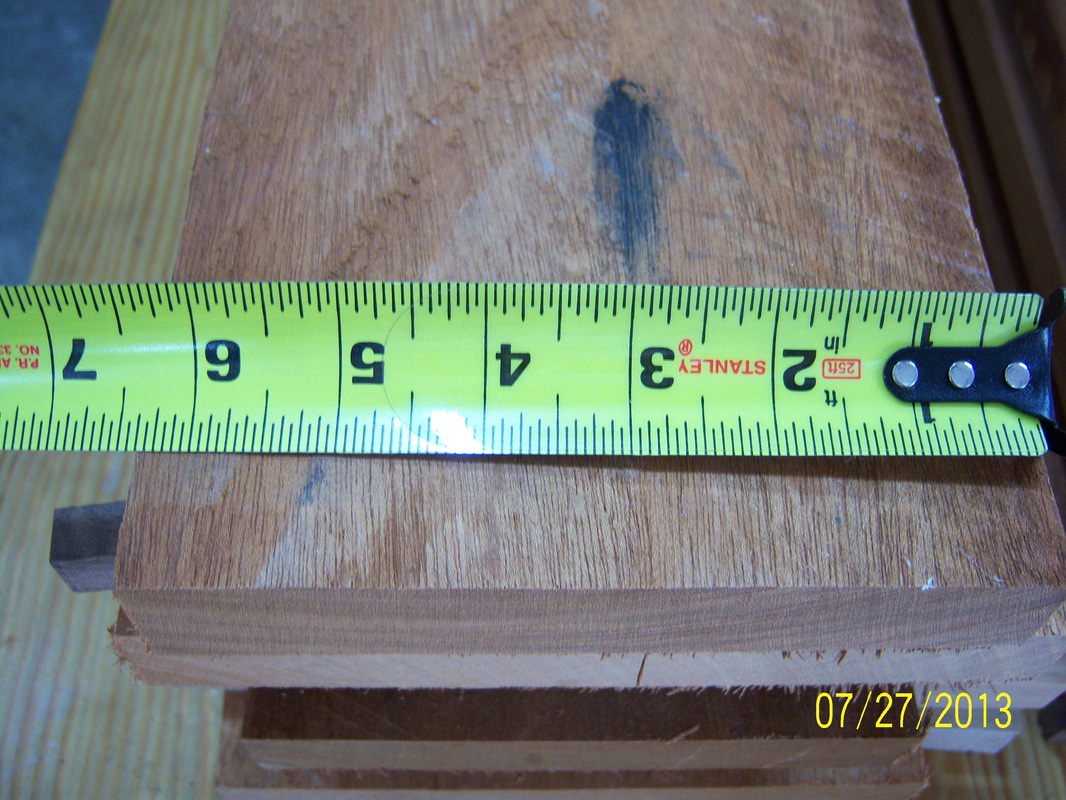
Each board was also ripped to 6" in width.
Mahogany Saber Case
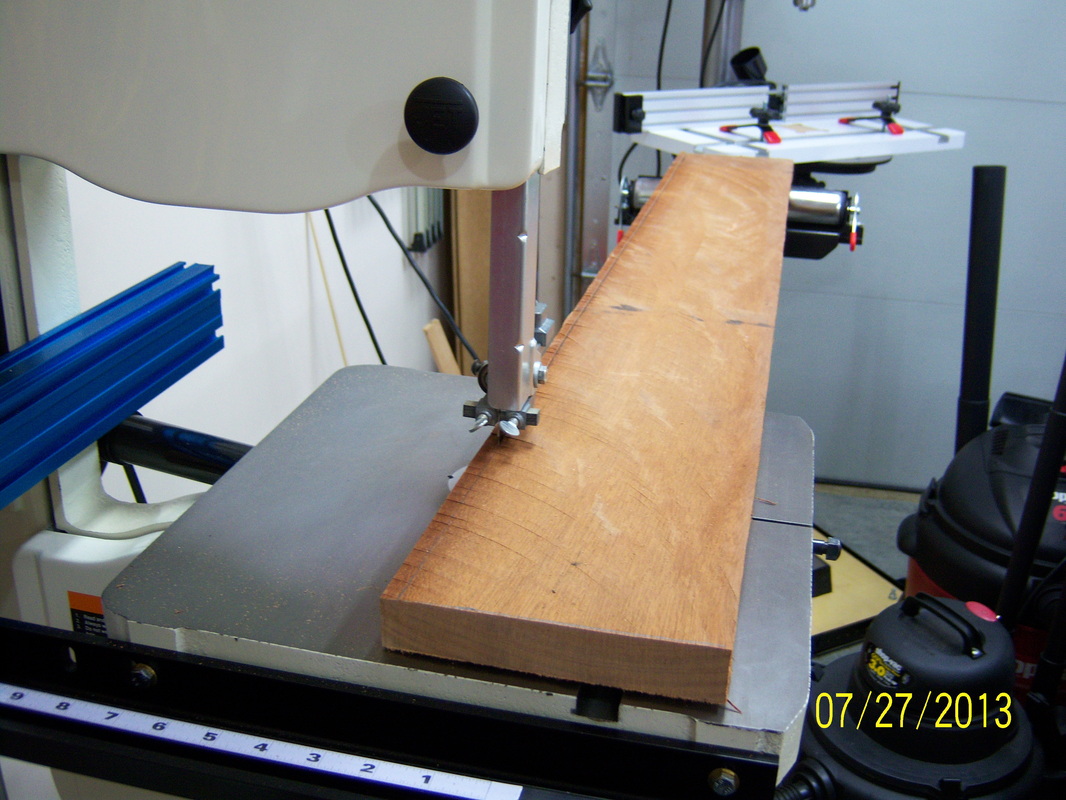
I used the band saw and an out-feed roller stand to rip each of the 48" long boards.
Mahogany Saber Case

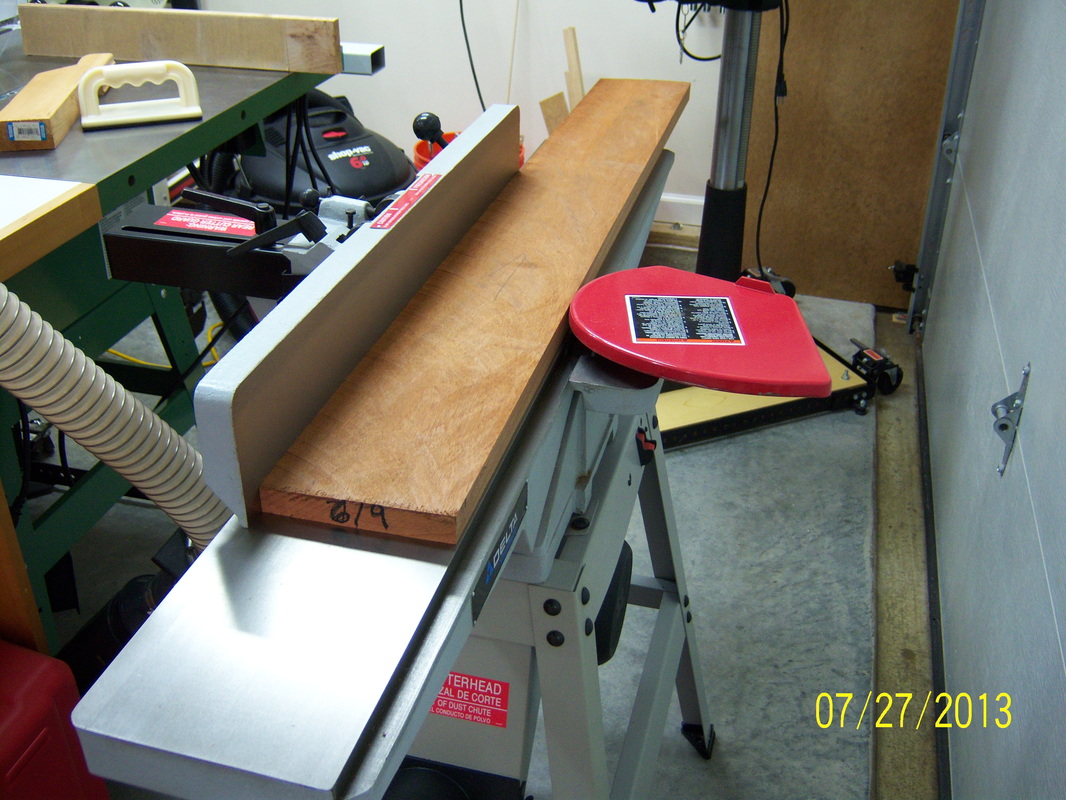
After each of the boards was cut roughly to size, they were stacked prior to being face and edge jointed.
Mahogany Saber Case
Mahogany Saber Case
Mahogany Saber Case
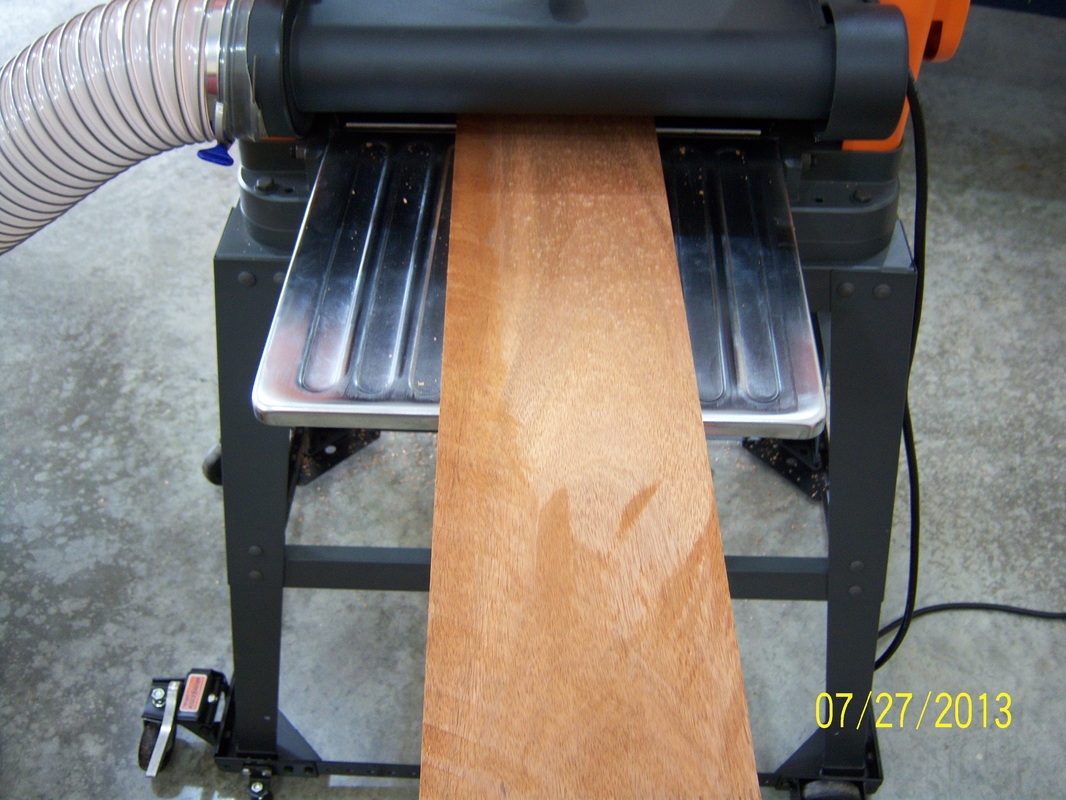
After the boards were made flat on one side, I ran each through the planer. If you look closely, you can see some tear-out. I reversed the feed direction of the board on the next pass which took care of the problem.
Mahogany Saber Case
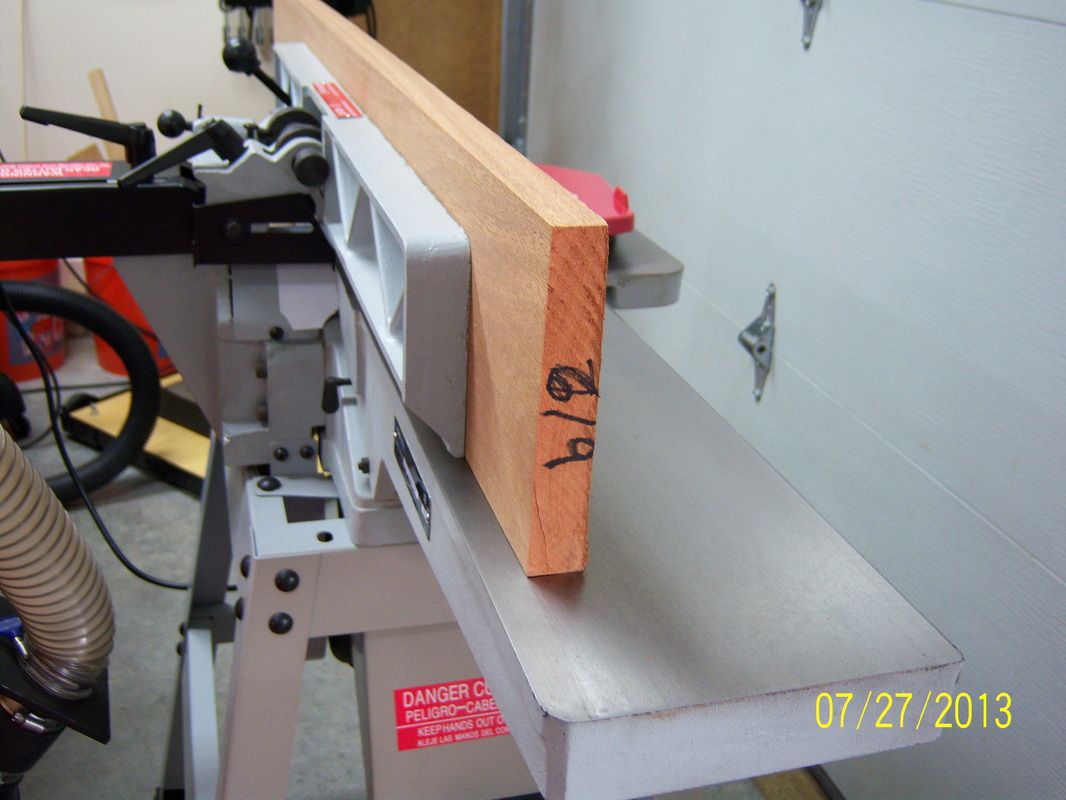
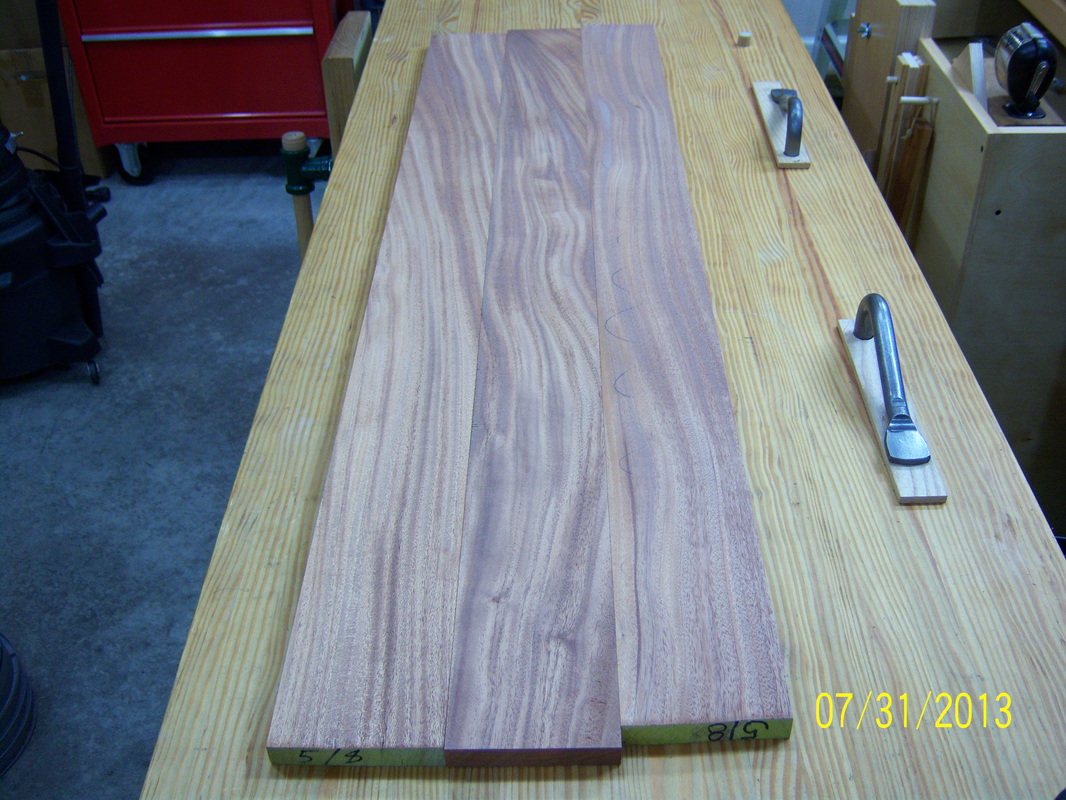
After planning to approximately 3/4" in thickness, the boards were ripped to width.
Mahogany Saber Case
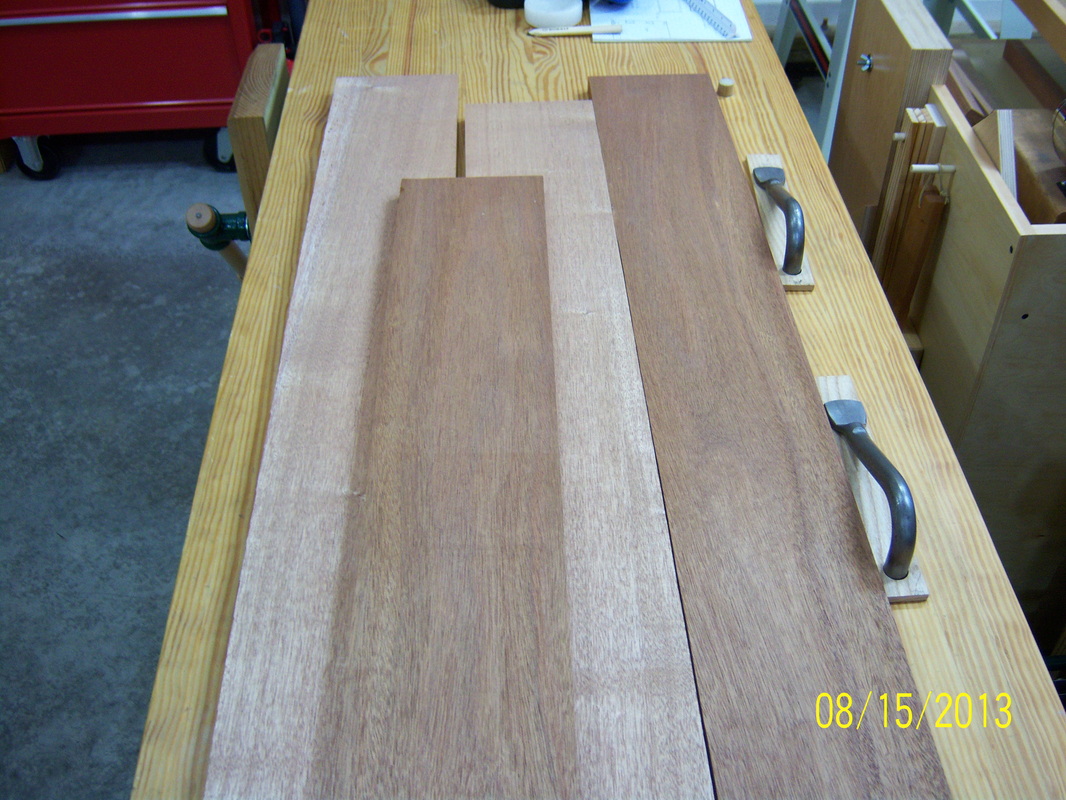
After ripping to width, the next series of photographs show different arrangements of the three boards that will comprise the back of the case. Time was spend rearranging the position of the boards in order to best match the grain pattern.
Mahogany Saber Case

Mahogany Saber Case
Mahogany Saber Case

Mahogany Saber Case
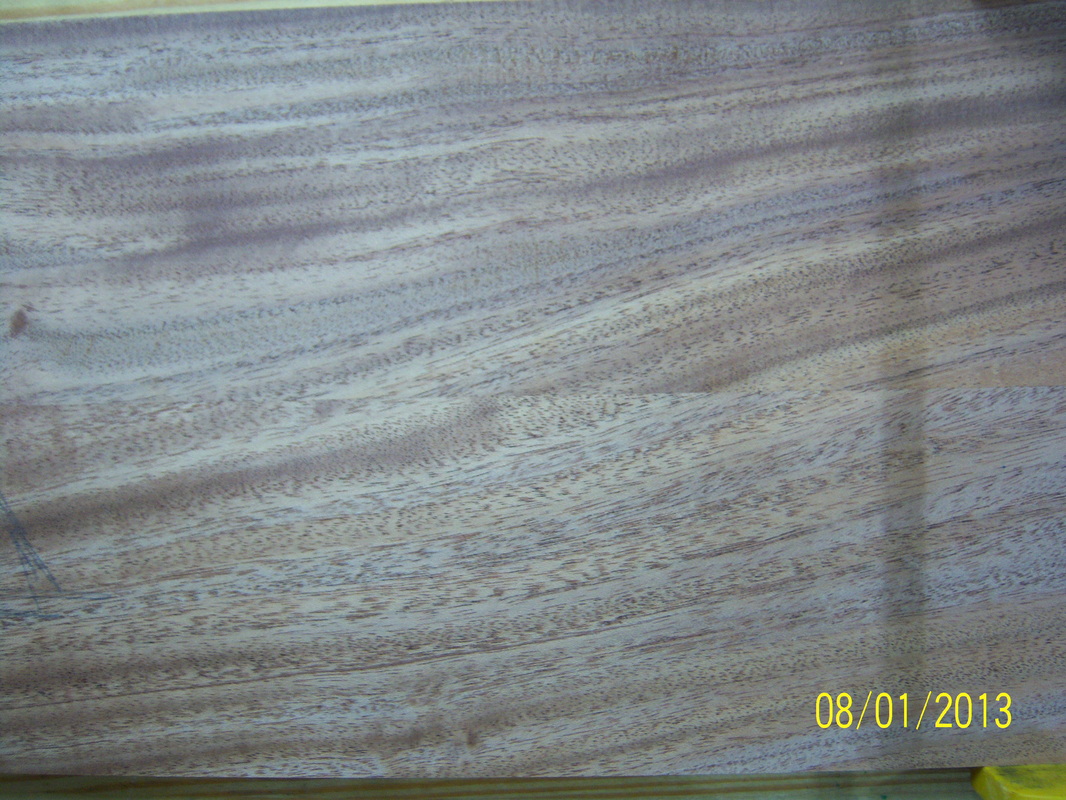
This will be the final arrangement for the best grain pattern. If you let your eyes go out of focus a bit, you can see how it all works together. The goal was not to see three mismatched boards, but to give the appearance of one, wide, homogenous piece.
Mahogany Saber Case
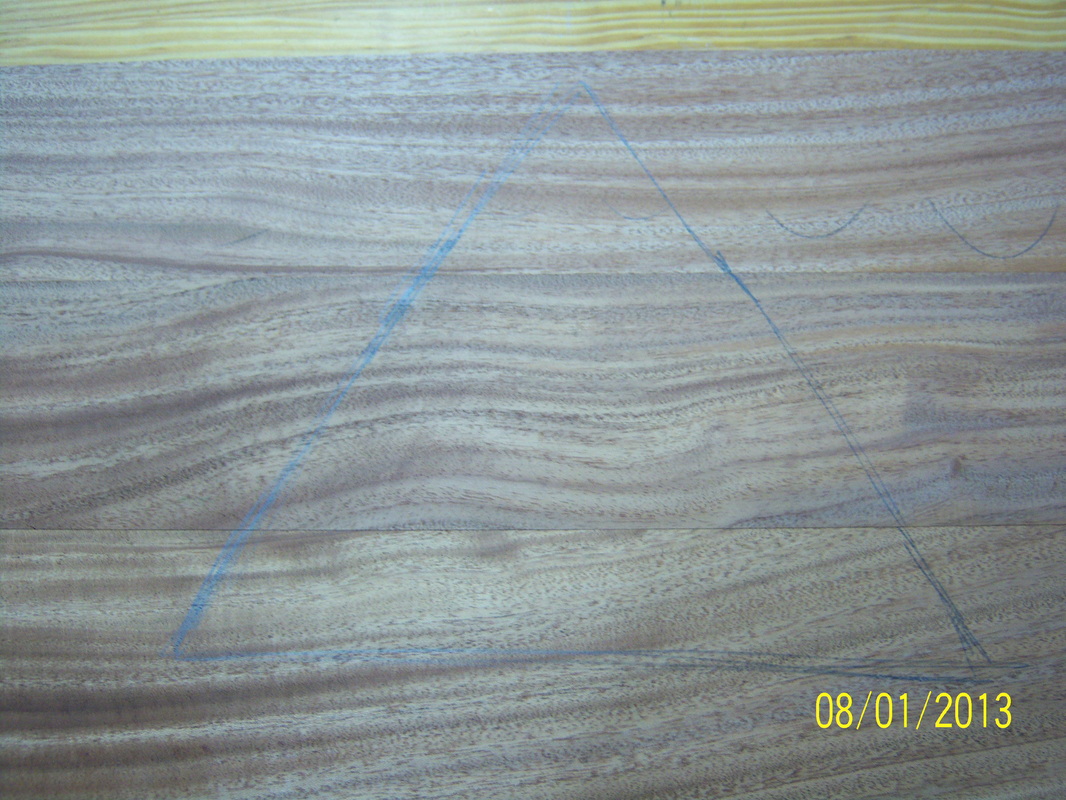
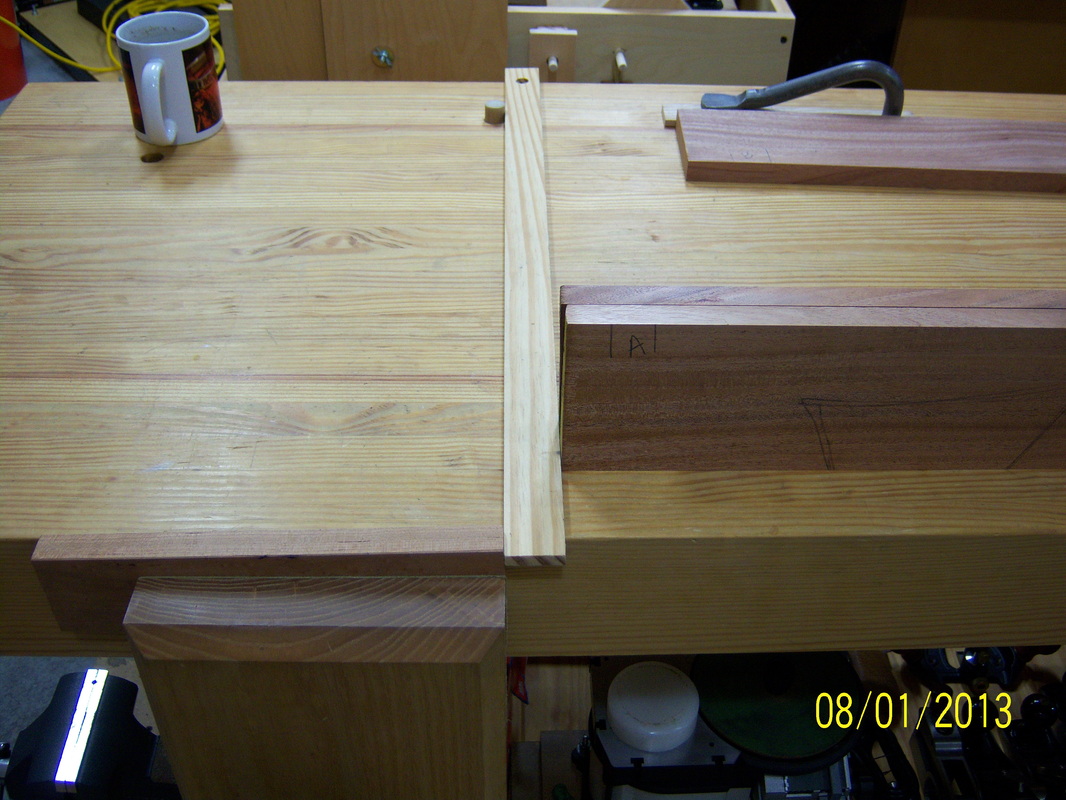
After the three pieces of the panel were arranged in a manner that was pleasing to the eye, a triangle was drawn across all three pieces to facilitate realignment after edge jointing.
Mahogany Saber Case
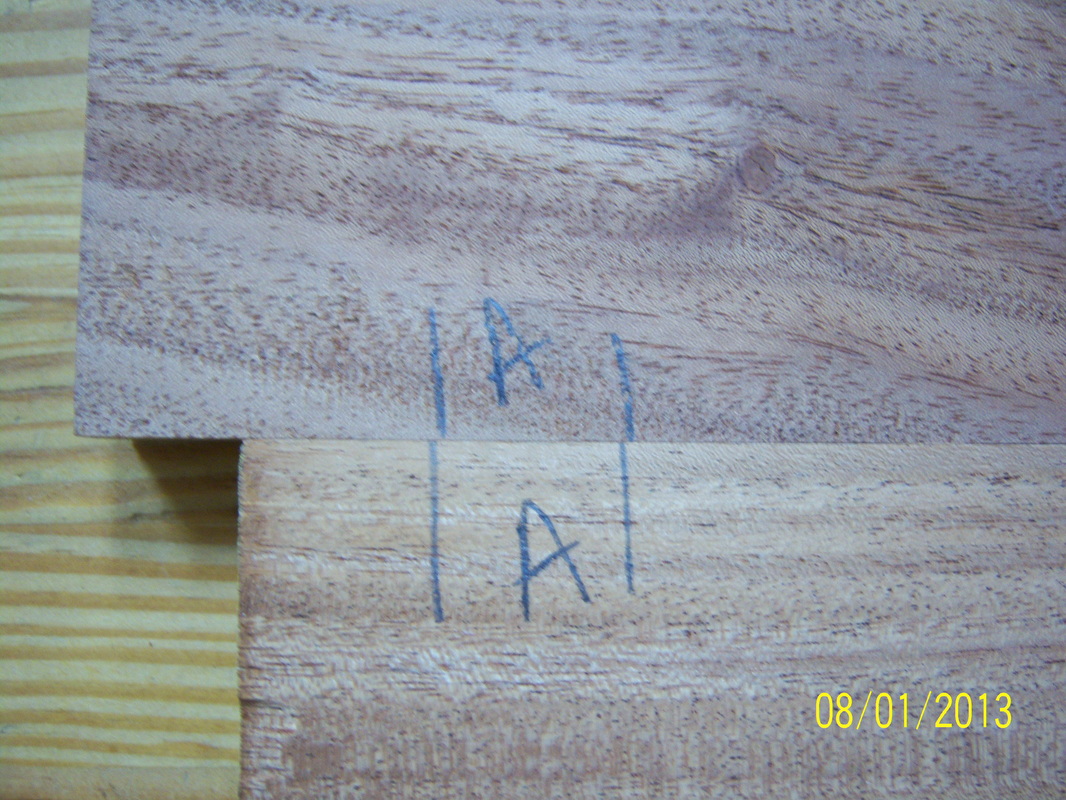
I also drew a few lines and labeled each matching set. Labeling the boards helped with the next step, which is jointing the edge.
Mahogany Saber Case
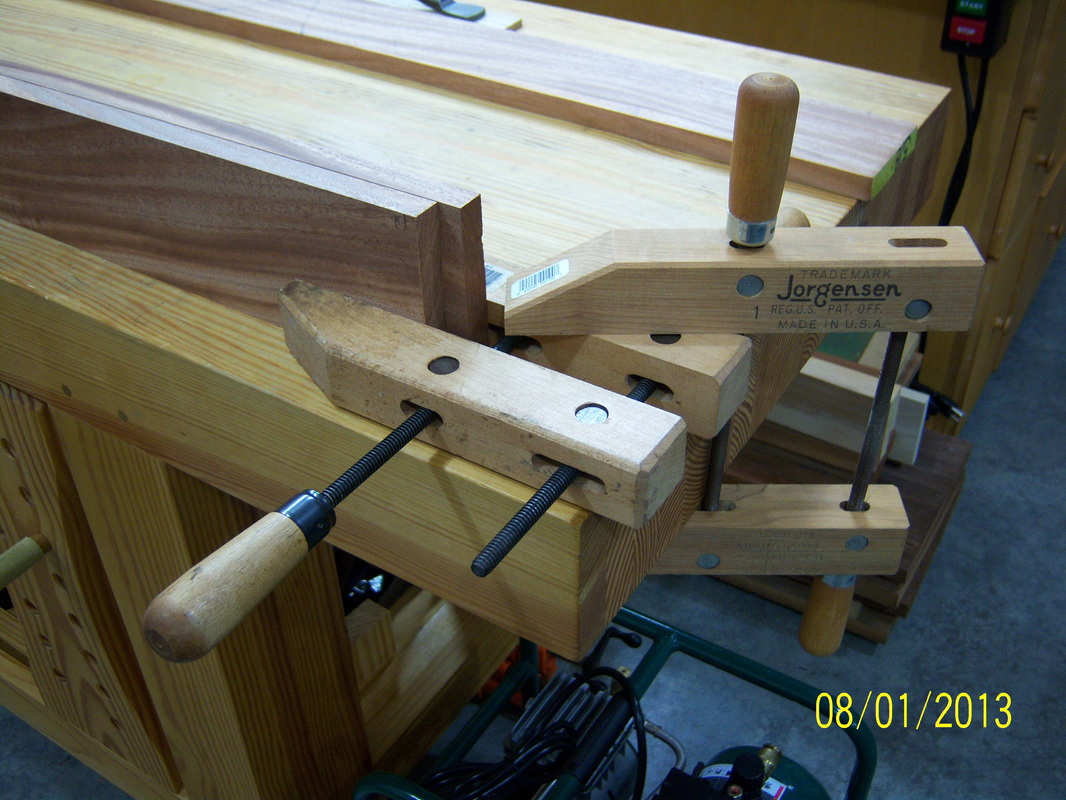
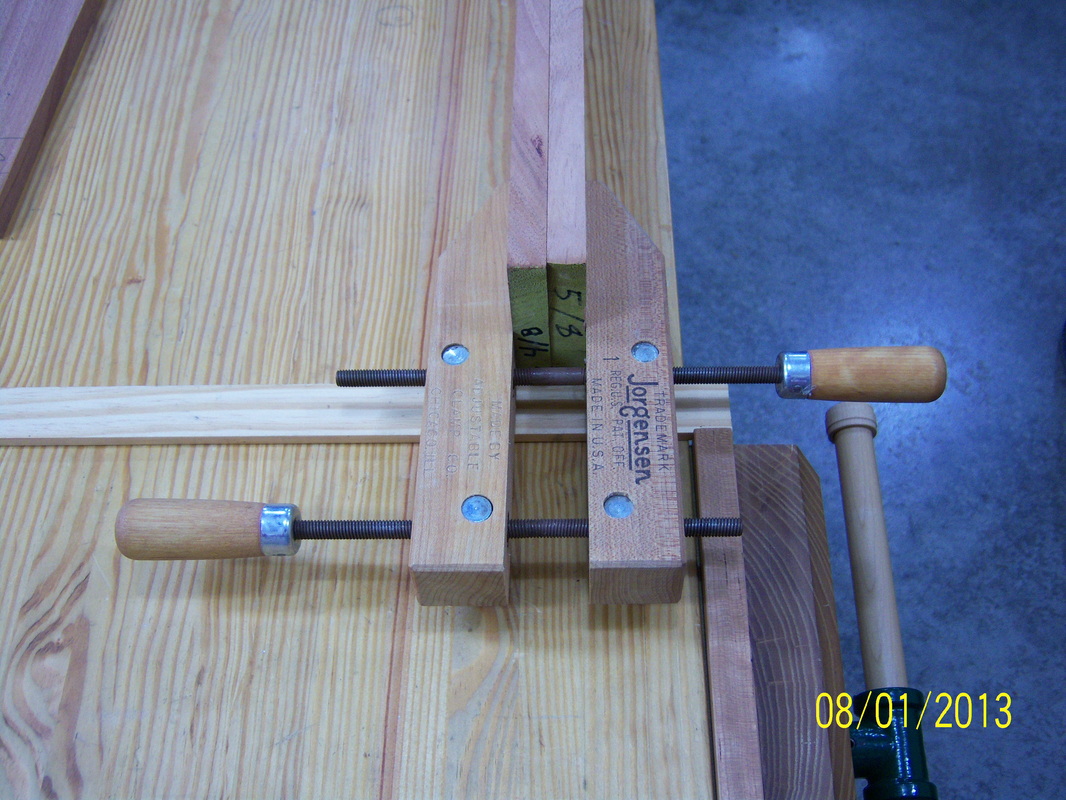
Each of the two mating board edges were "folded" upward like a book. The two boards were clamped together so that their edges could be planed simultaneously. Not mater what angle they are planed, the two edges will cancel each other out producing a very tight, 90-degree mating surface.
Mahogany Saber Case
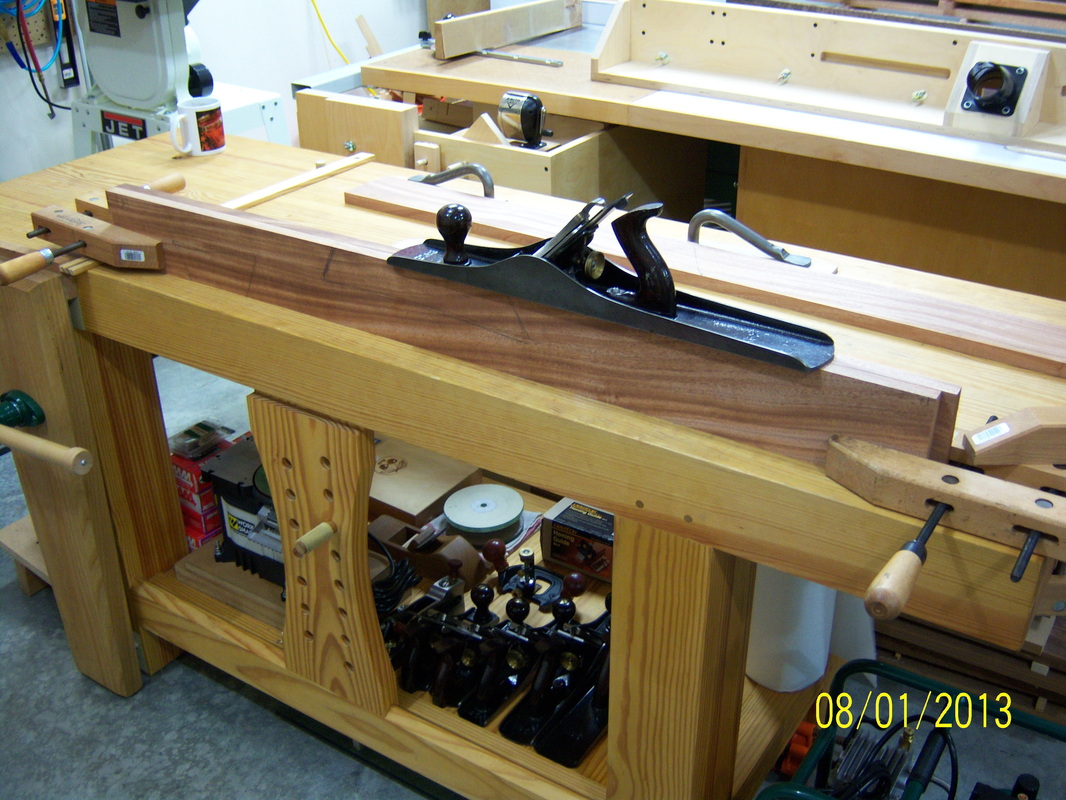
I use a piece of 3/4" dowel (inserted into a dog hole), and a piece of scrap mounted in the leg vice, as a brace for a thin piece of scrap to act as a planning stop. You can see a hole drilled into the end of the planning stop piece and it hangs just to the top of the picture on one of the pegs when not in use.
Mahogany Saber Case

I used a couple of hand screw clamps to not only hold the two boards together, but to also secure them to the bench. This was done to make planning the boards more stable.
Mahogany Saber Case
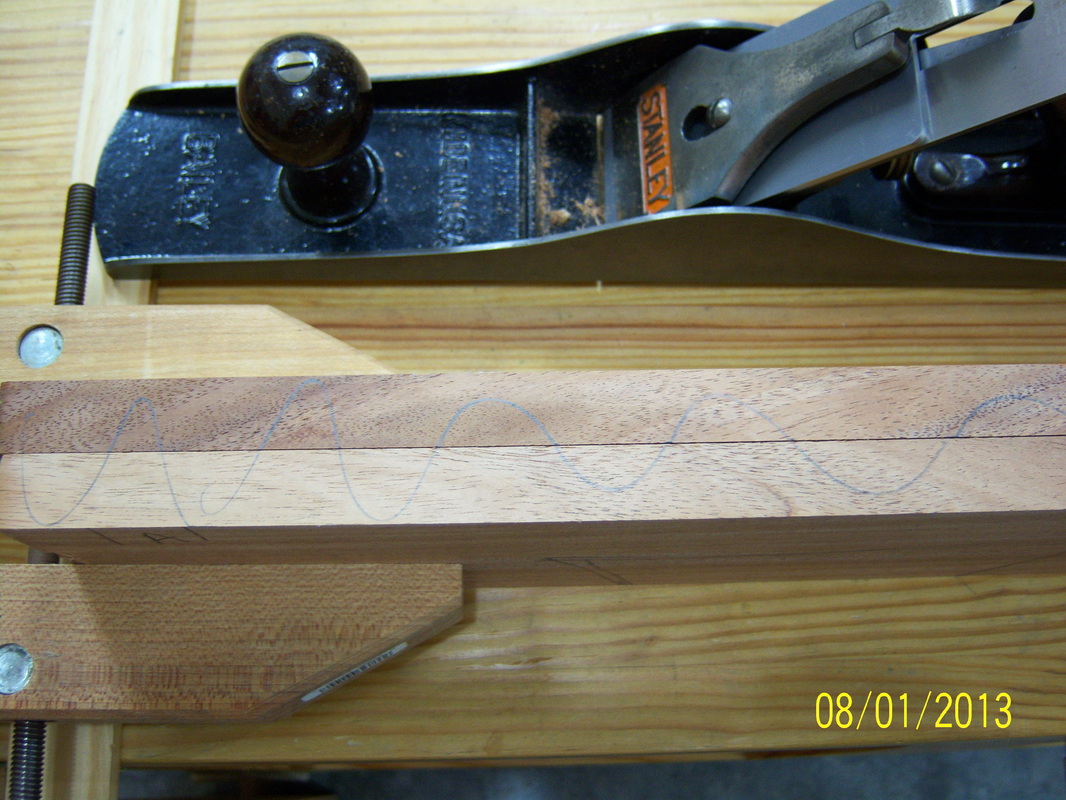
Using a #7 jointer, I made several paces over the mating edge surfaces until all of the pencil lines were removed.
Mahogany Saber Case
Mahogany Saber Case
You can see in this picture how all of the top edge and about half of the bottom edge are being planed. After a few more passes, both edges were producing complete shavings.
Mahogany Saber Case
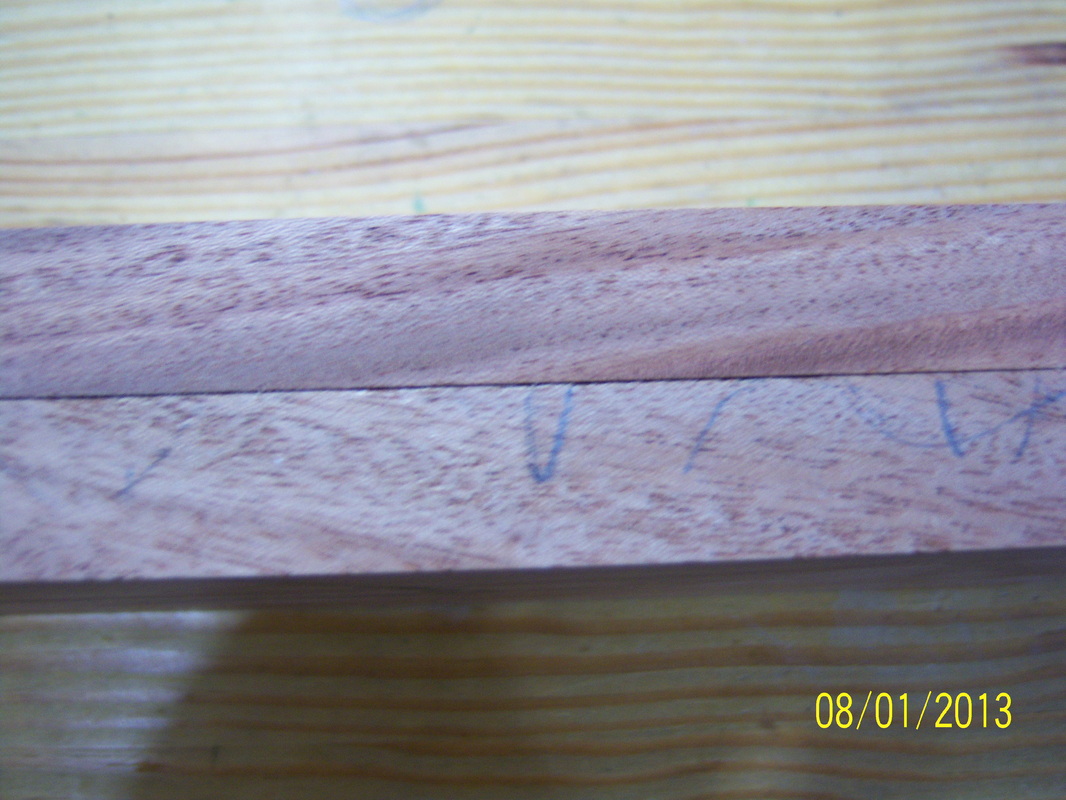
After jointing, the soon-to-be glued line almost disappears in the grain.
Mahogany Saber Case
After jointing both pairs of edges, I checked how easily the panel fit together using only mild pressure from a couple of clamps.
Mahogany Saber Case

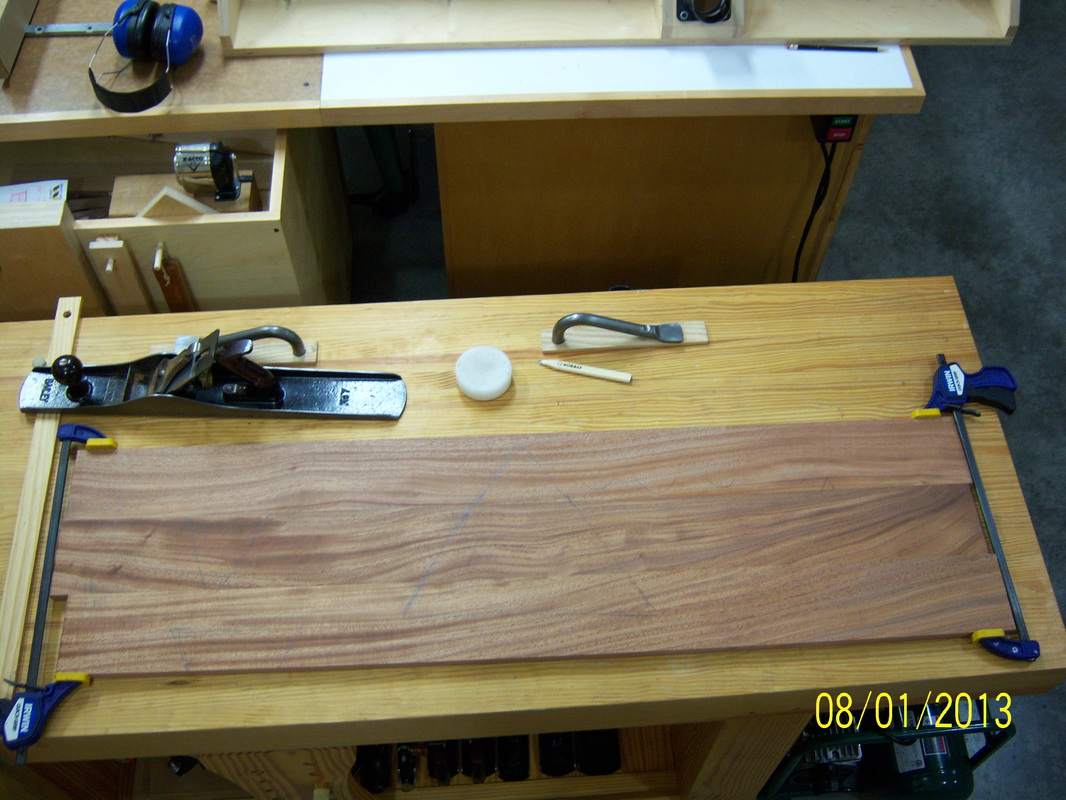
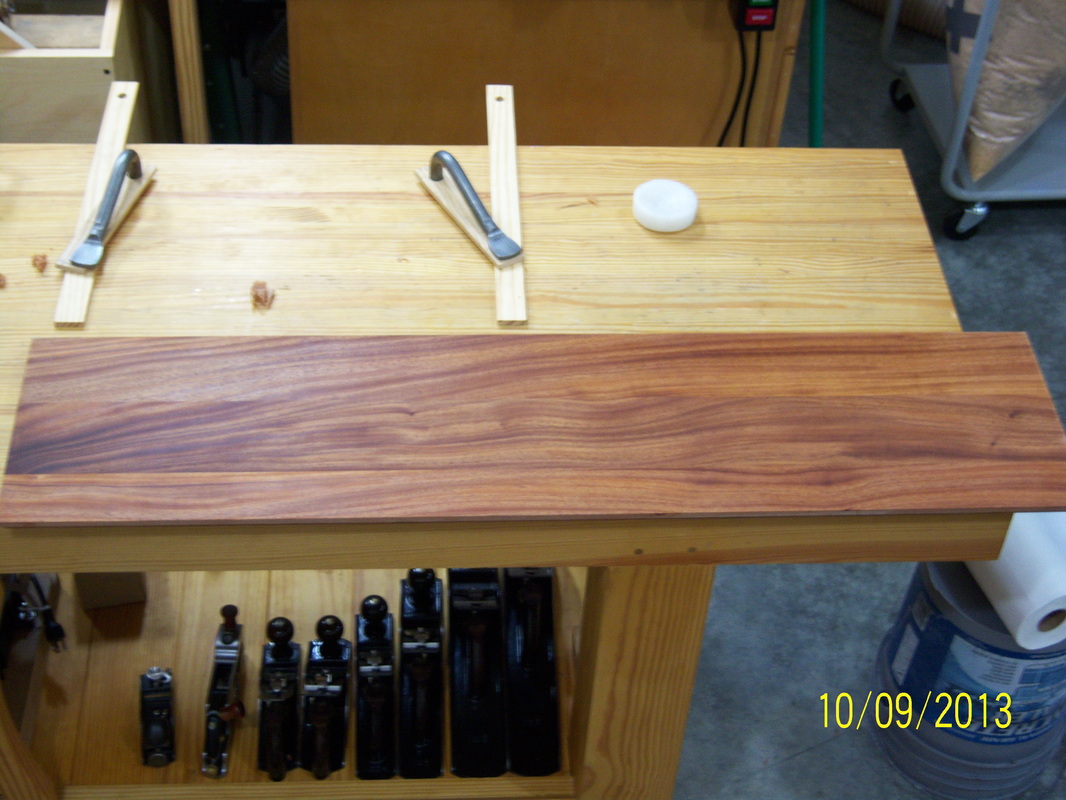
To assist with keeping the three pieces of the panel flat during glue-up, I took a moment to make a couple of cauls out of hard maple.
Mahogany Saber Case

I ripped the width of the maple board in half and then cut each half into two pieces.
Mahogany Saber Case
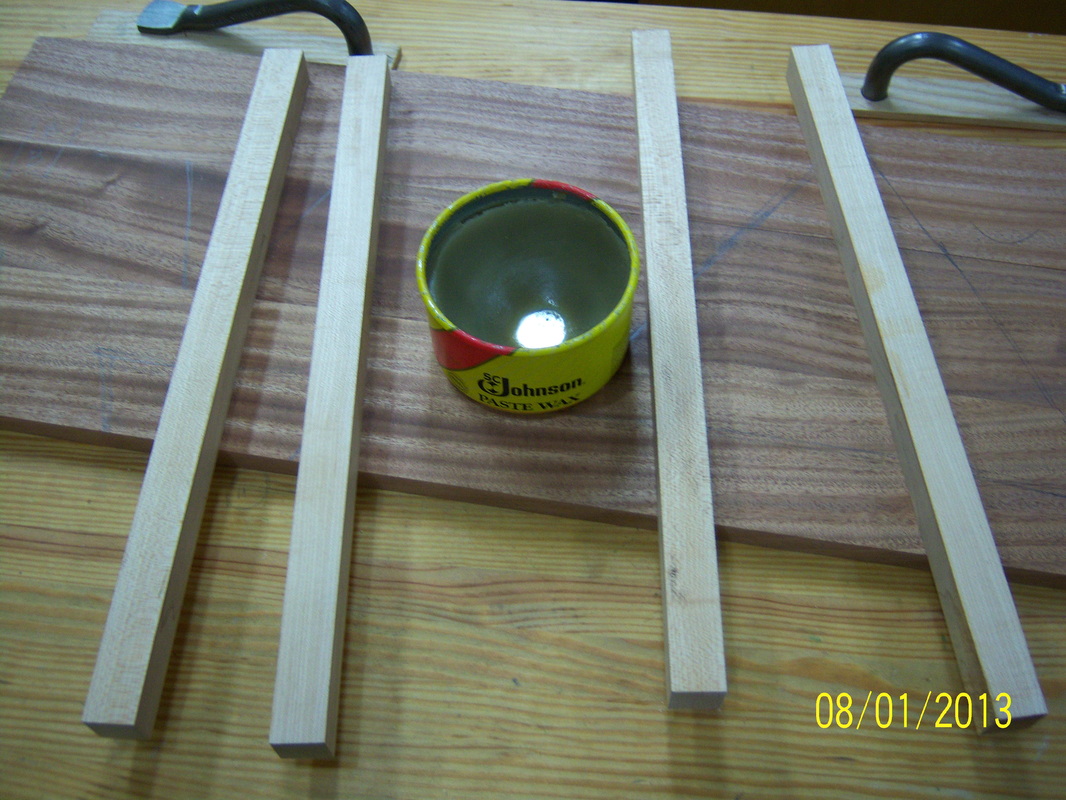
I then applied paste wax to the surface that would come into contact with the panel to make sure that any glue that squeezed out would not glue the caul to the panel.
Mahogany Saber Case

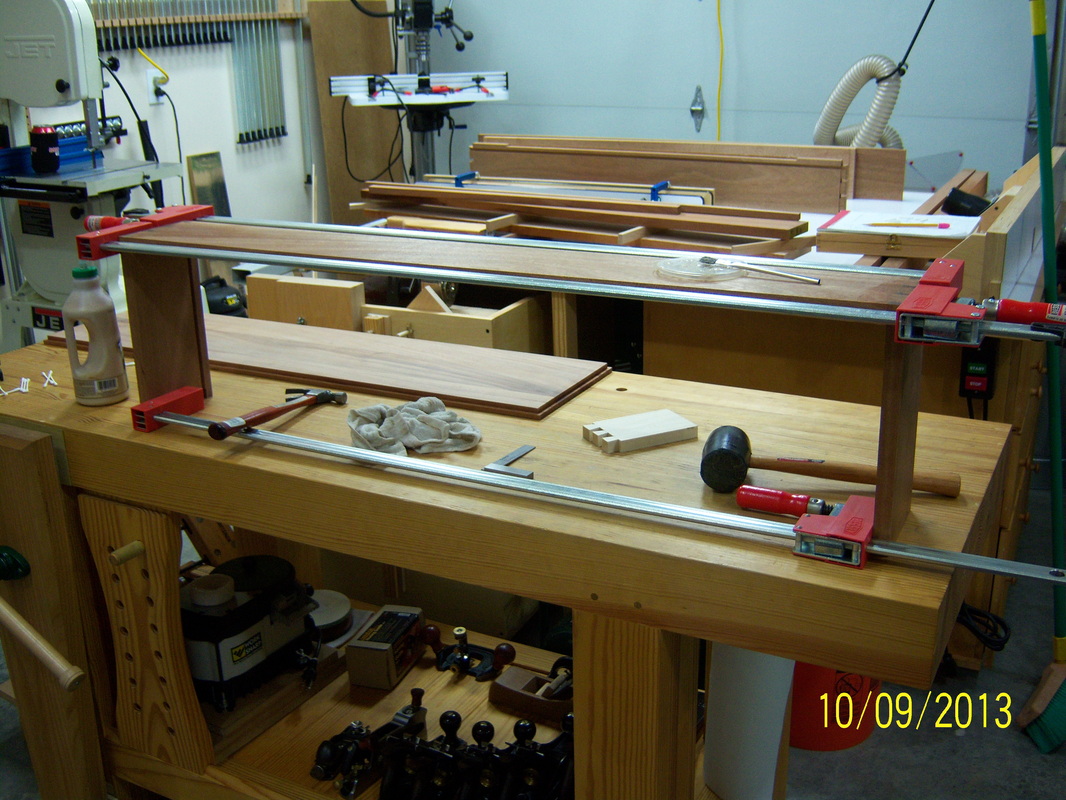
Here you can see how the cauls were used to keep the ends of the panel flat while I placed more clamps along the panels entire length.
Mahogany Saber Case
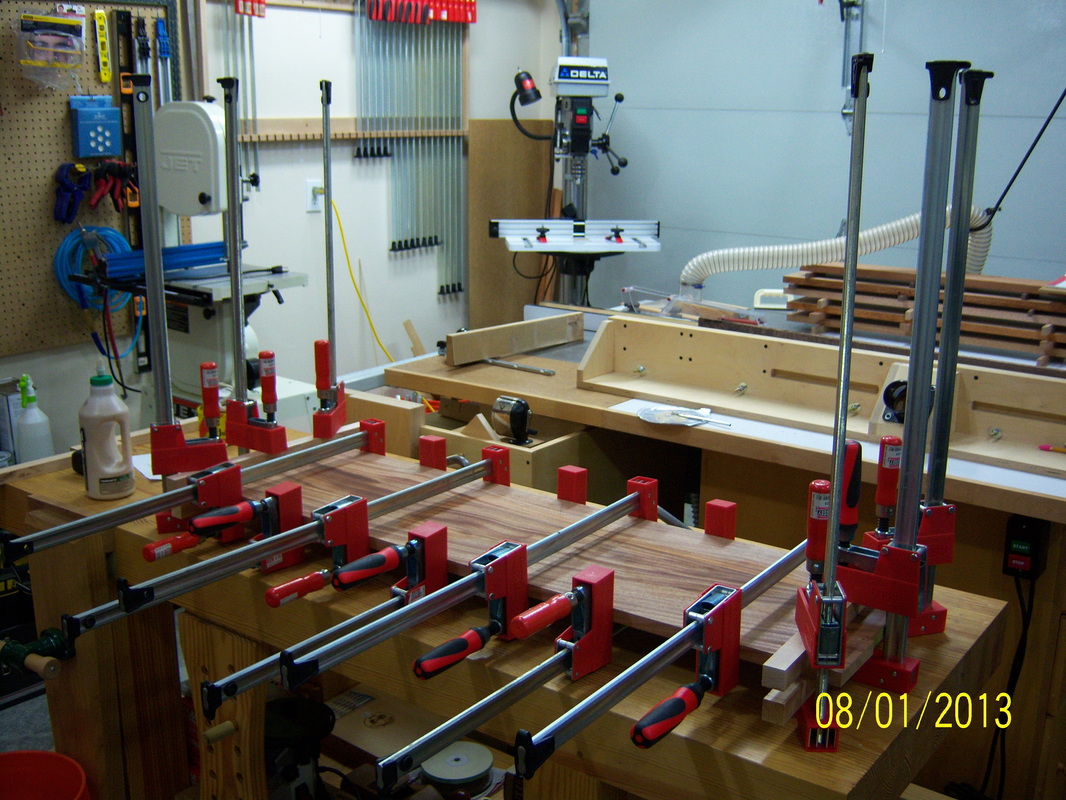
Mahogany Saber Case
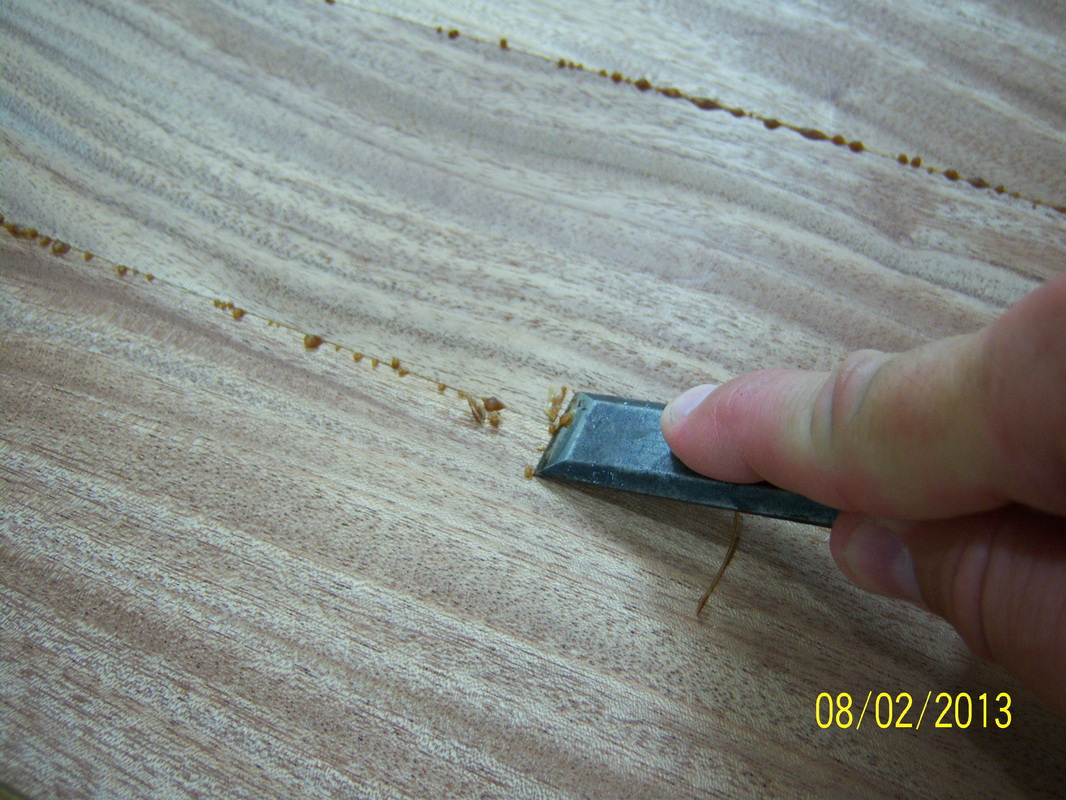
After the glue dried, I removed the clamps. Using a dull, rounded-over, old chisel I carefully scraped off the rubbery glue squeeze-out.
Mahogany Saber Case
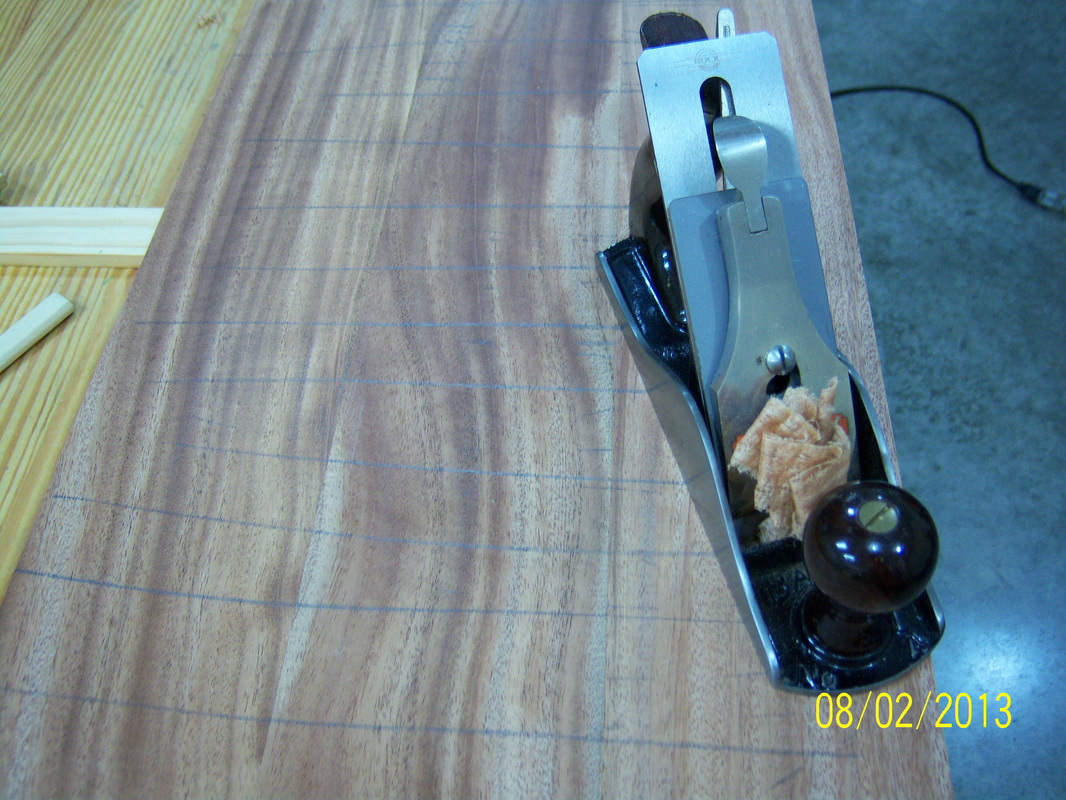
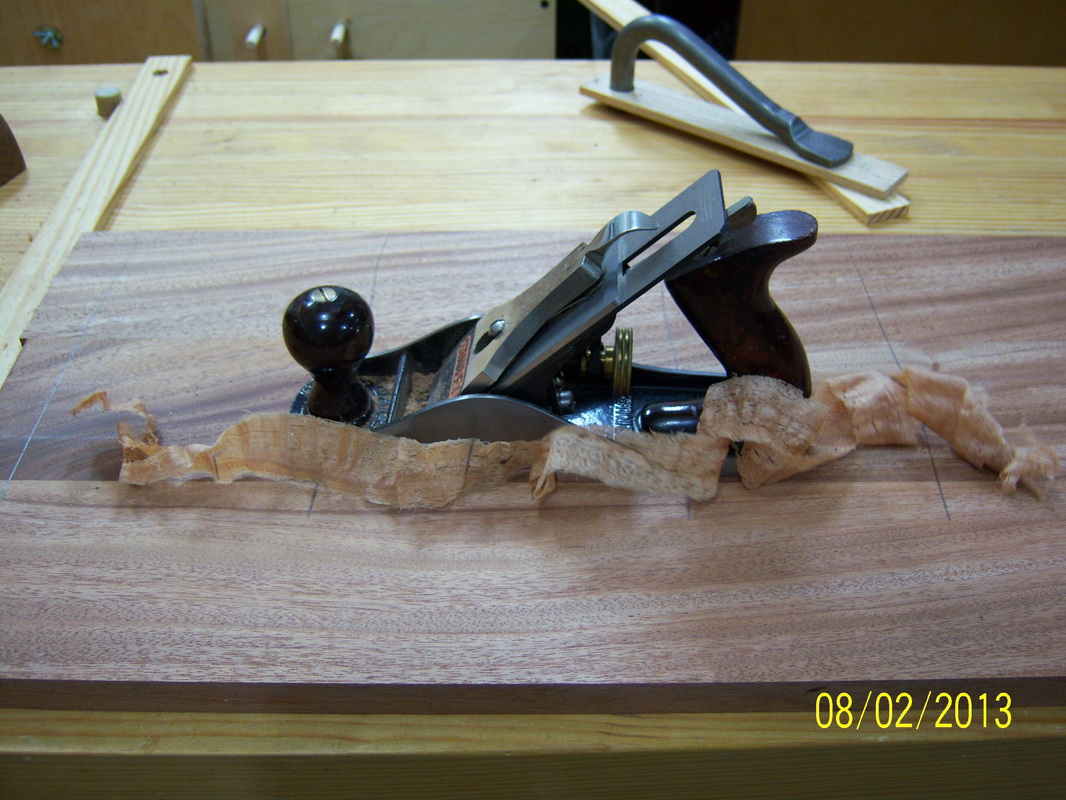
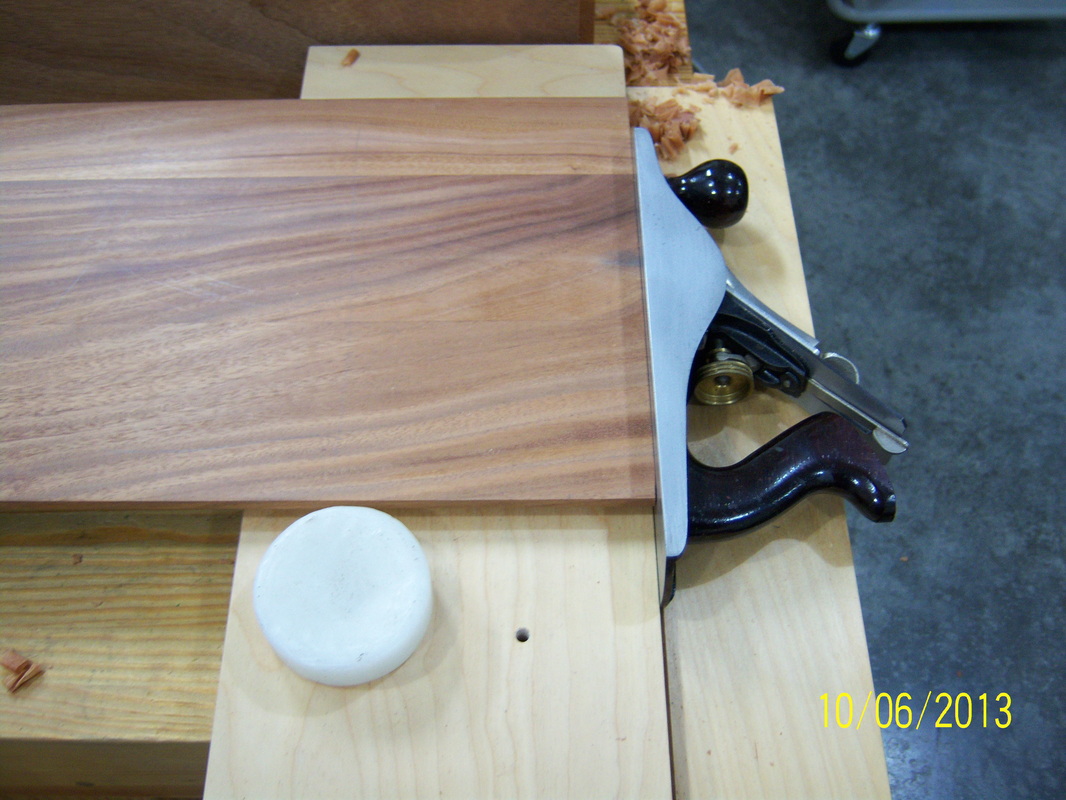
I started smoothing the "face" side of the panel with a Hock blade equipped Stanley #4. I set the blade to take a bit thicker of a shaving than normal. This was done to speed up the process of removing some of the tear-out that was produced by the thickness planer.
Mahogany Saber Case
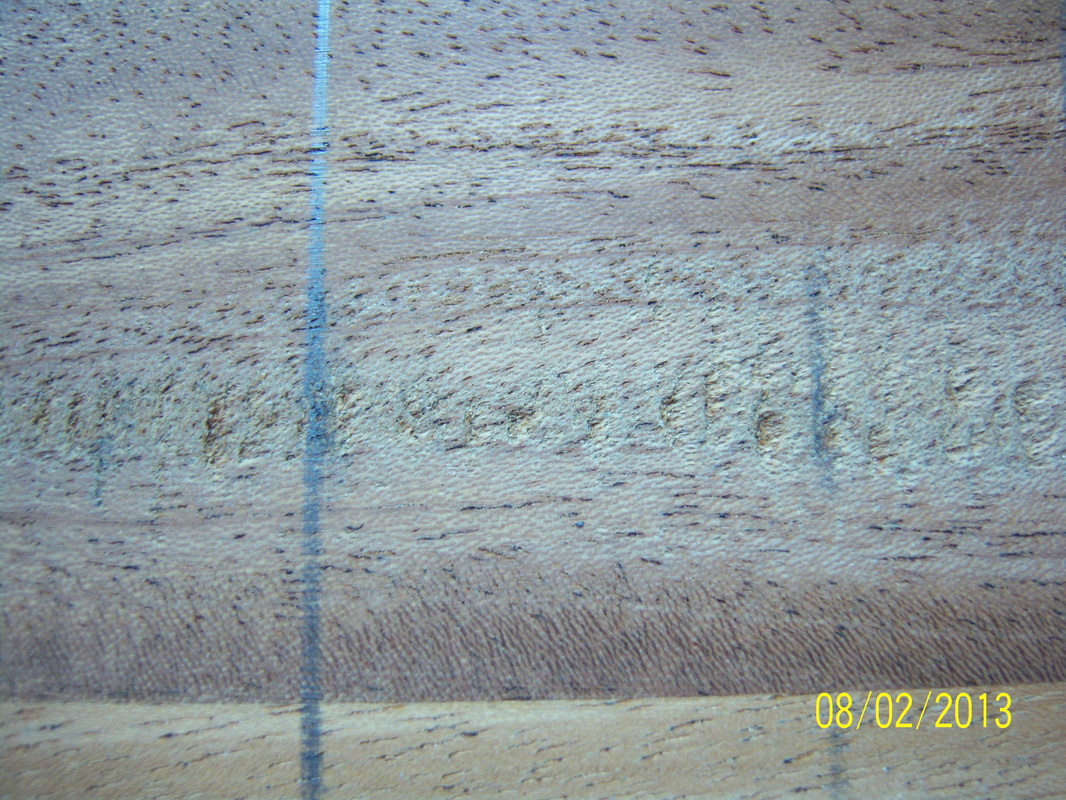
Here you see some of the tear-out that the thickness planer caused. I set the planer to take only a small amount at a time, but some amount of tear-out was unavoidable.
Mahogany Saber Case
After a few passes of taking full-width savings, the tear-out was completely removed.
Mahogany Saber Case
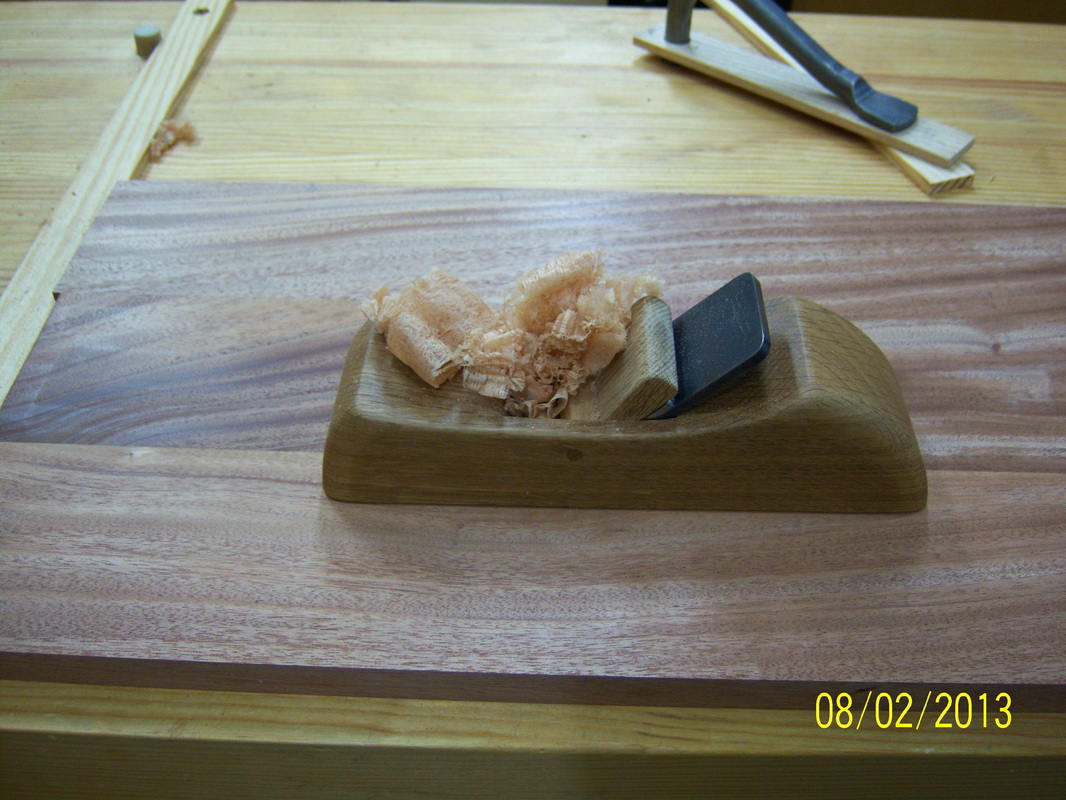
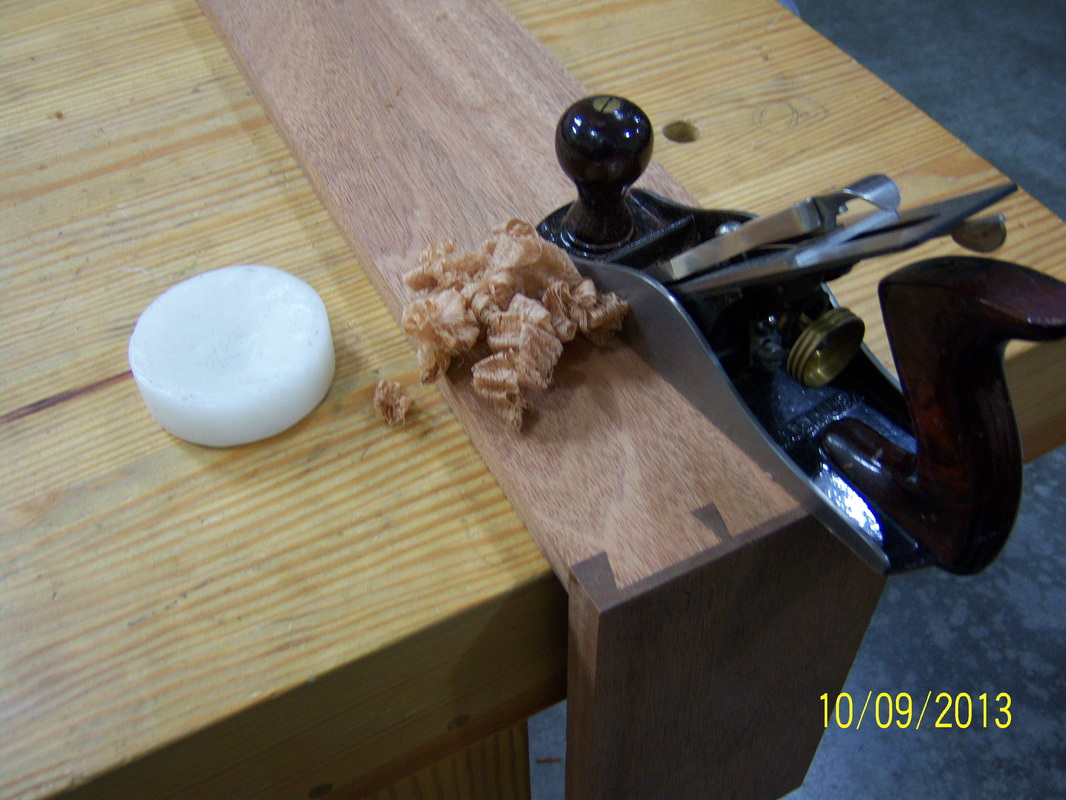
Because I just couldn't wait to use the wooden smoothing plane I had made, I had to take a few, wispy shavings. I have some more machining to do to cut the panel down to size, so I will wait until that is done to give it a final smoothing.
Mahogany Saber Case
Mahogany Saber Case

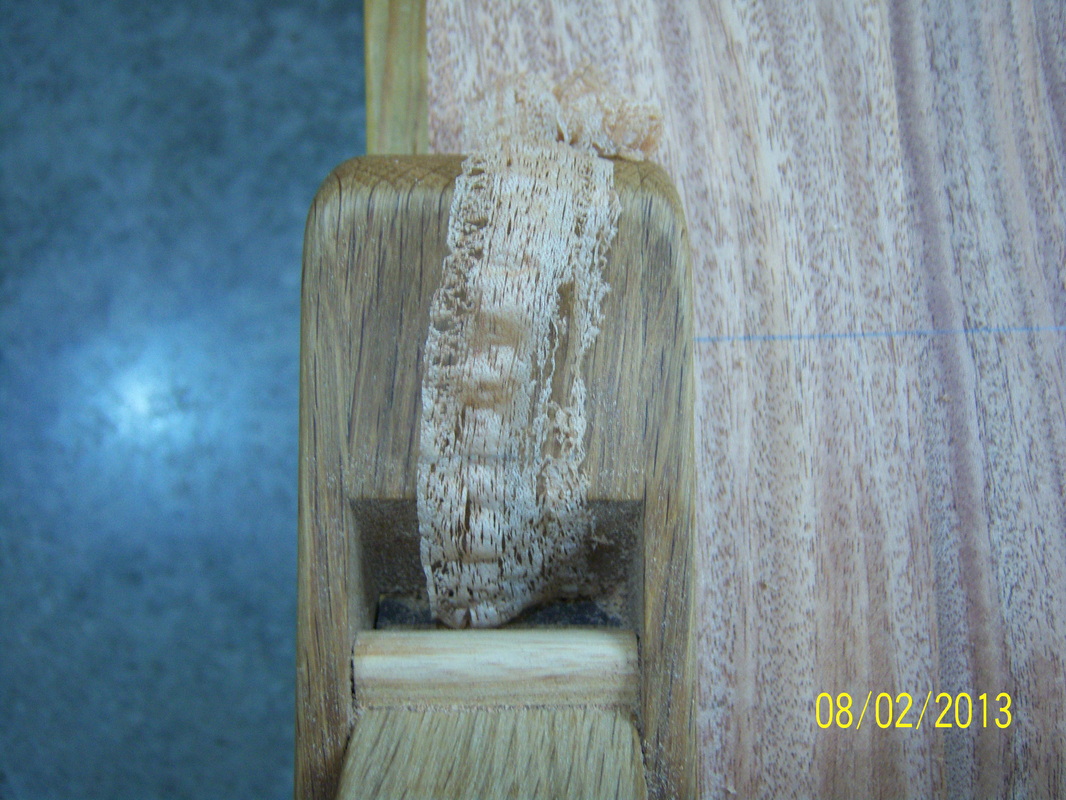
Here is the back panel after it has been cleaned up a bit with the smoothing planes. I cut the smoothing process short because it will still need to be ripped to width, cut to length, and rabbeted prior to the final touches. I'll touch up the panel with a card scrapper before finishing.
Mahogany Saber Case
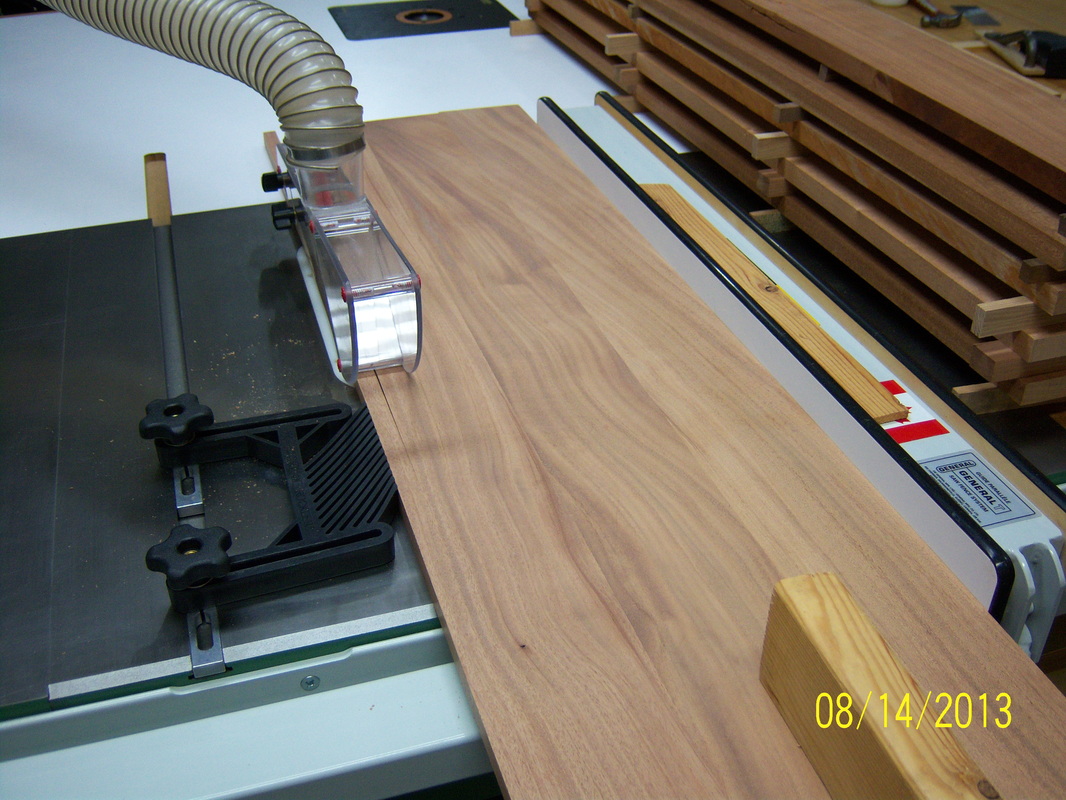
Since I have yet to assemble the case, the panel was ripped a bit wider than I expect the inner case to be. This will allow for some adjustment room when cutting to final width.
After being ripped, both ends were cut square.
After being ripped, both ends were cut square.
Mahogany Saber Case
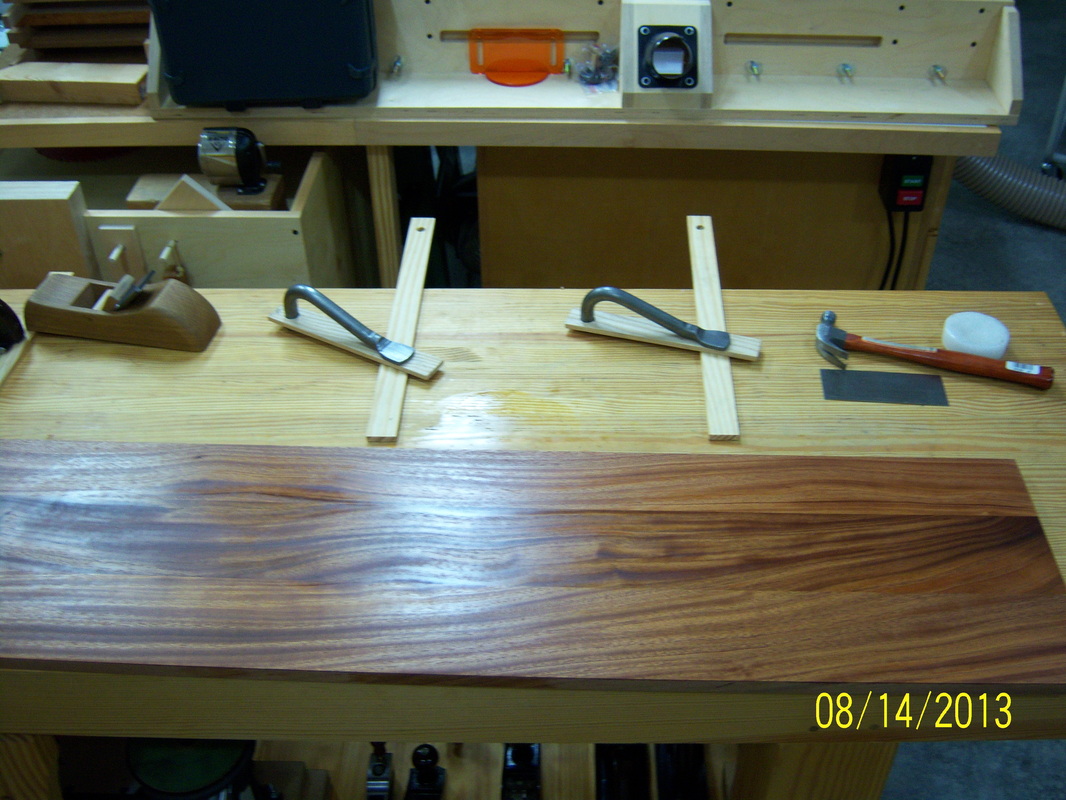
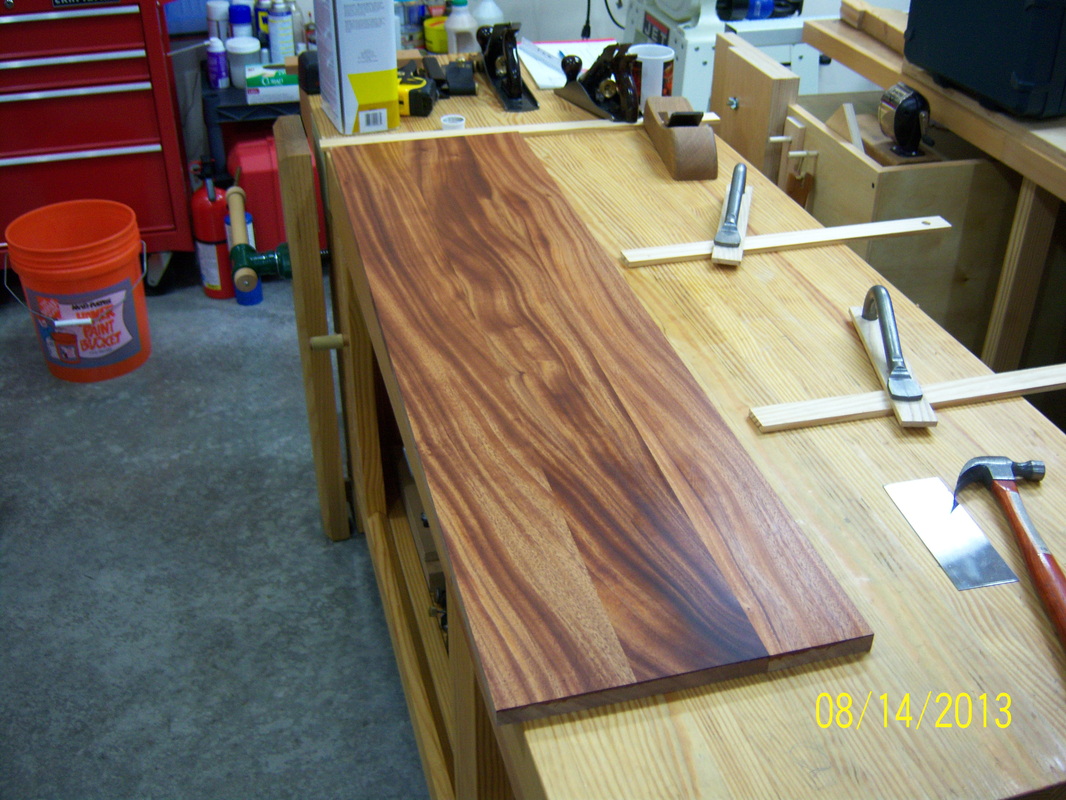
Prior to setting the panel aside to work on the case, I wiped it down with mineral spirits to get a idea of what it might look later when finish is applied.
Mahogany Saber Case
Mahogany Saber Case
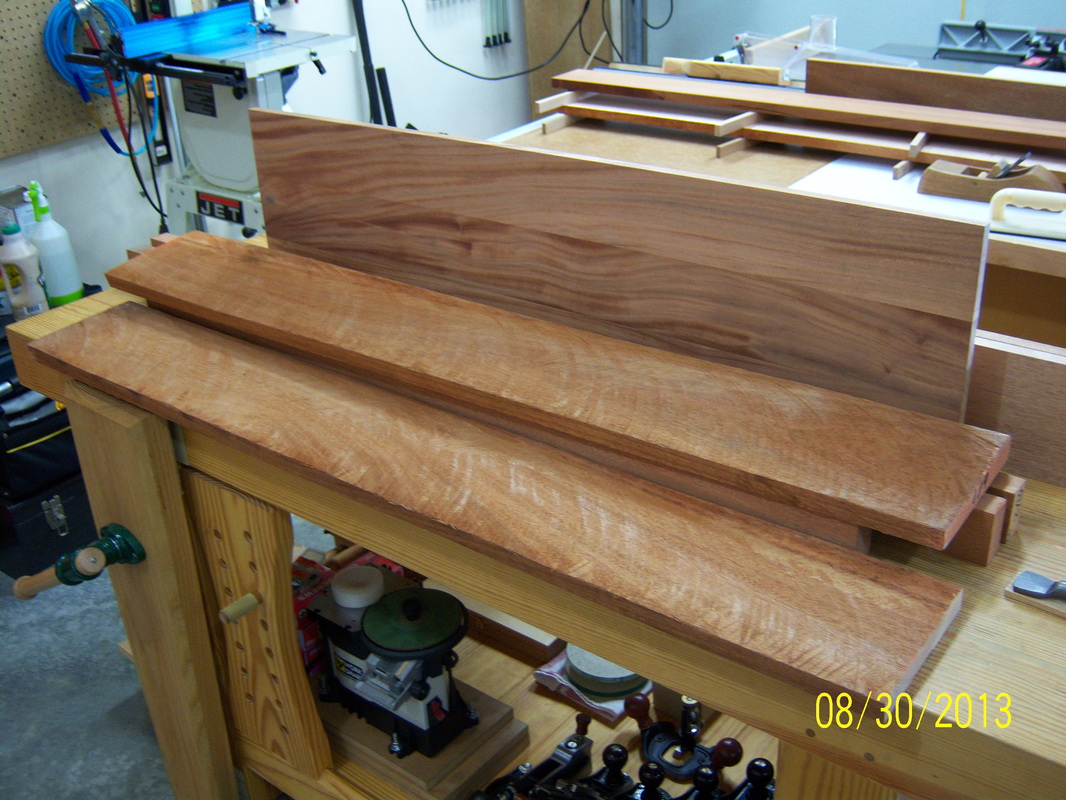
Upon milling the lumber for the sides of the case, I noticed that two of the boards were much lighter in color than the other two. The two darker boards will comprise the top and sides of the case, while one of the lighter colored boards will make the bottom. The tone will hopefully be matched a bit better during the finishing stage when some gel stain is applied.
Mahogany Saber Case

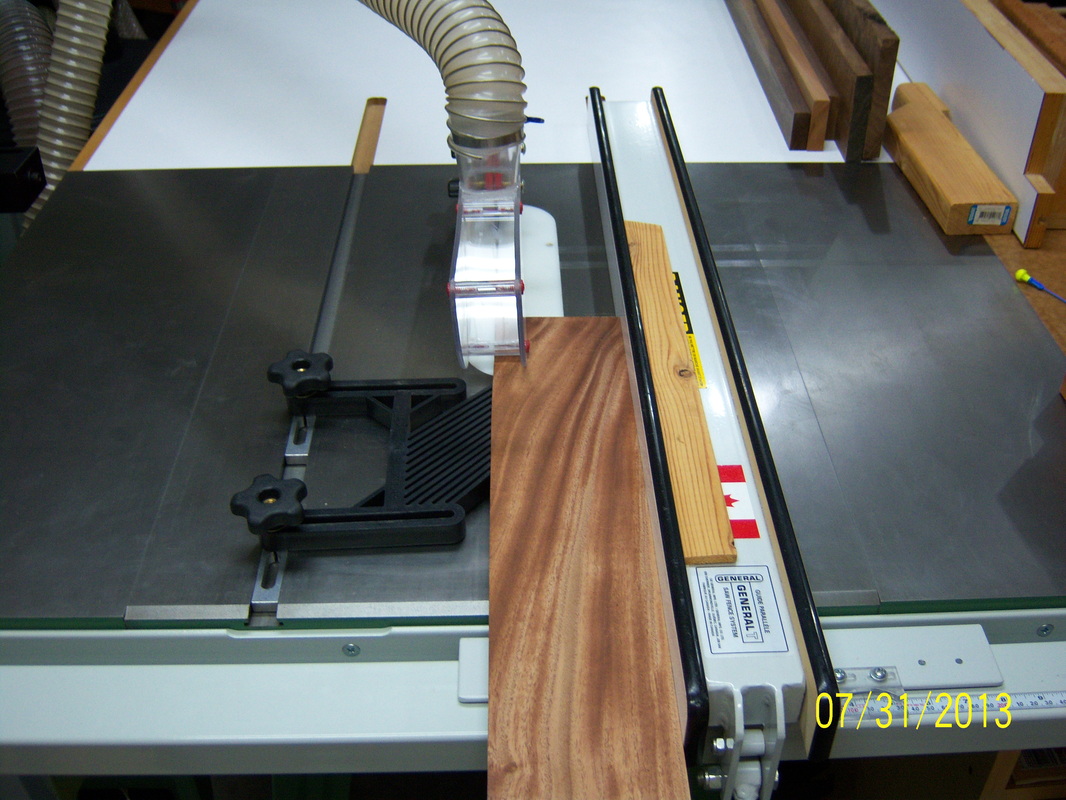
Each of the case pieces were crosscut to length on the tablesaw.
Mahogany Saber Case

Most important tool in the shop - coffee cup. Without it there is no hope of holding the coffee...
Mahogany Saber Case

Using a shooting board, the ends of all four case pieces were made square. This was done to make sure that the blind dovetail joints that will be holding the case together start off square when cut.
Mahogany Saber Case
You can see how thin of a shaving is being taken off by the plane - half of the thickness of the pencil line is still visible. You can see where the lower, right corner was just a bit out of square. It only took a few passes to get the end of all of the boards perfectly square.
Mahogany Saber Case
Prior to dovetailing, a 1/8" rabbet was cut on the "tail" end of two boards to aid in cutting the dovetails.
Mahogany Saber Case
After getting some really good advise from several individuals at Woodnet.net, I decided against trying to match the lighter wood to the darker wood using gel stain. Instead, I bought a couple darker boards that matched quite a bit better.
Mahogany Saber Case
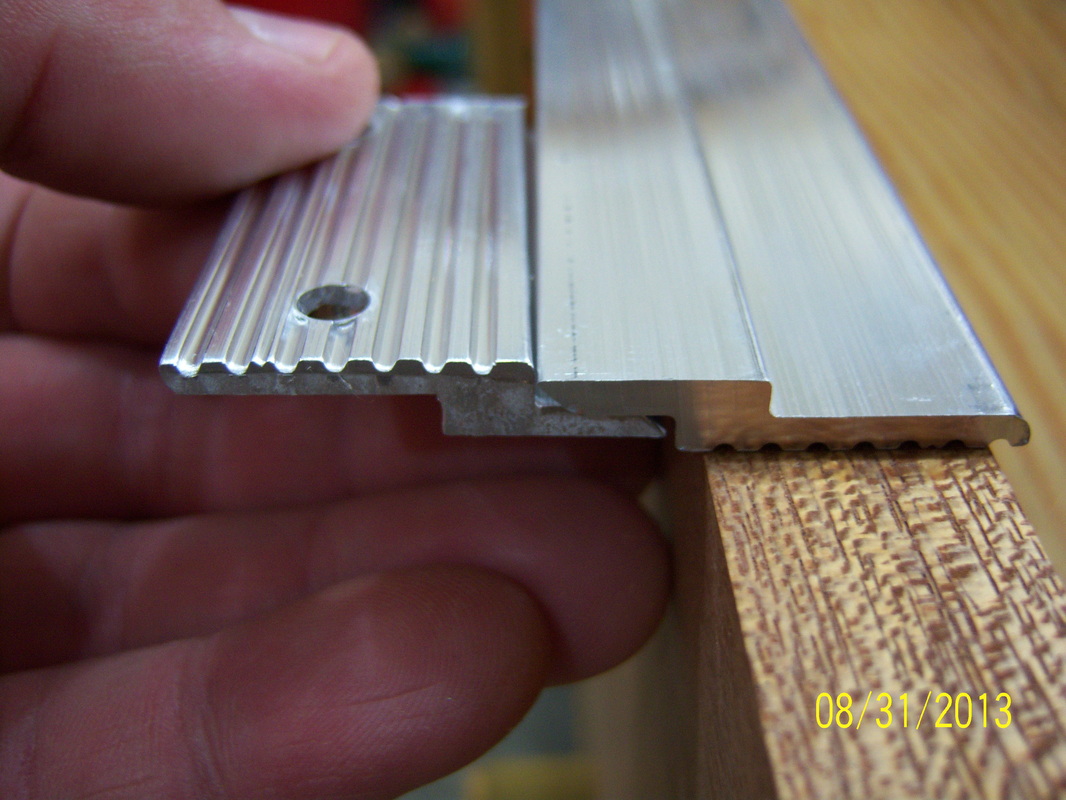
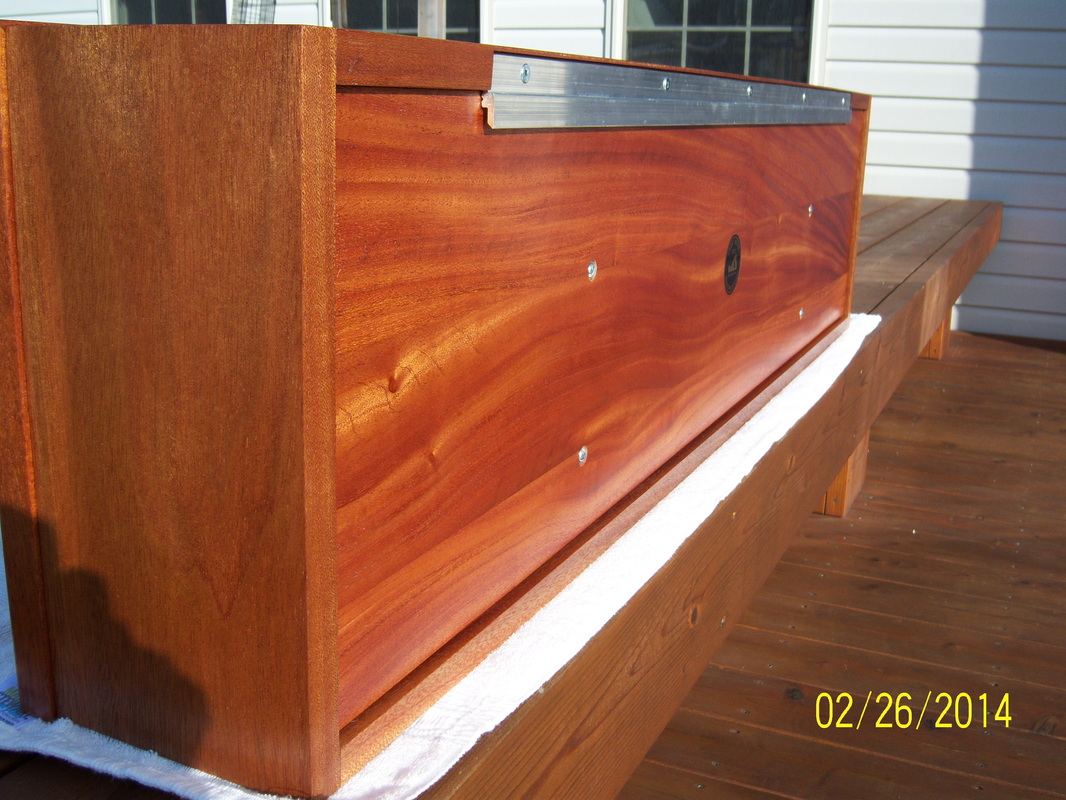
I am using "Z-Clips" to attached the case to the wall. I don't expect the weight of the completed case to be too heavy for other type of fasteners, but I do want it to be easily relocated if needed. Also, having 36" of mounting rail will accommodate various spacing between wall studs.
Mahogany Saber Case
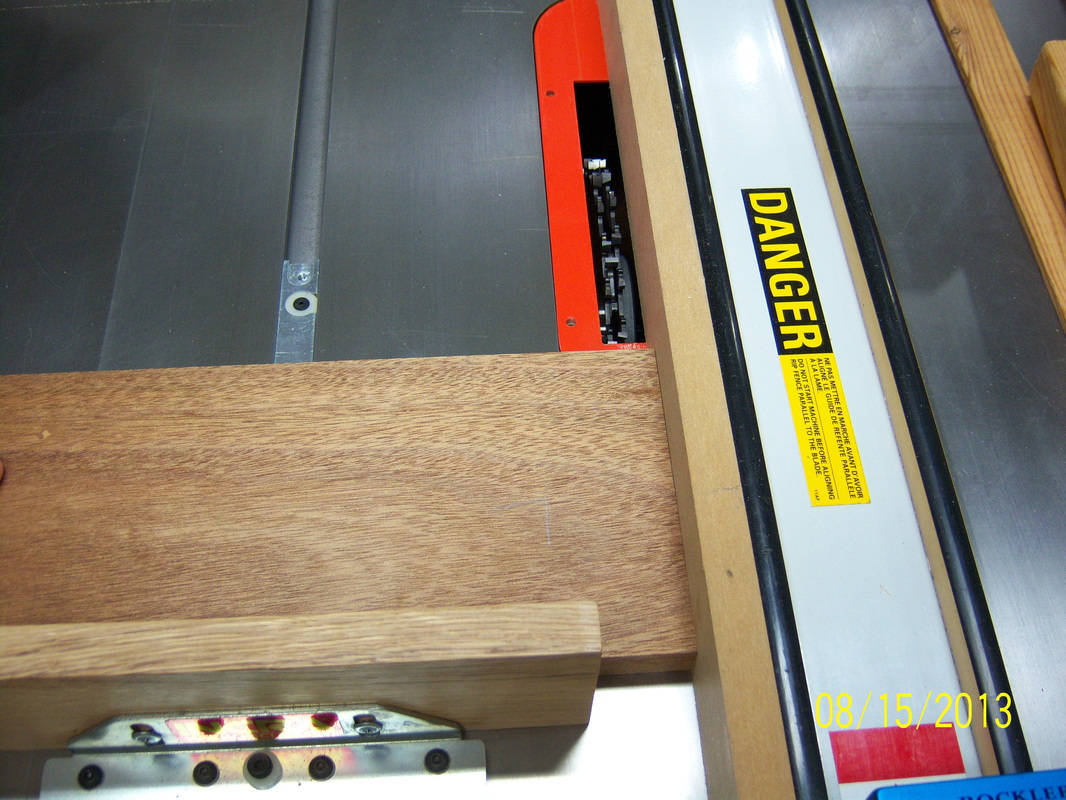
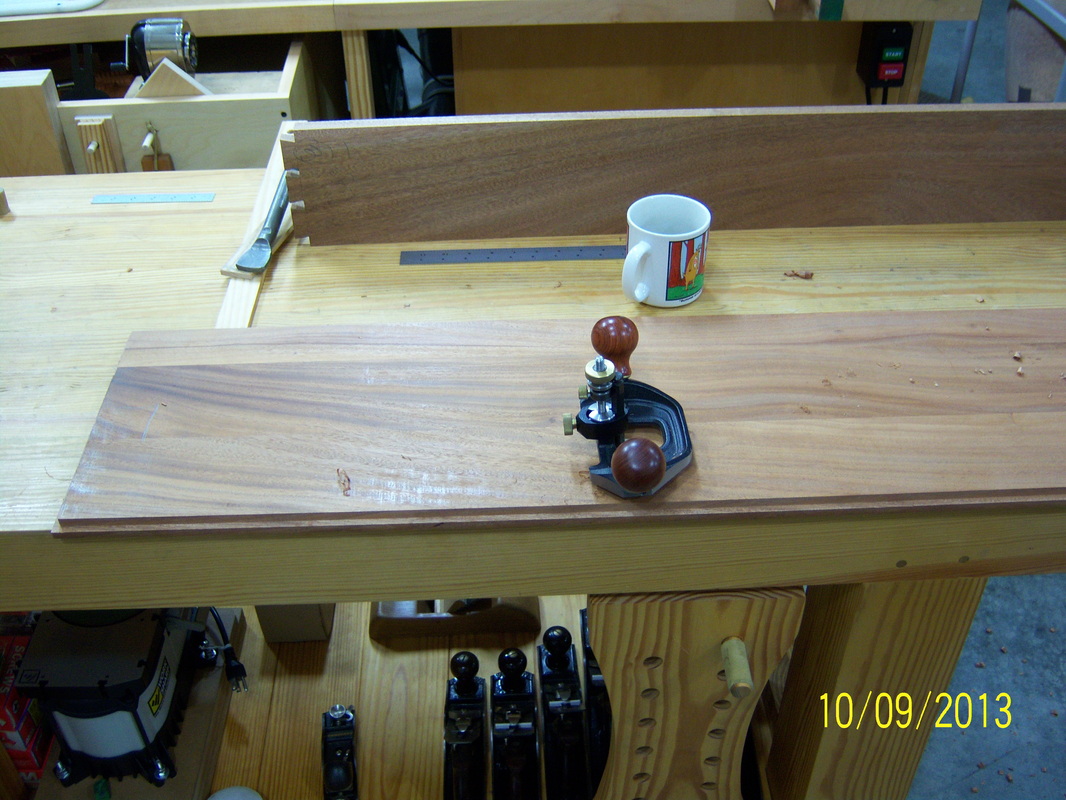
The long mounting rail will need to be recessed 1/4" into the top edge of the case in order to sit flush against the wall.
Mahogany Saber Case

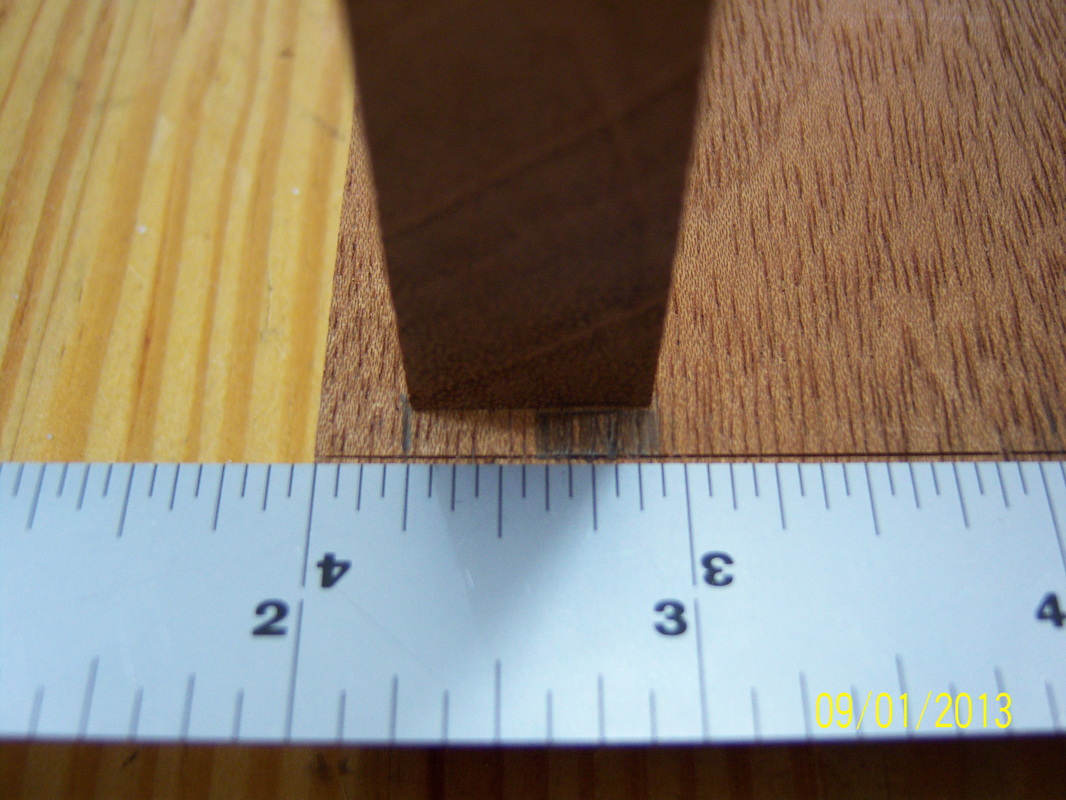
Measuring the overall length of the top o the case, I subtracted the length of Z-clip rail before dividing by two. The resulting number was how far from each end the rabbet needed to be cut.
Mahogany Saber Case
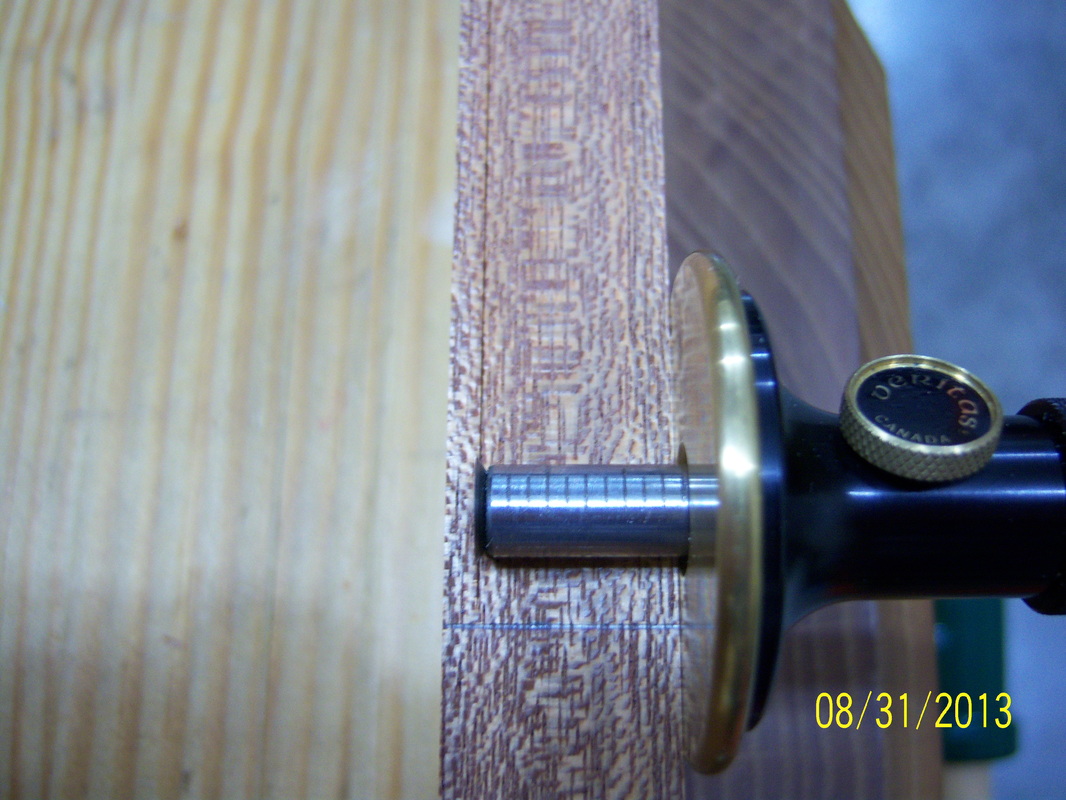
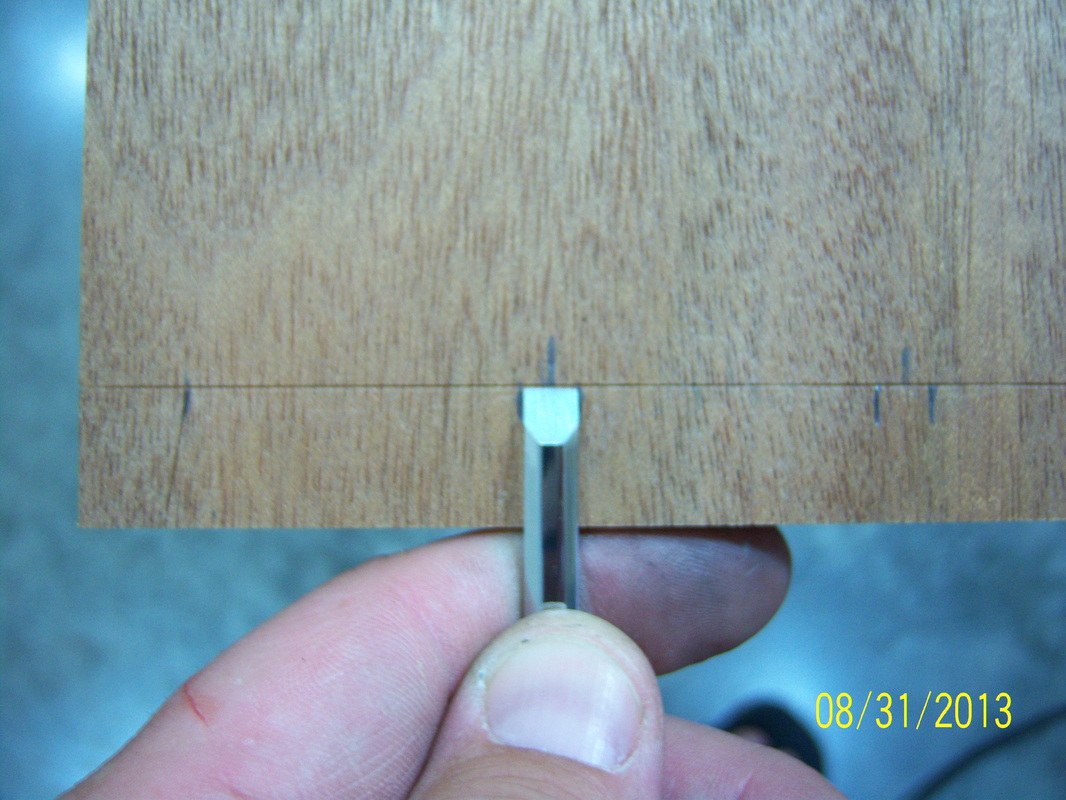
Using a marking gauge, a line was scored into the edge of the upper piece of the case to define the edge of where the mounting rail would be located.
Mahogany Saber Case
The marking gauge was adjusted and a line was scored to define the 1/4" depth needed to accommodate the rail.
Mahogany Saber Case
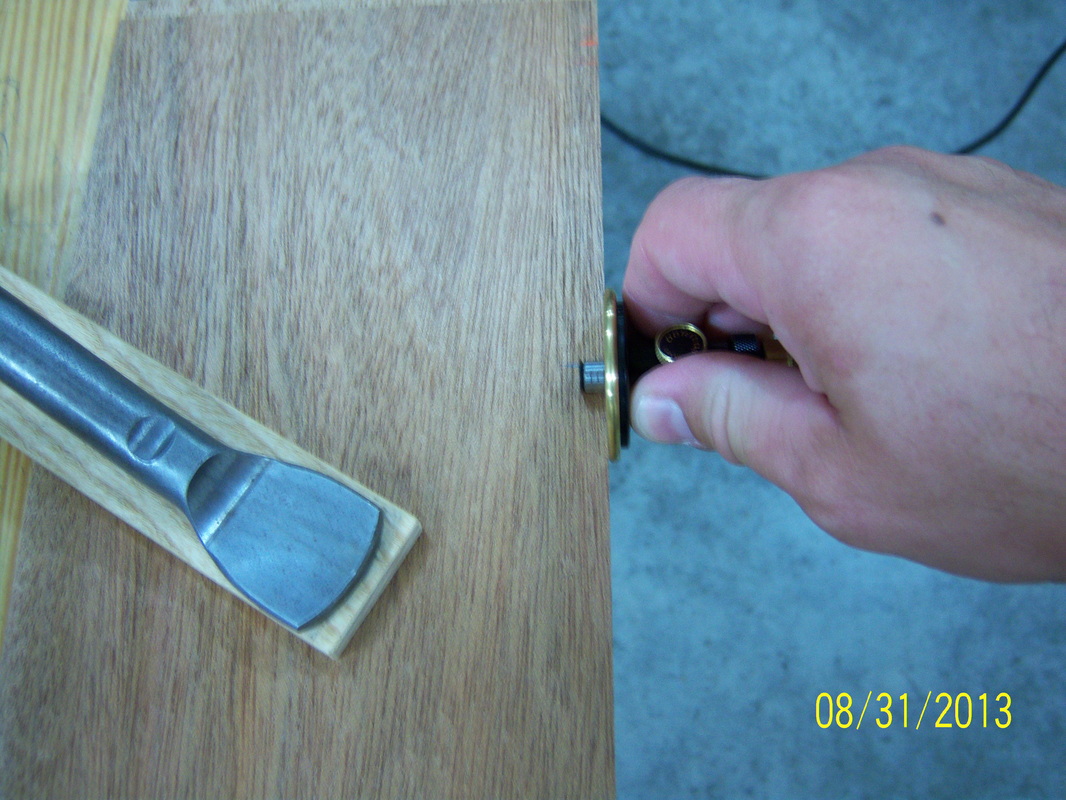
The end of the rabbet for the mounting rail was defined using a chisel and a light tap from a mallet.
Mahogany Saber Case

After the lines for the rabbet was cut, the board was turned on edge and held in place with a holdfast on one end and a clamp on the other.
Mahogany Saber Case
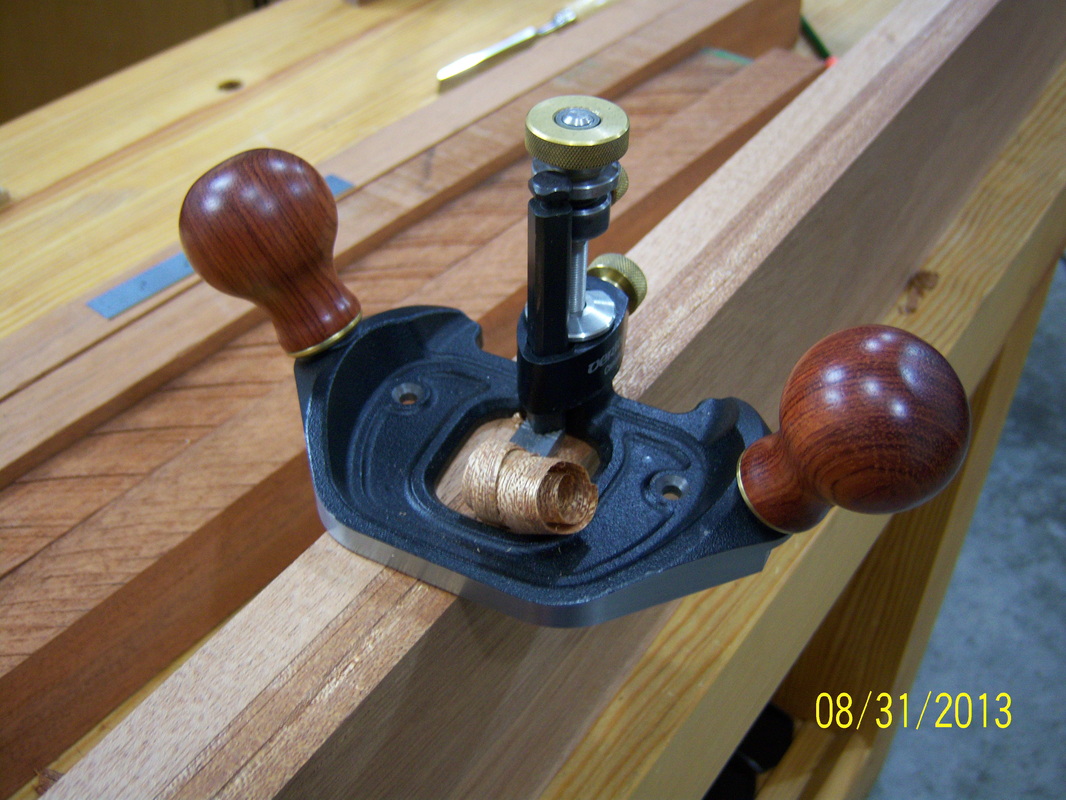
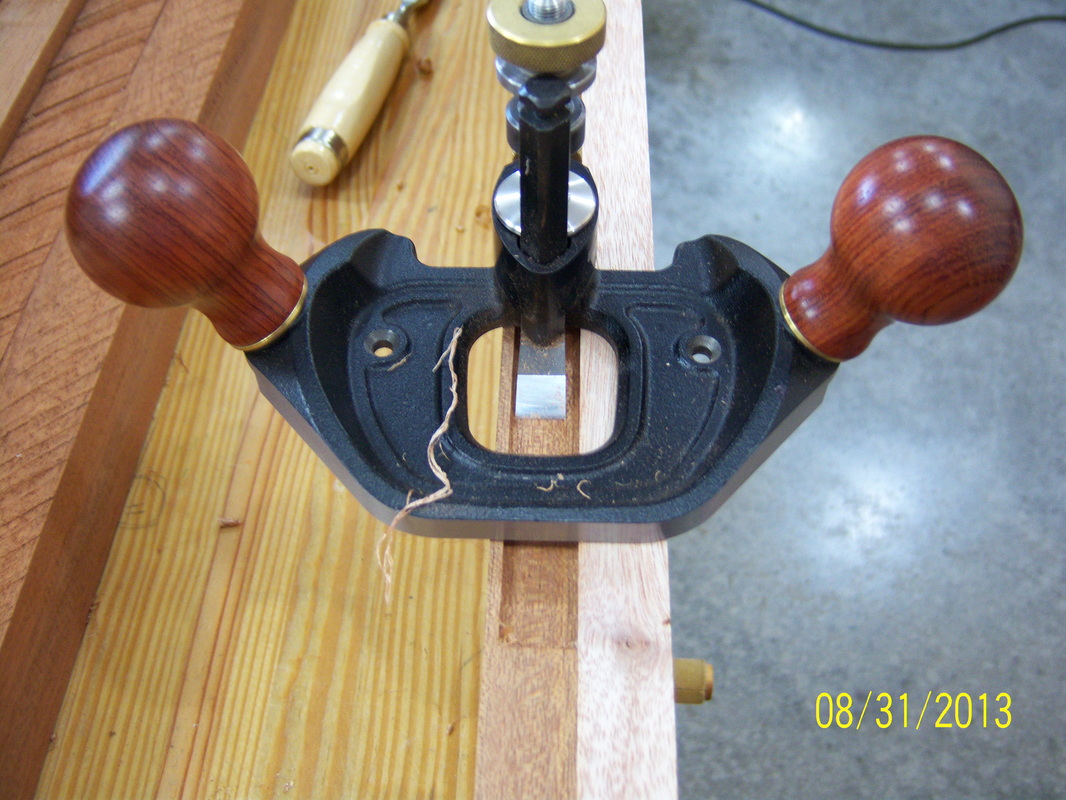
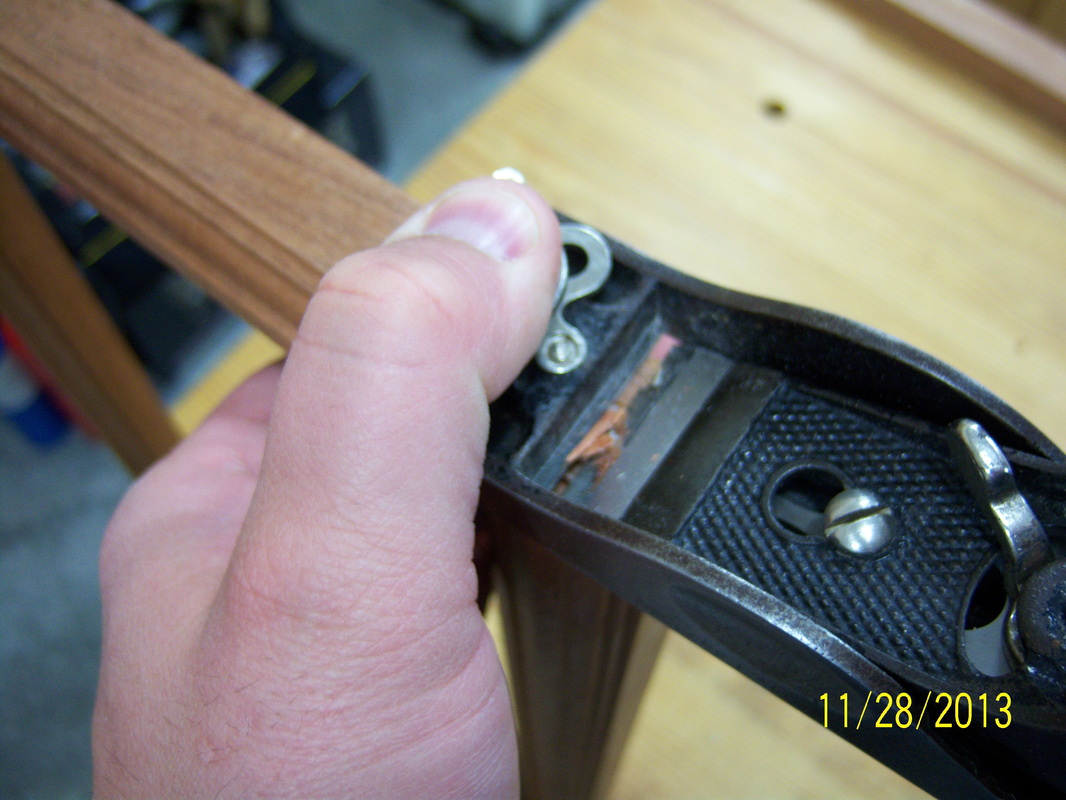
I placed a scrap board next to the piece to be rabbeted in order to provide more support for the router plane. It took about as much time to use the router plane as it would have to setup an electric router, and the setup was quite a bit easier and produced less dust.
Mahogany Saber Case
Mahogany Saber Case
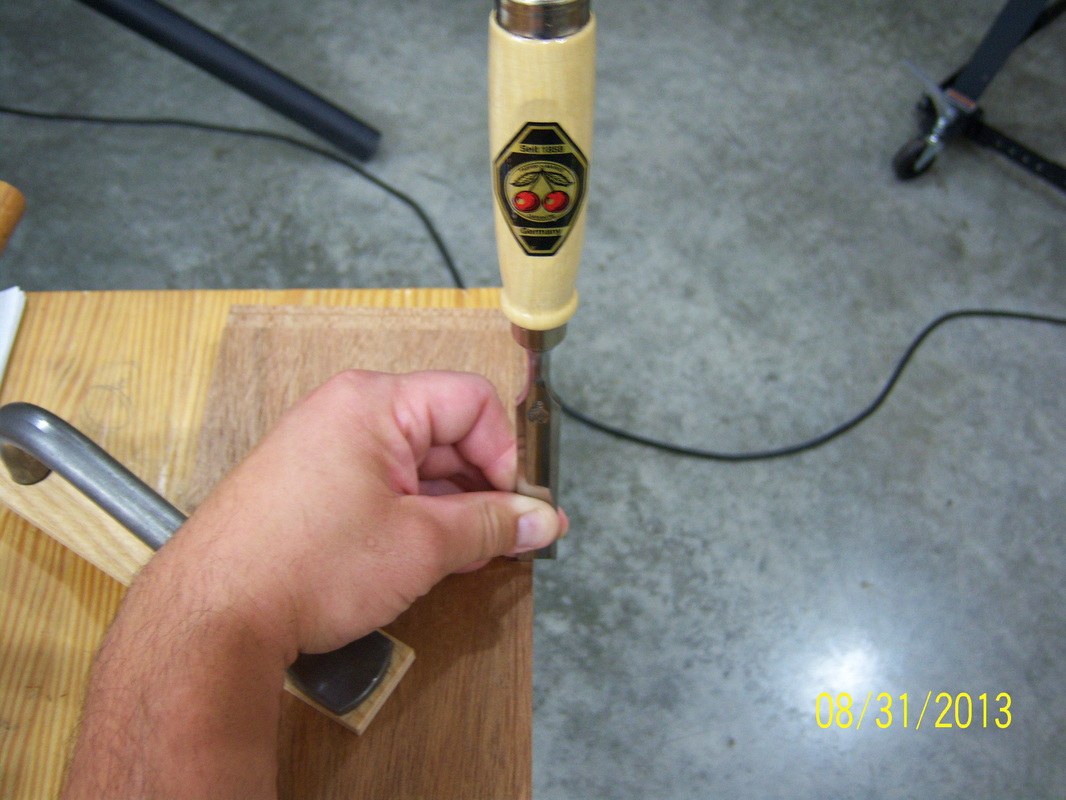
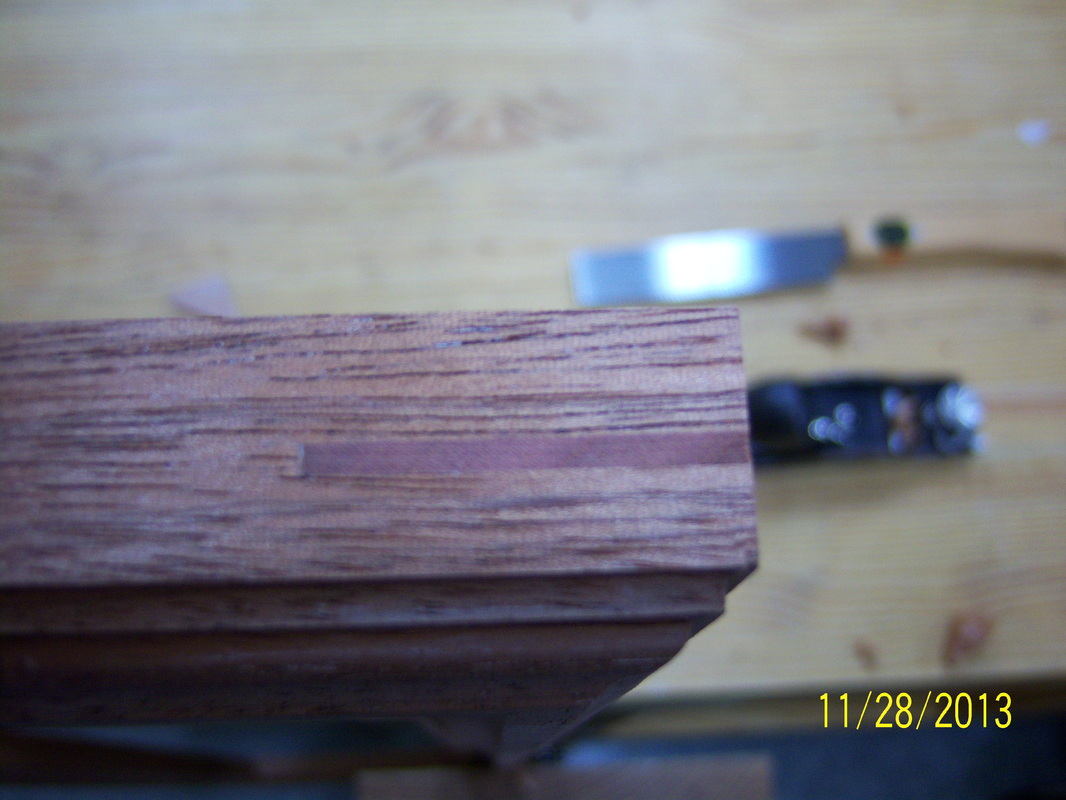
Since the router plane is pushed in the direction of the grain, a chisel was used to clean up the beginning end of the rabbet where the plane left a ramp of uncut wood.
Mahogany Saber Case

Mahogany Saber Case
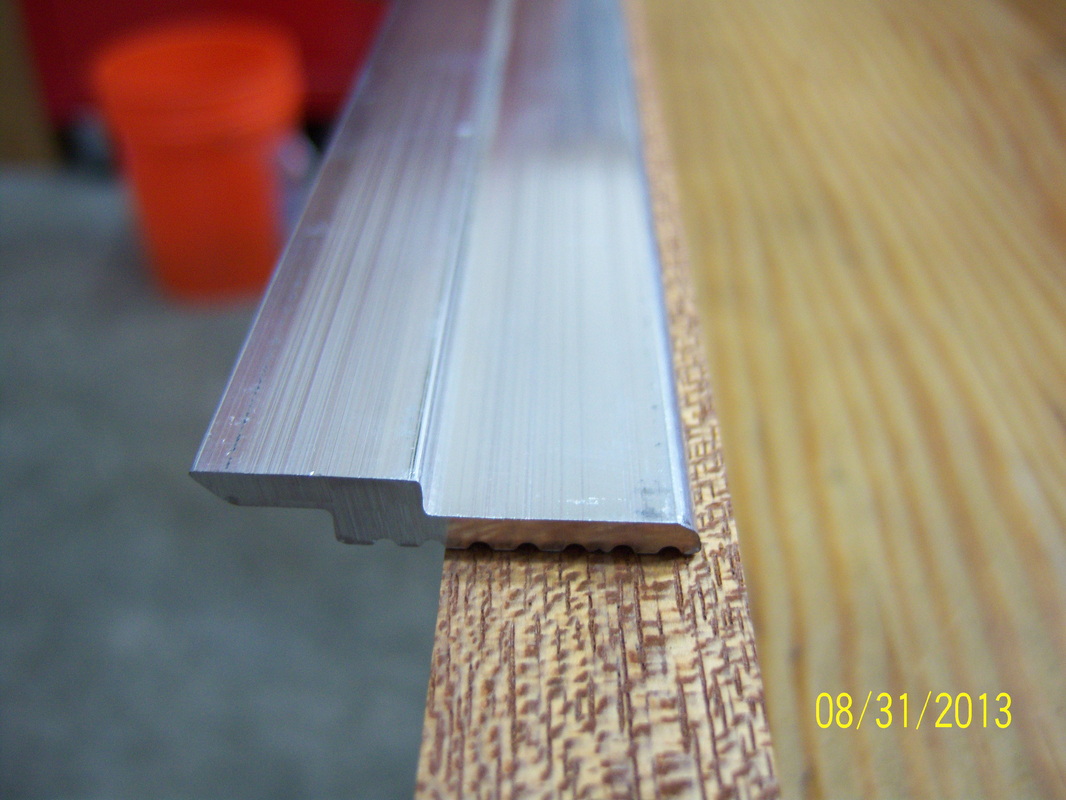
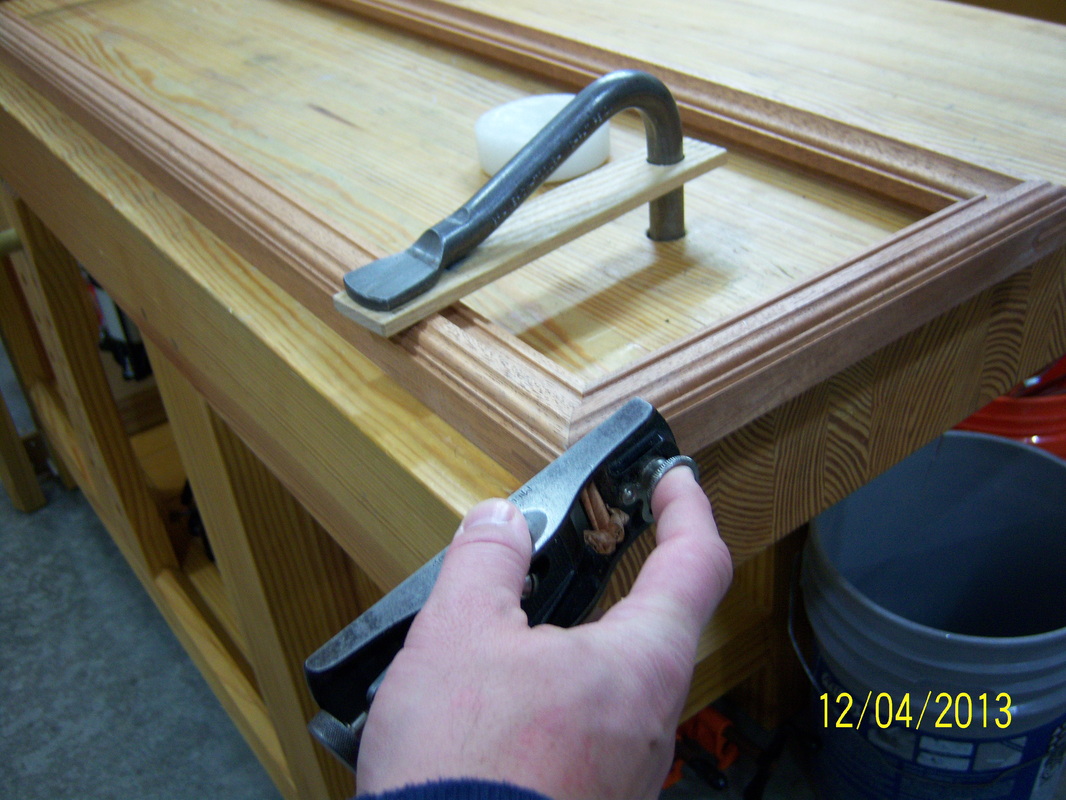
The mounting rail is in place, but will be drilled and held with screws after the finish is applied.
Mahogany Saber Case
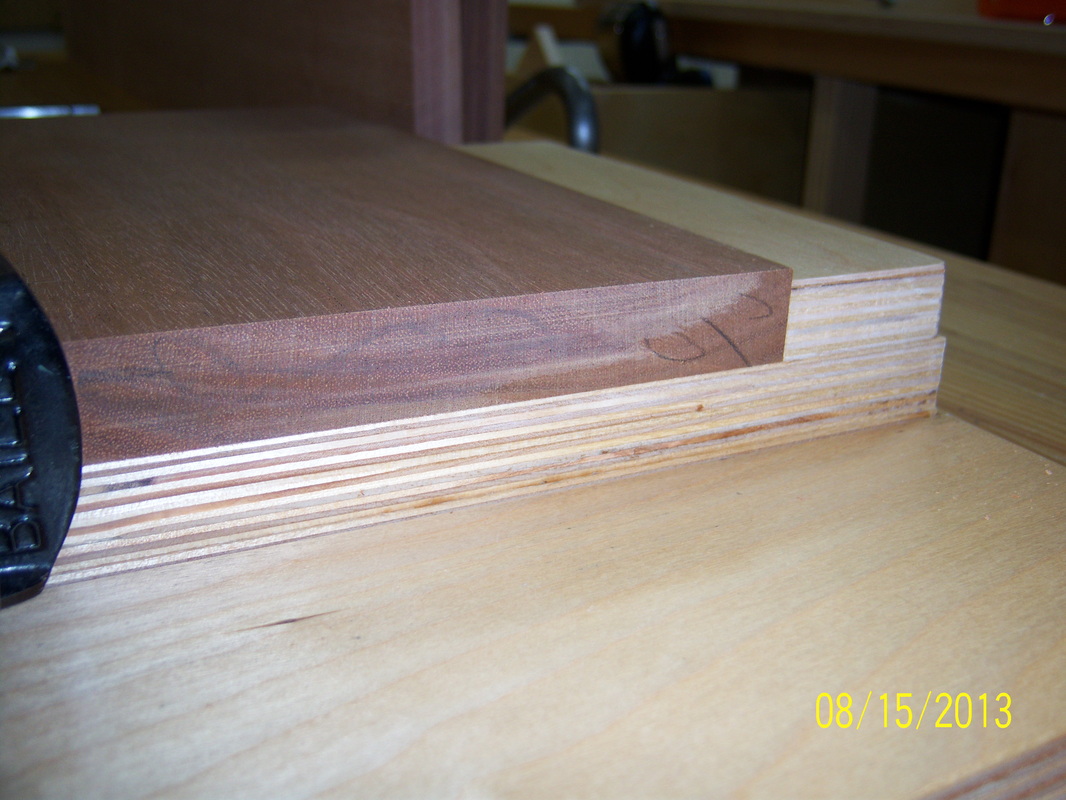
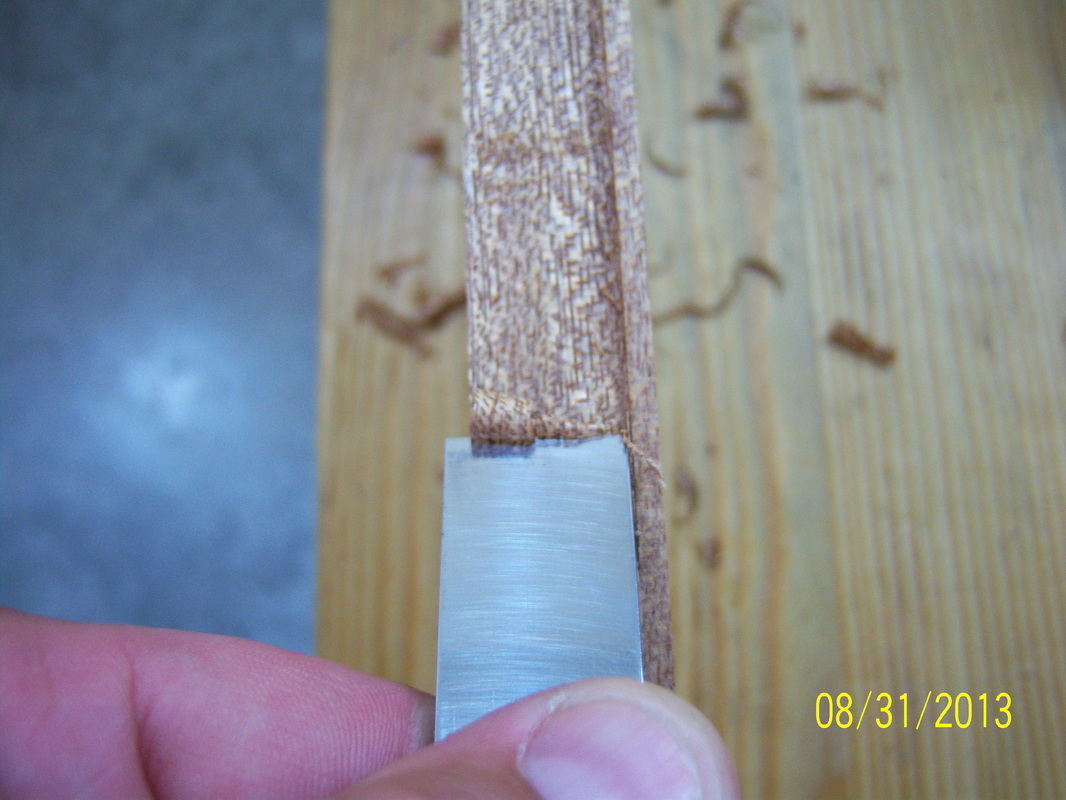
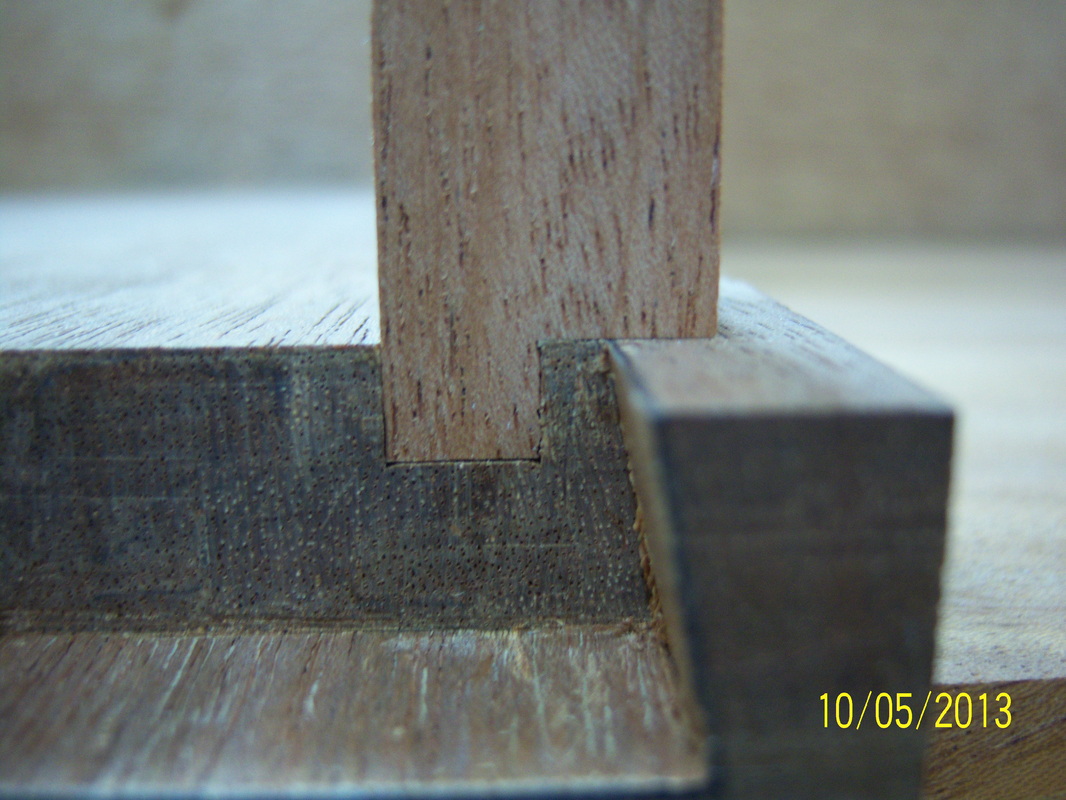
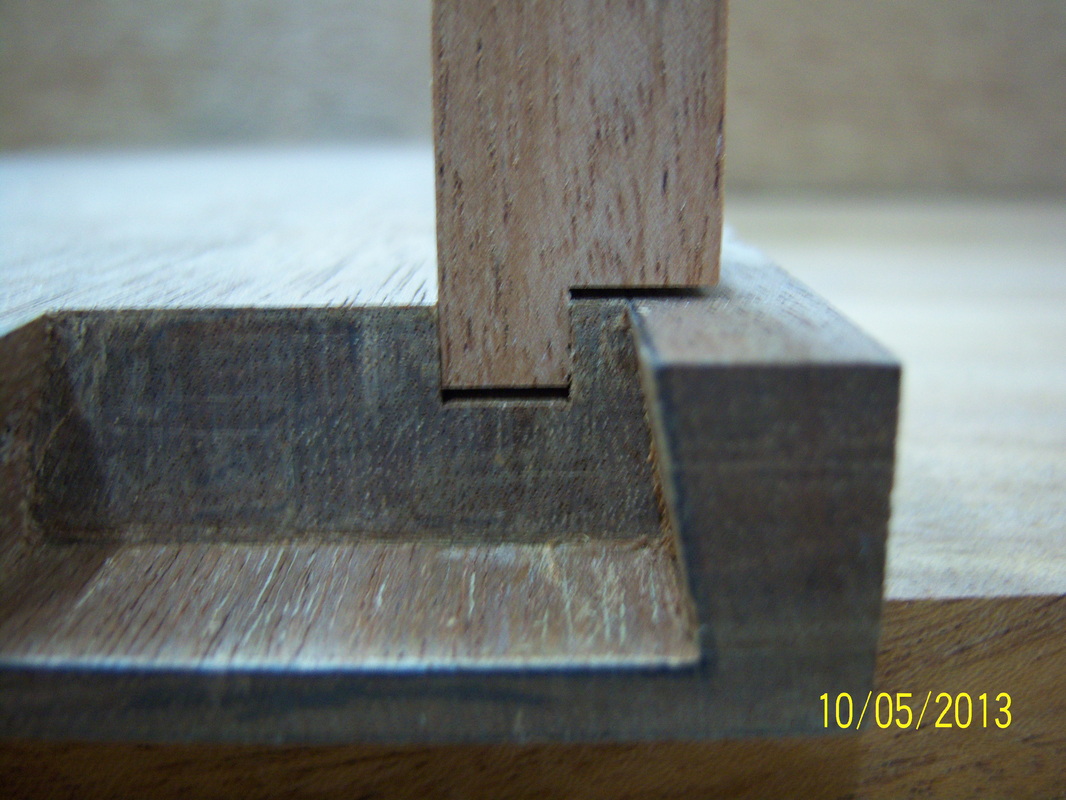
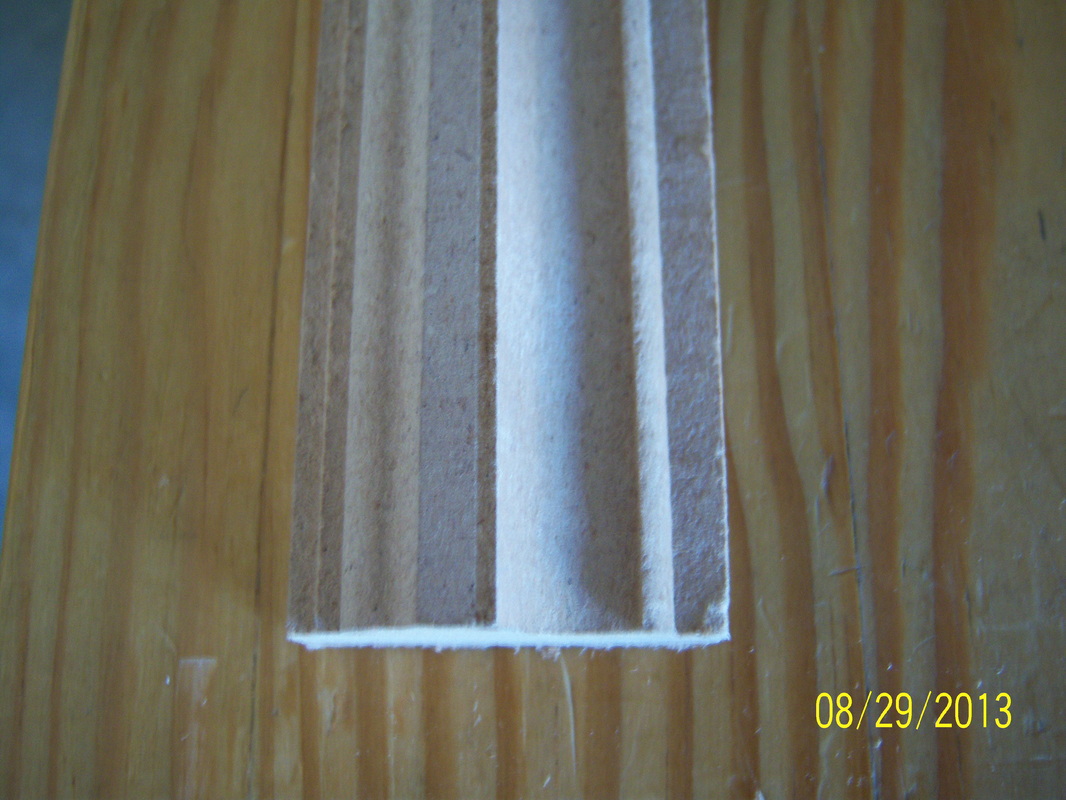
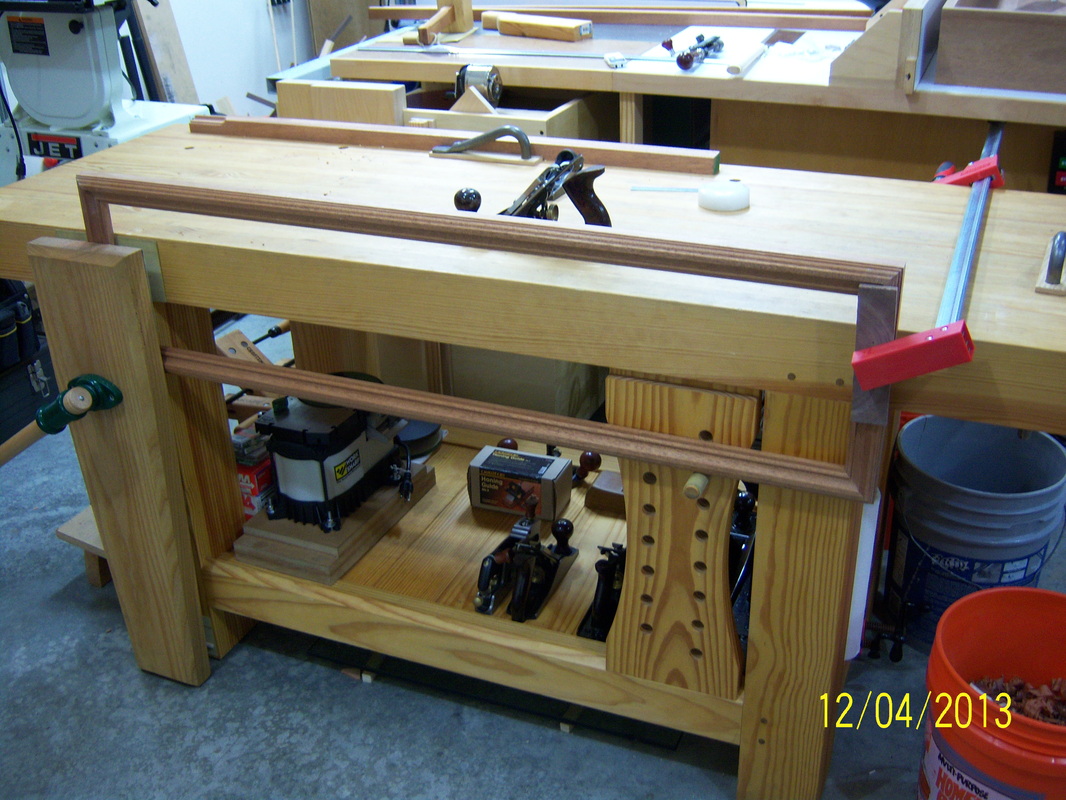
The vertical piece is the case back, while the piece laying flat is the bottom of the case. The back will be held in place by a dado (or groove) that will be cut on the inside of all four case pieces. You can see how the back was inset a 1/4" to allow room for the mounting rail. The back is just over 5/8" thick. The dado will be cut approximately 5/16" wide.
Mahogany Saber Case
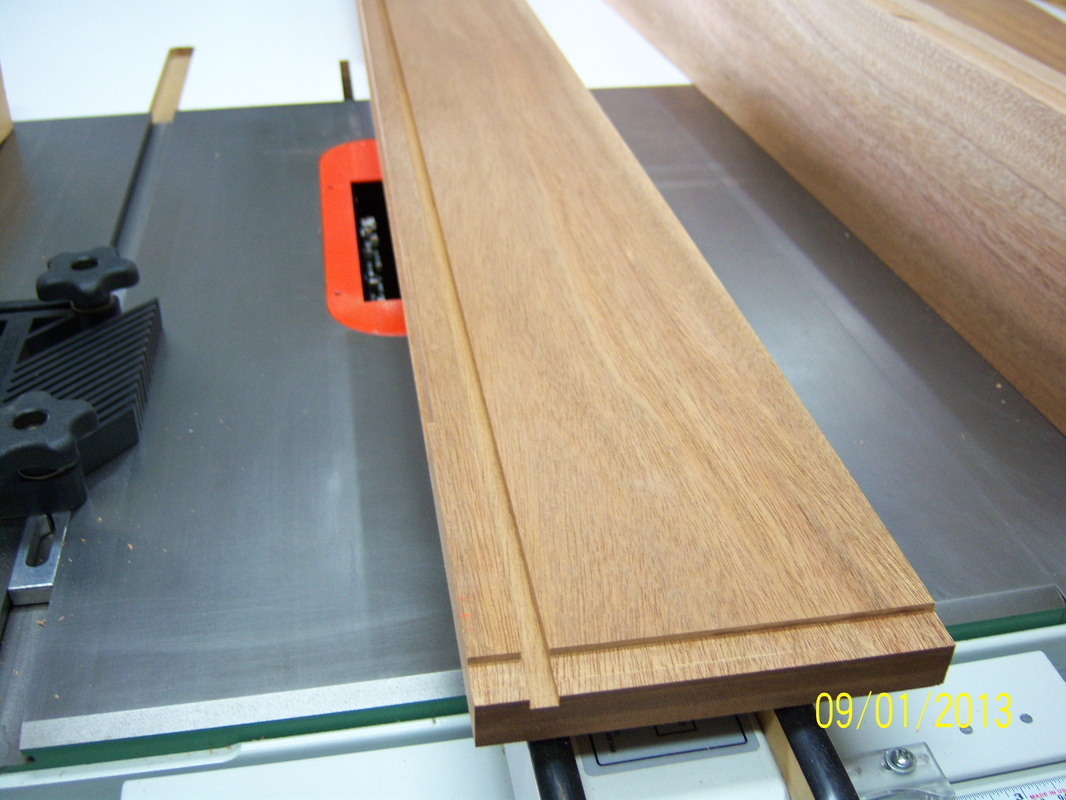
The rabbet on the end of the board is to make dovetailing easier, the long dado will hold the case back.
Mahogany Saber Case
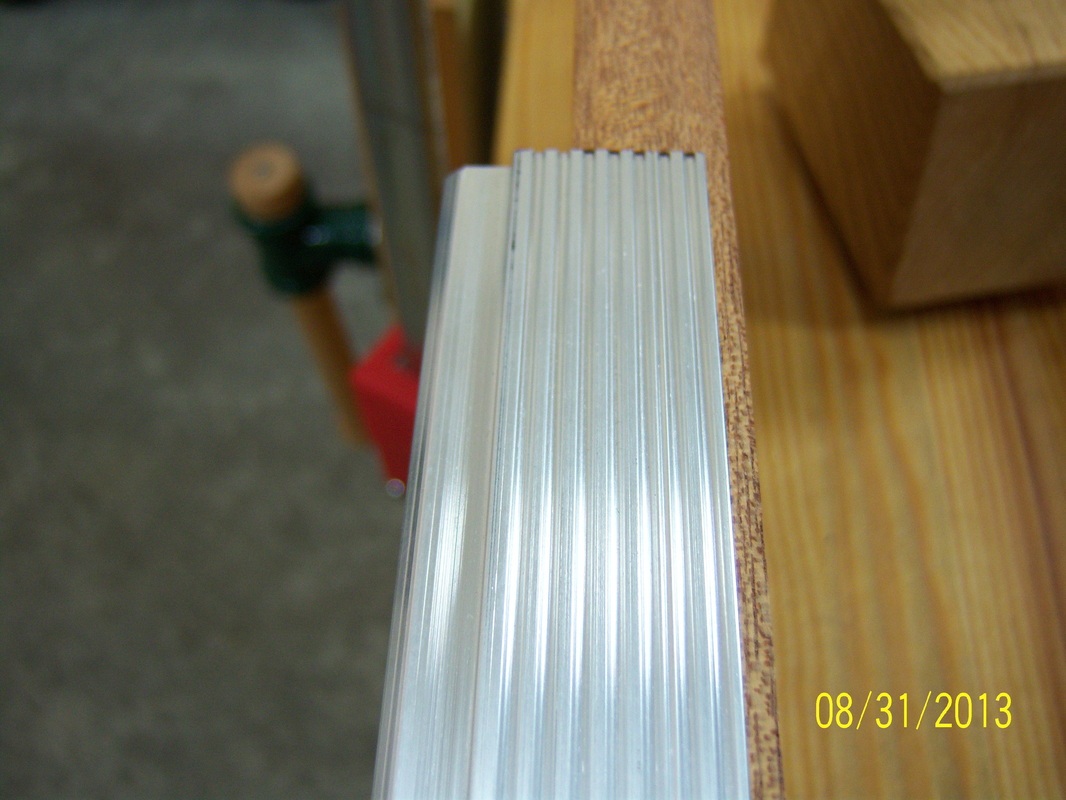
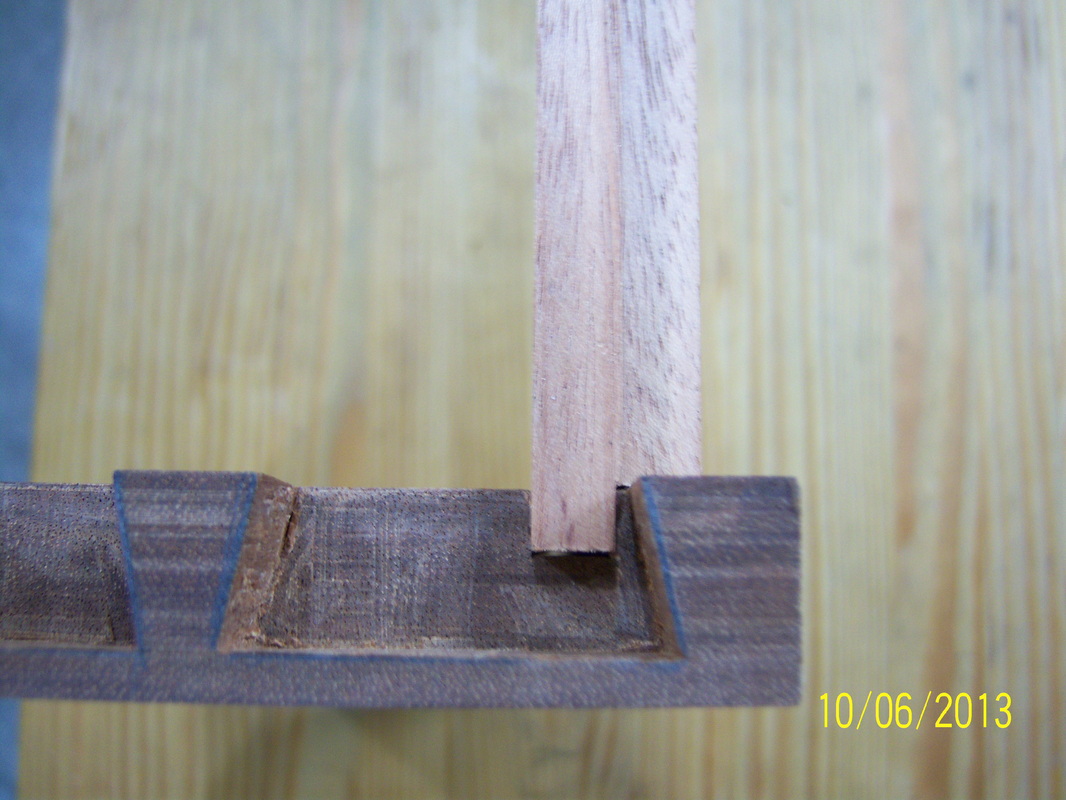
Here you can see the dado that will accept the rabbet that will later be cut around the edge of the back panel. The groove will allow the back panel to expand with changes in moisture since it was made out of solid wood.
Mahogany Saber Case

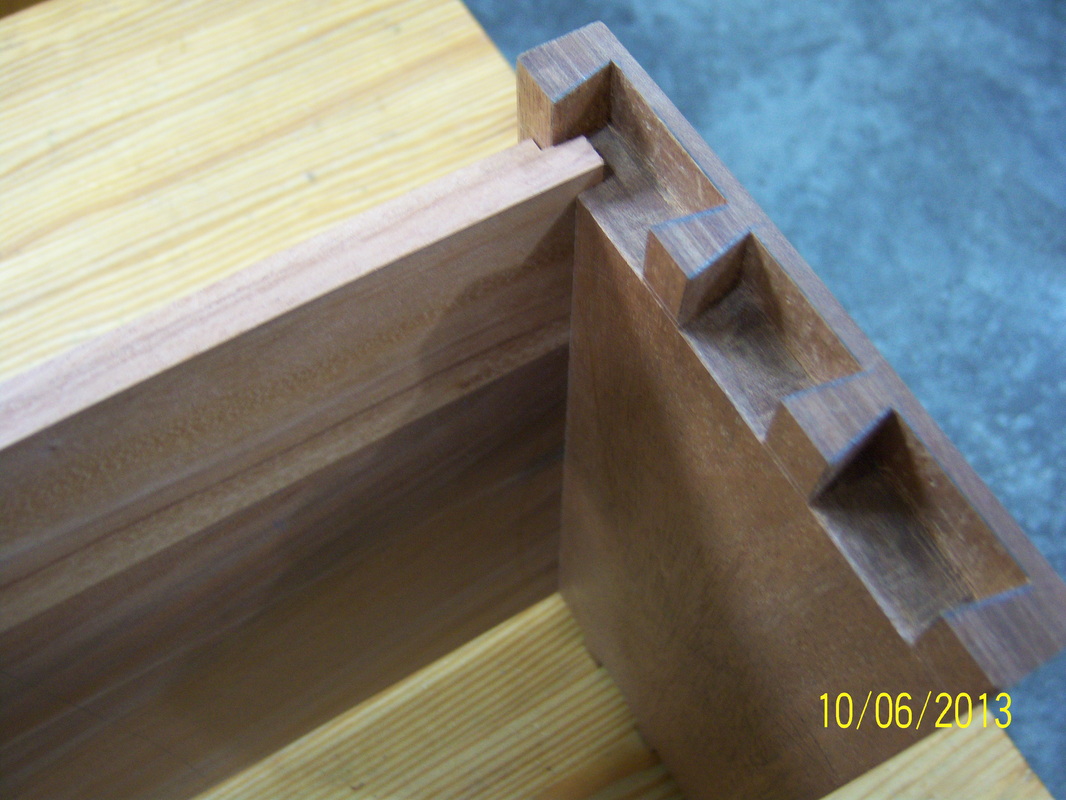
On to dovetailing the case together... I decided to assemble the case using half-blind dovetails. Since the back panel will float and not be glued in place, I figured the case needed the extra strength of the dovetailed joint.
After scribing a line with the marking gauge, I used a 3/8" chisel to define the outer tail locations.
After scribing a line with the marking gauge, I used a 3/8" chisel to define the outer tail locations.
Mahogany Saber Case
I divided the remaining space by three and marked the width of the pins between the tails with a 1/4" chisel.
Mahogany Saber Case

Using a bevel gauge and a marking knife I scribed the lines that defined the three tails.
Mahogany Saber Case

Using a small square, the lines were carried over the end of the board as well. Cutting these lines straight will be very important when it comes time to lay out the pins.
Mahogany Saber Case

Mahogany Saber Case
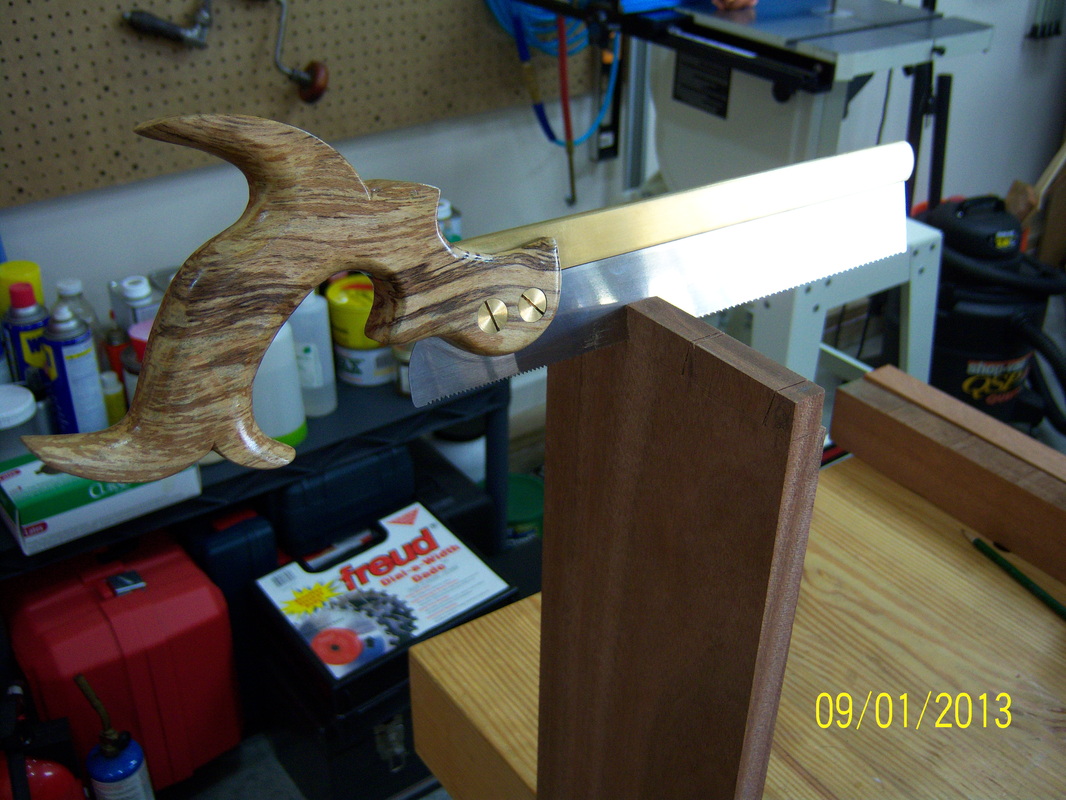
I cut the sides of the tails with a dovetail saw that was made by a man I met on www.woodnet.net. Very nice saw - cuts well, and is very nicely made.
Mahogany Saber Case
The waste between the tails was cut out using a coping saw with a fine blade.
Mahogany Saber Case
Prior to cutting out the waste on the sides of the board, I used a sharp chisel to remove a bit of material up to the scribed line. By doing so, the saw had a better chance of tracking on the waste side of the line.
Once the two sides were trimmed, the board was clamped to the workbench and the waste between the tails was removed with an 1/4" chisel.
Mahogany Saber Case

Here you can see how the waste was chiseled away to about the midpoint of the board. After one side is completed, the board is flipped over and the other side is done.
Mahogany Saber Case

After the tails were cut, the tail board was positioned above the pin board so that the tails could be scribed onto the pin board.
This picture shows how the shallow rabbet cut on the inside of the tail board comes in useful when placing it on top of the pin board. The "shelf" that was created sits firmly in place while you scribe around the pins.
Mahogany Saber Case
After the tails are scribed onto the pin board, the tails now become the waste as marked on the pin board.
Mahogany Saber Case
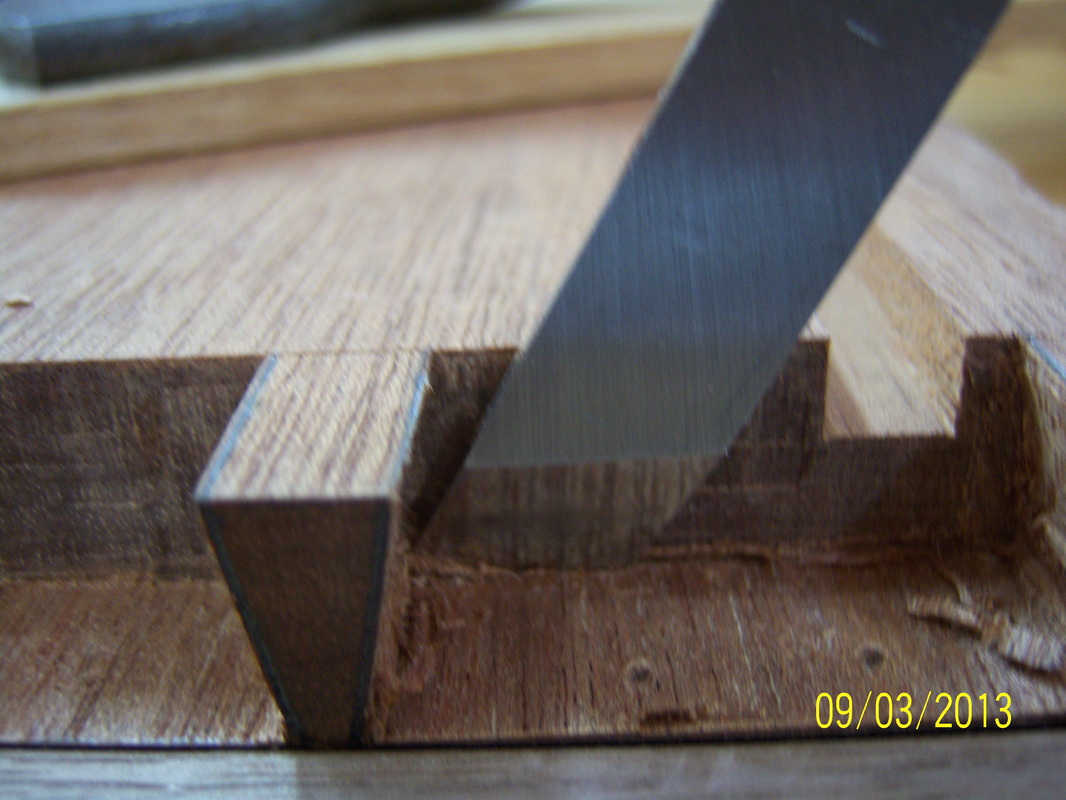
I used a forstner bit to remove the bulk of the waste material between the pins.
Mahogany Saber Case

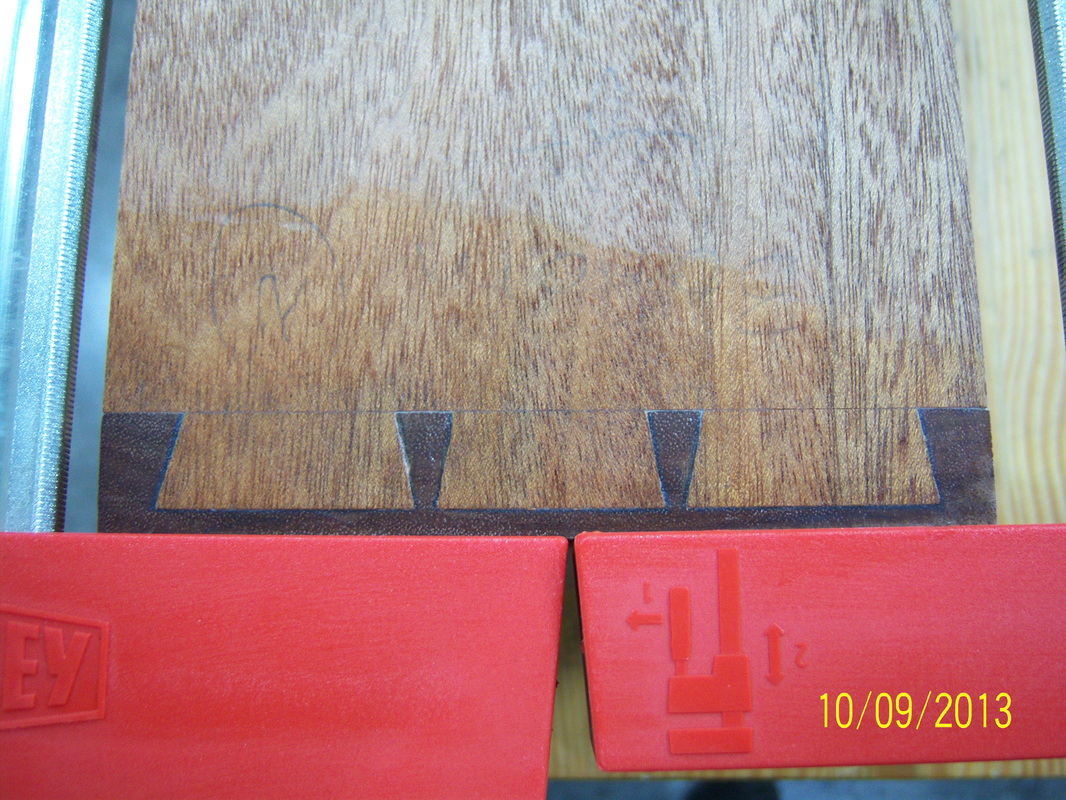
You can see how I have cleaned up all but the bottom of the first section of the pin board. The process was repeated for the second and third tail waste area. You can also see how I stayed a good distance away from the pins with the saw... I used a chisel to sneak up to the line.
Mahogany Saber Case
Mahogany Saber Case
Using a shim that matches the thickness of the material that will remain on the pin board, I pared away at the bottom of the recess until it was flat.
Mahogany Saber Case
Mahogany Saber Case

Mahogany Saber Case
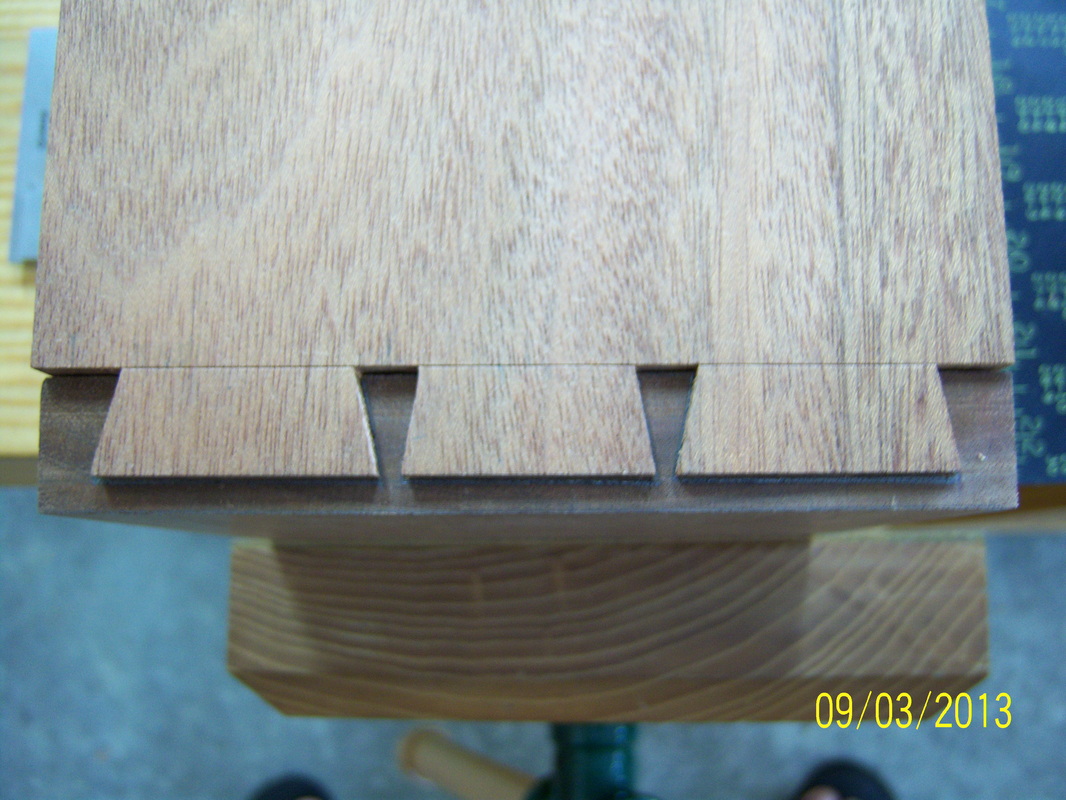
Here is have the tail board lightly tapped into the pin board. Everything fits well so far, but I think I will have a bit to clean up prior to gluing to ensure that the joint seats tightly.
Mahogany Saber Case
In order to determine the back panel's final dimensions, I measured the inside distance that the panel would have to span on the side and the top/bottom parts of the case. I then added 1/2" for both 1/4" rabbets and then subtracted 1/8" to allow for wood movement.
Mahogany Saber Case
Mahogany Saber Case

Once the dimensions were known, I ripped the back panel to width.
Mahogany Saber Case
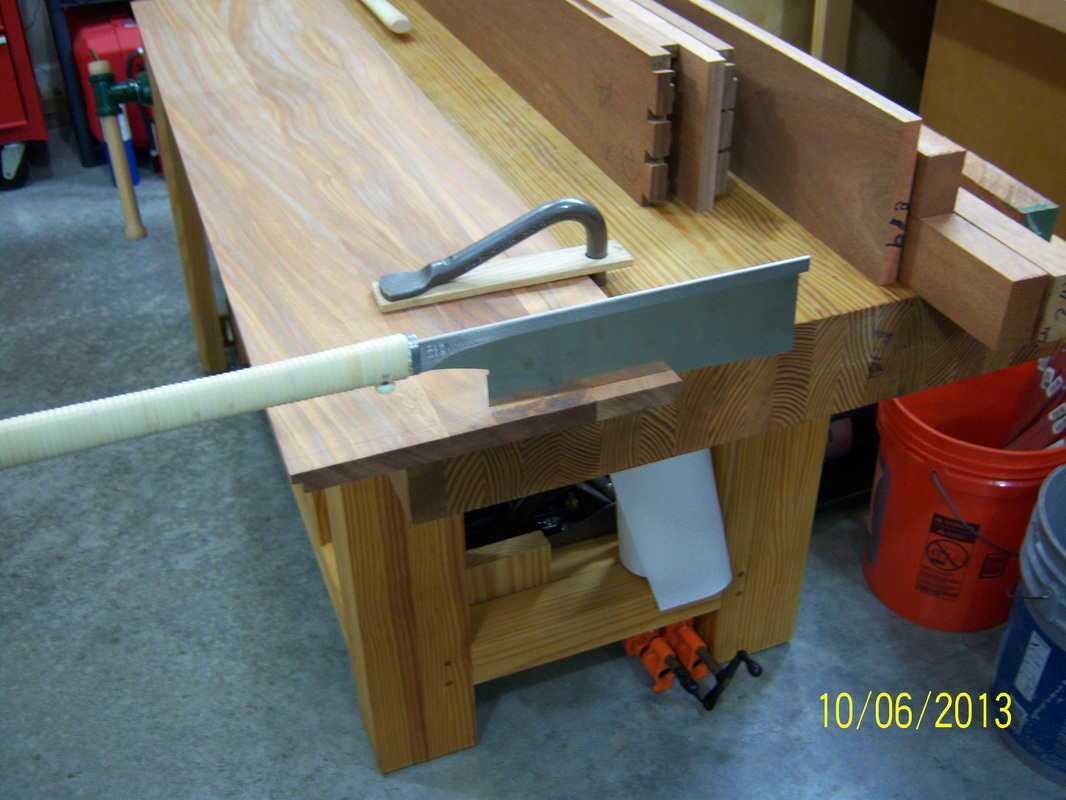
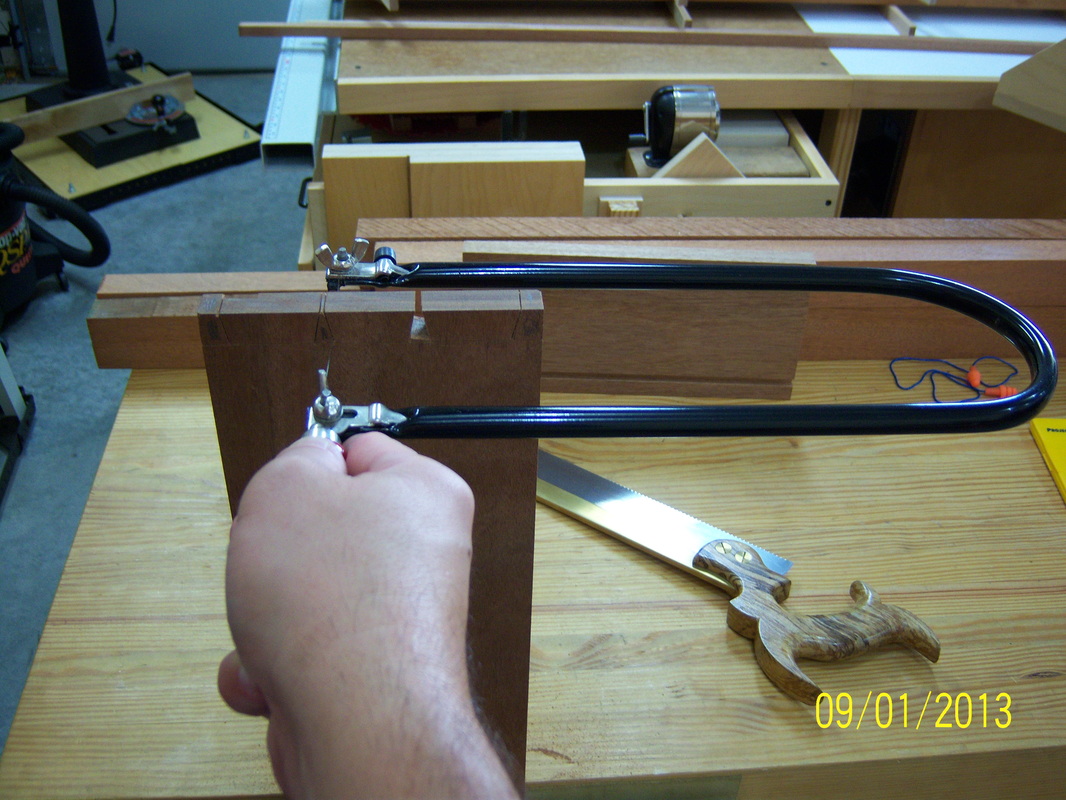
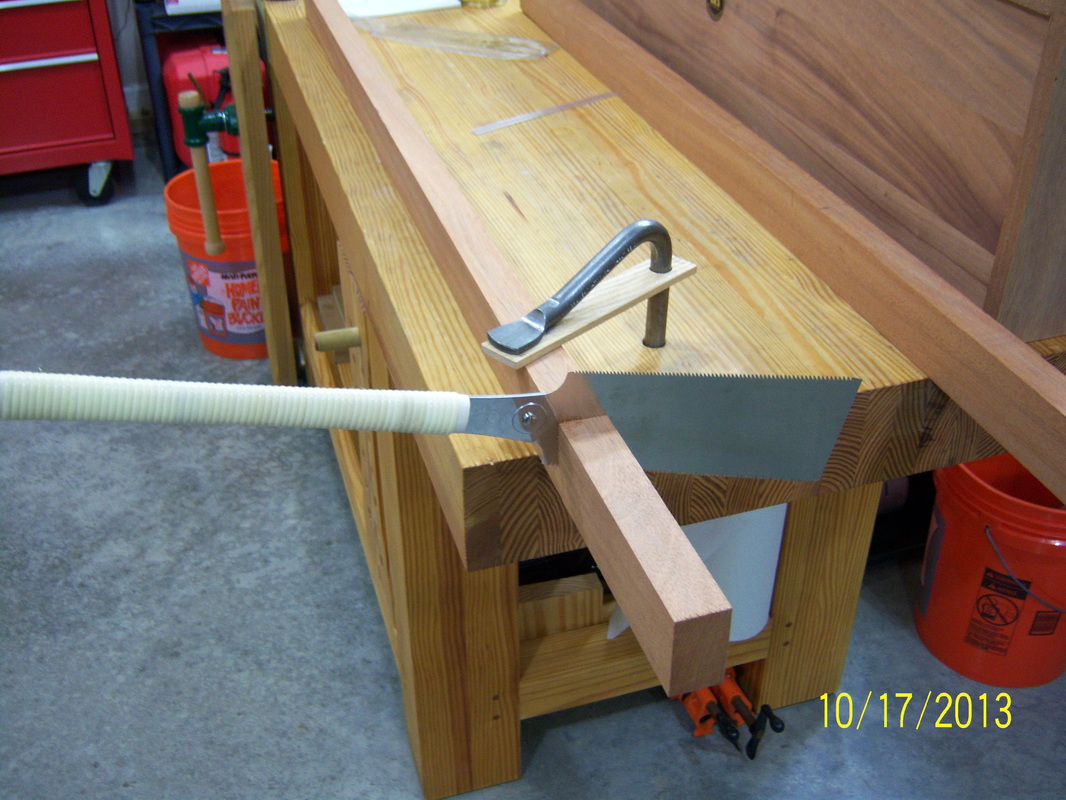
I got ahead of myself and installed the dado blade in my table saw prior to cutting the back panel to length. Instead of wasting the time reconfiguring my table saw, I cut the back panel to length with a Japanese saw.
Mahogany Saber Case
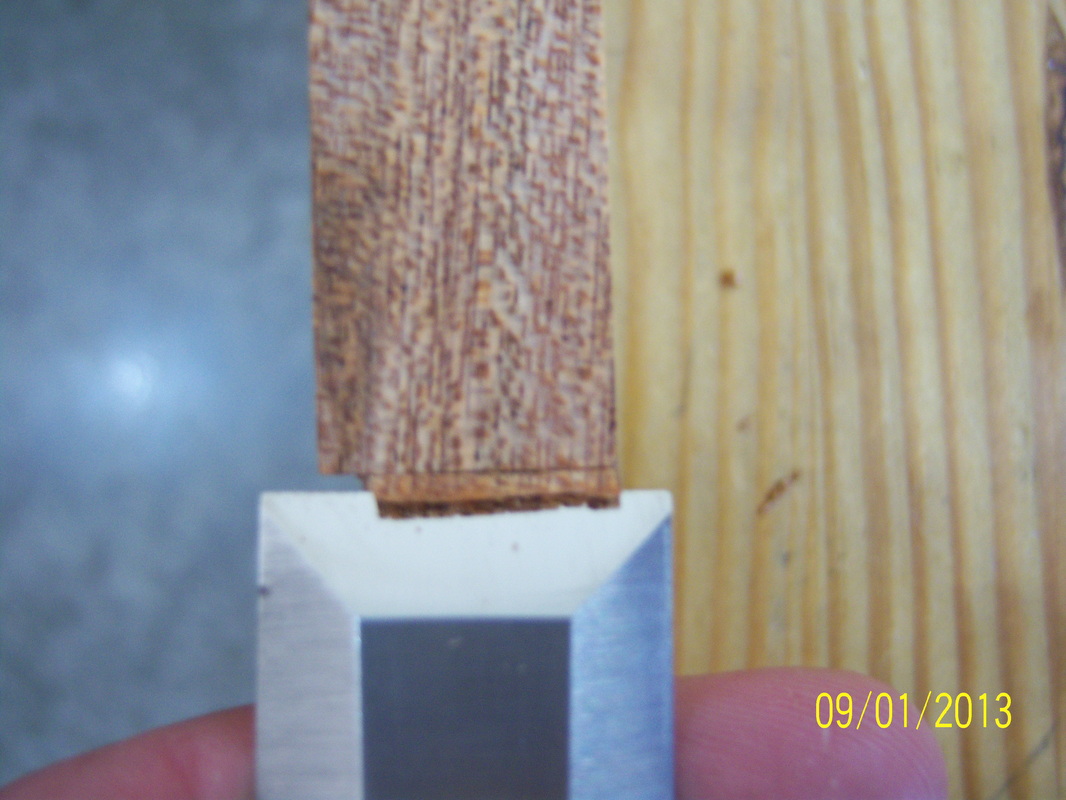
After sawing the panel to length, I made sure the end was square with the use of a shooting board.
Mahogany Saber Case
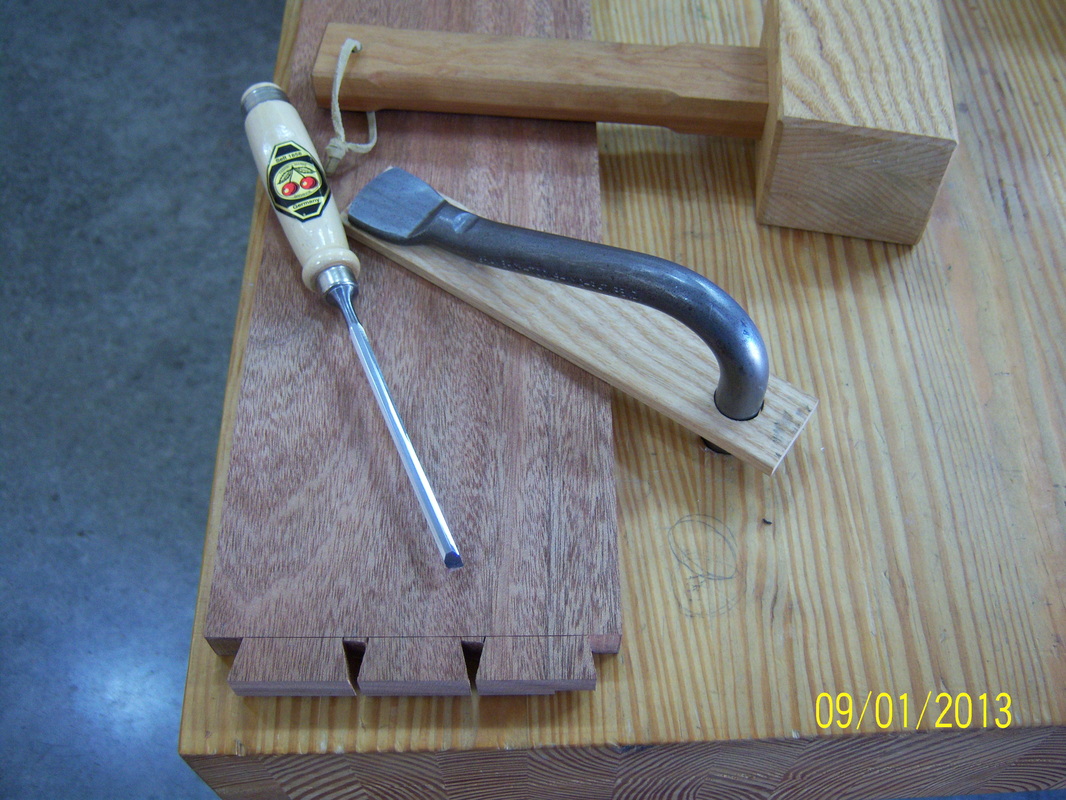
After setting the dado to cut 1/4" wide rabbet, all four edges of the back panel were rabbeted.
Mahogany Saber Case
A test piece was cut to gauge the accuracy of the setup.
Mahogany Saber Case
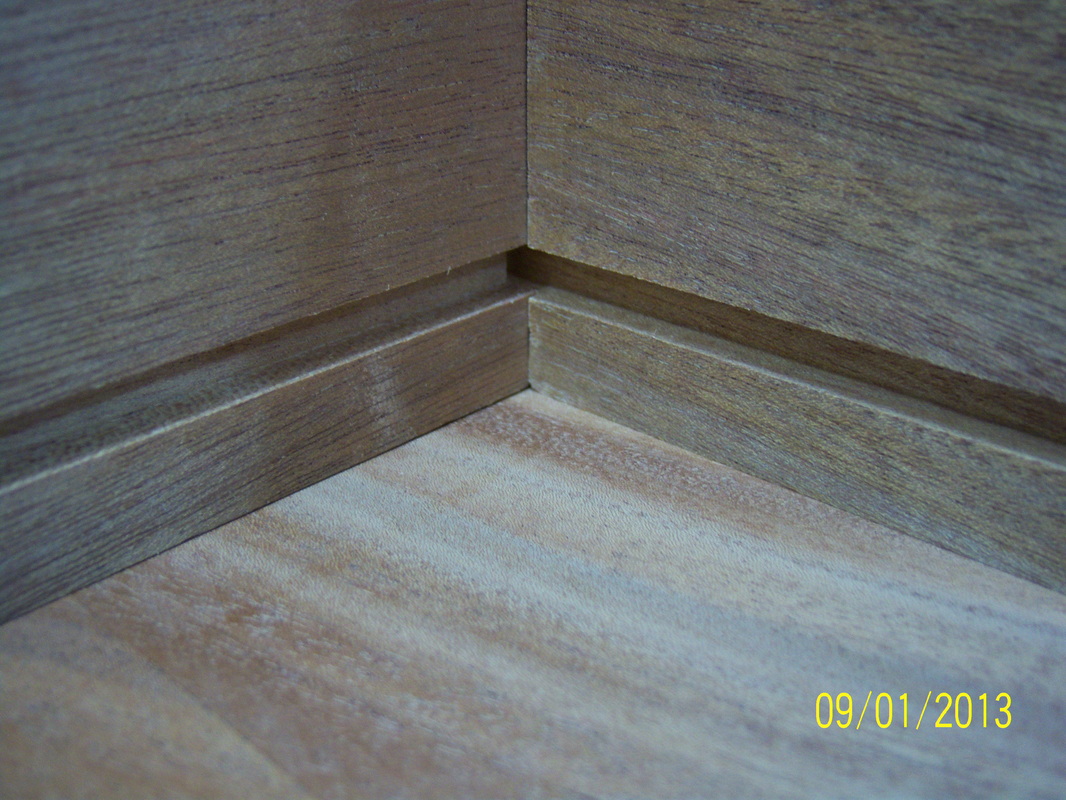
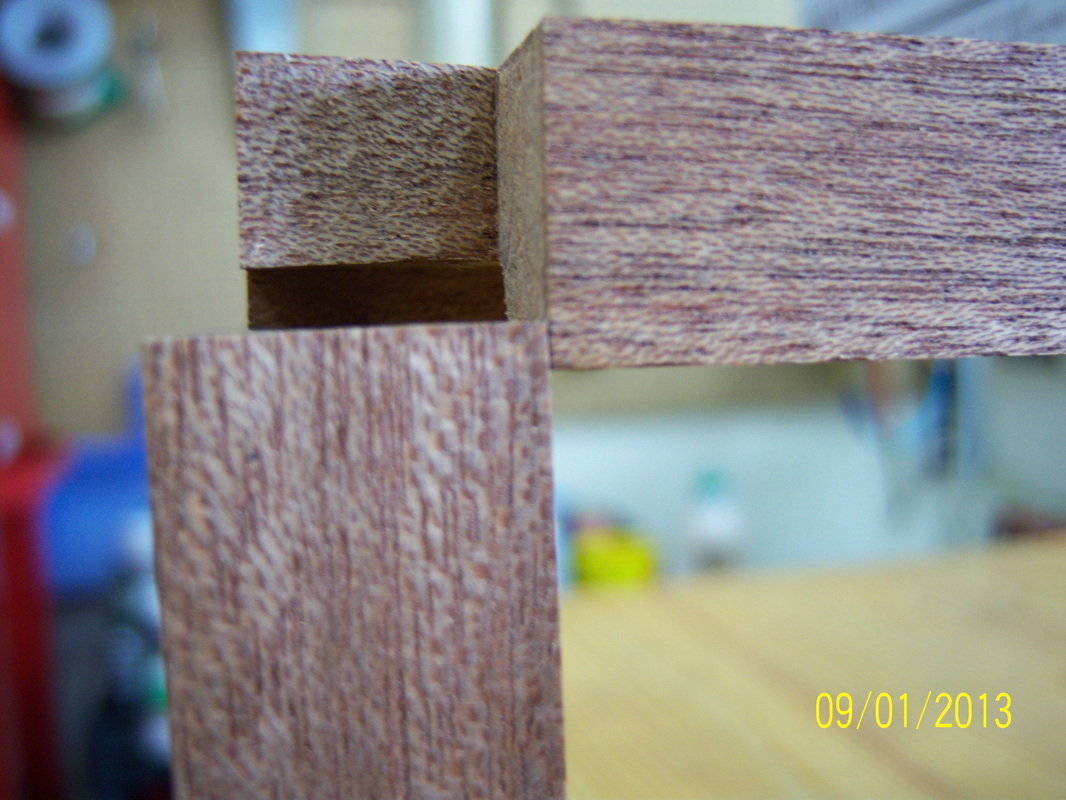
This is a better representation of how the back panel will actually fit in the case side. Since the panel was cut an 1/8" shorter to allow for wood movement, a 1/16" reveal will be visible around the perimeter of the back of the case. Unfortunately, no one will ever see it as it will face the wall when hung.
Mahogany Saber Case
After the back panel was rabbeted the fit was tested. Before the case goes together and is glued, the rabbet will be relieved a bit more to allow for easier assembly.
Mahogany Saber Case
Here you can see how the rabbet faces the back of the case and will not be seen when hung. The back panel can contract and expand with changes in the relative humidity without those changes being visible.
Mahogany Saber Case

Before the case could be assembled, one of the things that needed done was to tweak the thickness of the rabbets on all four sides of the back panel as mentioned above.
Mahogany Saber Case
Mahogany Saber Case
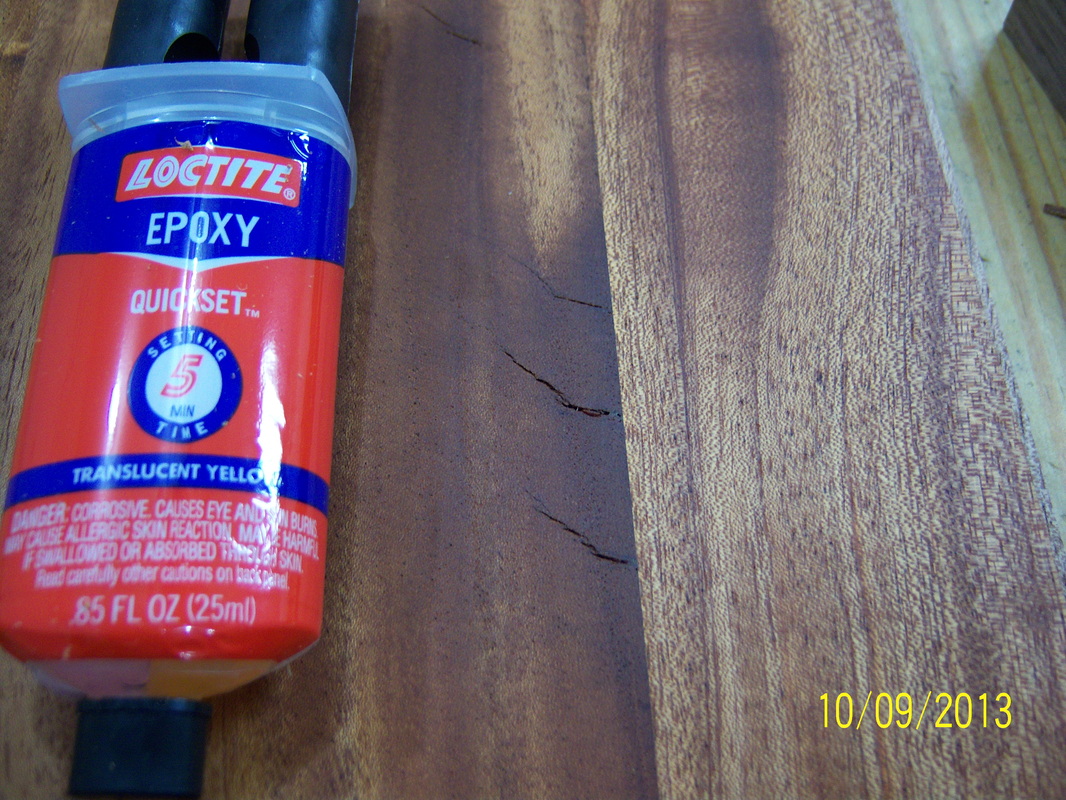
Prior to the case being assembled, I made sure both surfaces of the back panel were planed smooth and some of these natural stress cracks in the wood was filled with epoxy. I am guessing the epoxy will satisfy an aesthetic issue for me more than add any real stability.
Mahogany Saber Case

Using one of the many fake plastic credit cards you get in the mail, I pressed as much epoxy into the cracks as possible.
Mahogany Saber Case

After the epoxy dries it will be sanded.
Mahogany Saber Case
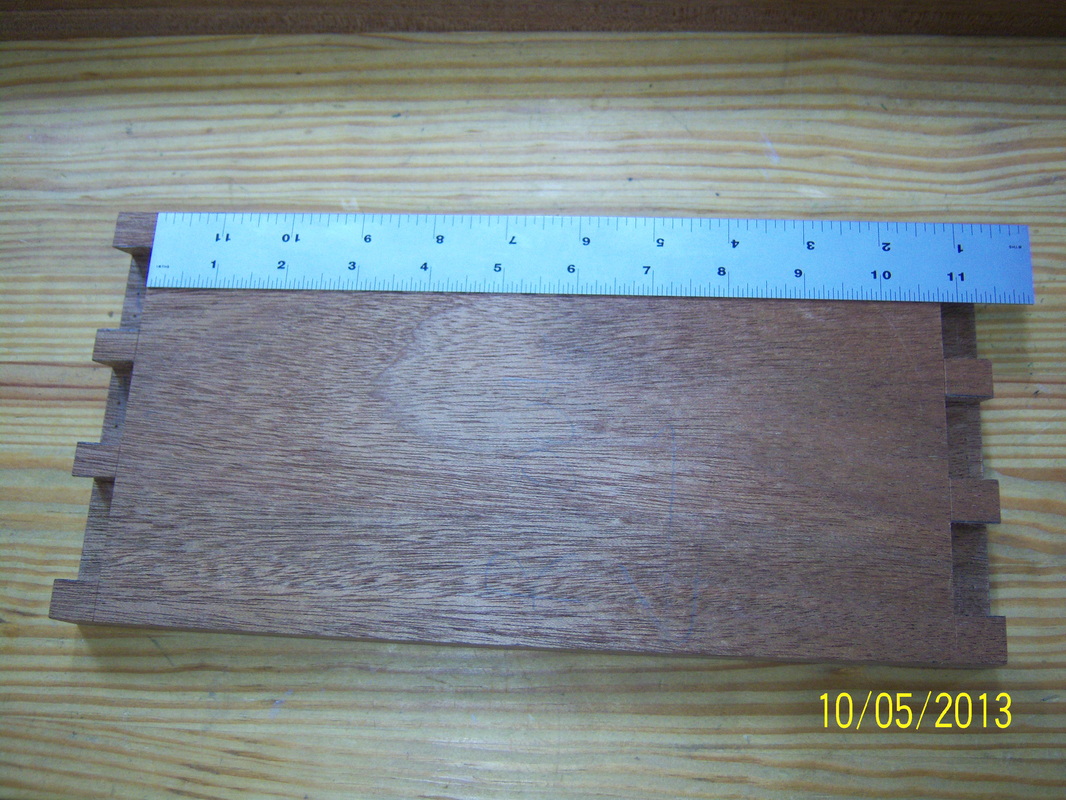
The back panel is finished - cut to size, epoxied, and sanded.
Mahogany Saber Case
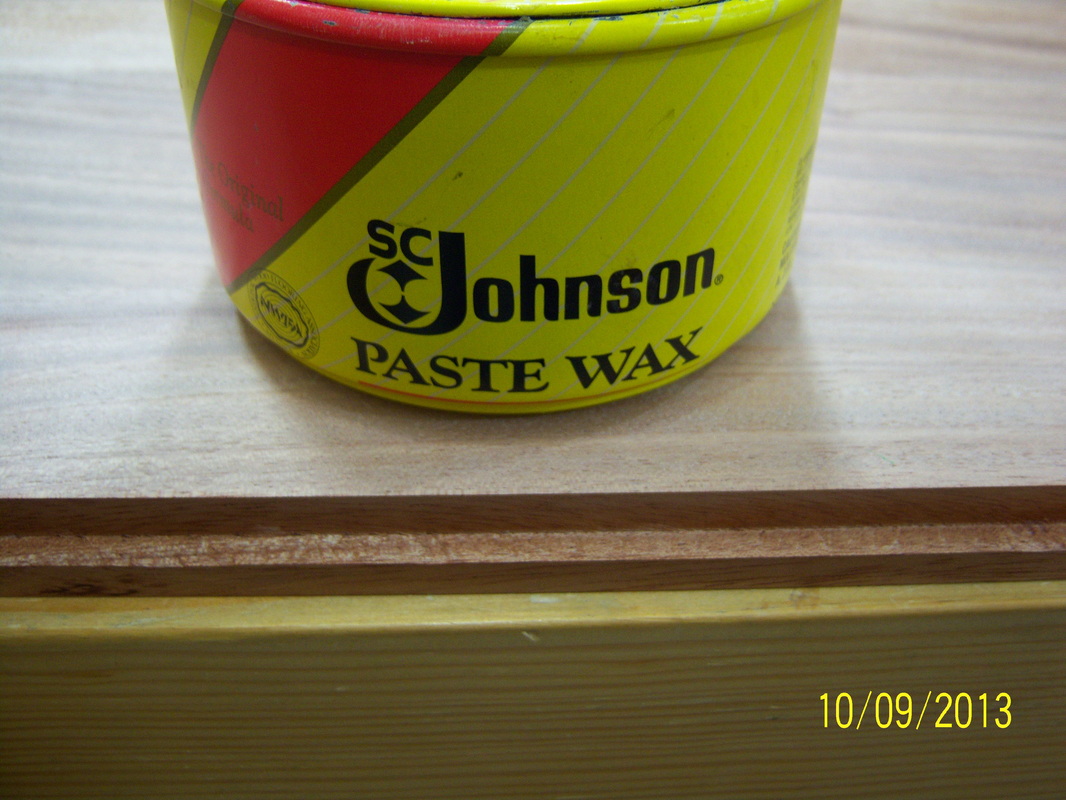
Before the back panel gets inserted into the dados in the case, I applied a bit of paste wax to the rabbet just as insurance against any misplaced glue.
Mahogany Saber Case
In preparation for glue-up, all of the involved pieces were set out including glue, glue brush, and a couple of hammers...
Mahogany Saber Case
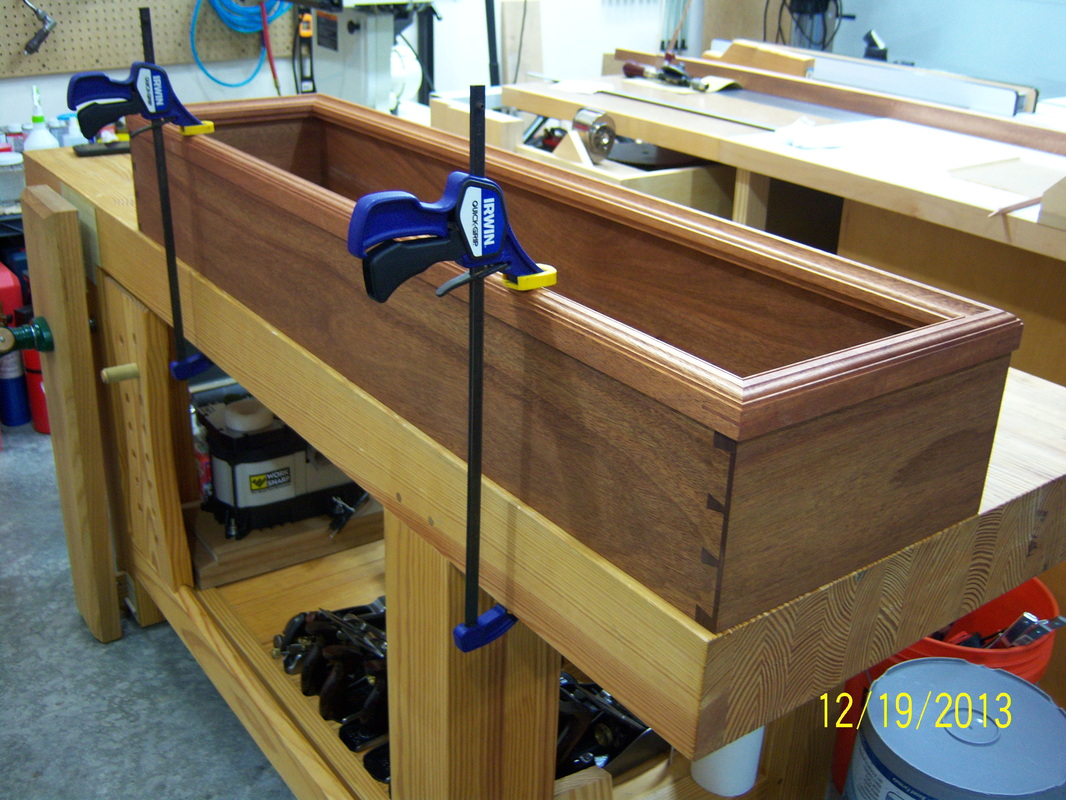
Though the longer clamps don't get used as often, they work great when they are needed. The bottom clamp is actually being used in reverse to push the sides out a bit to make sure the assembly is square.
Mahogany Saber Case

Mahogany Saber Case
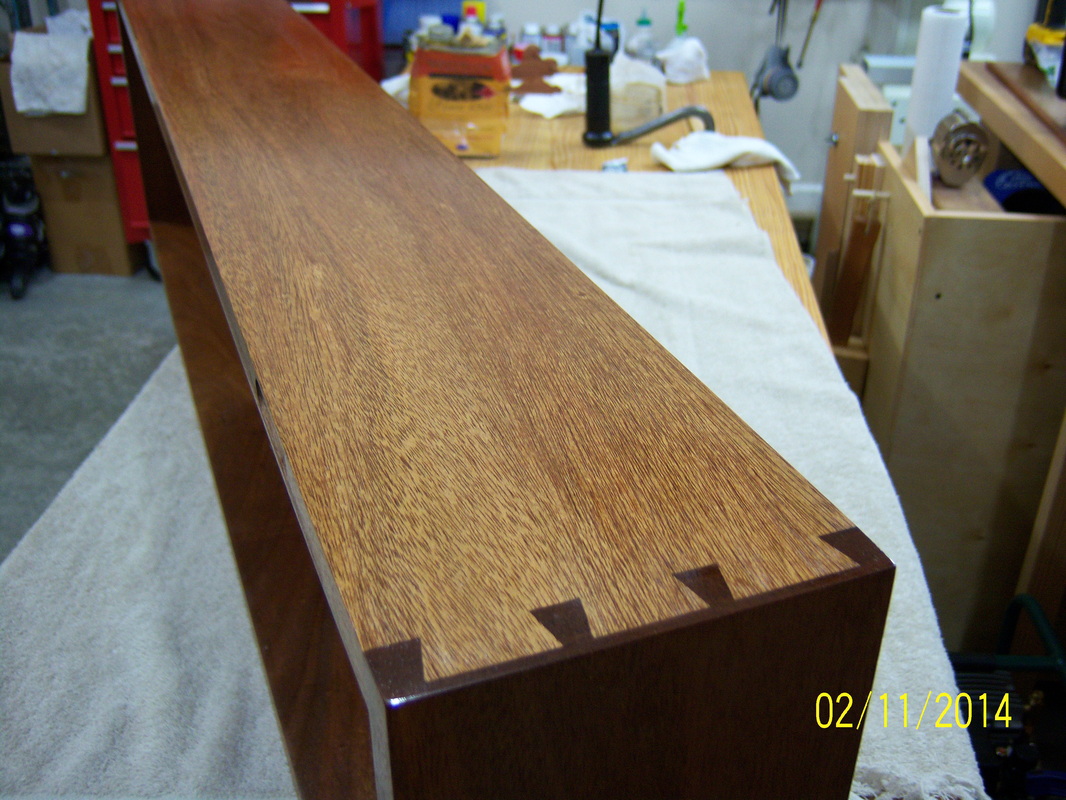
Quick peek at the dovetails to see how they fit. They will look pretty good once the glue dries and the joint can be planed.
Mahogany Saber Case
Mahogany Saber Case
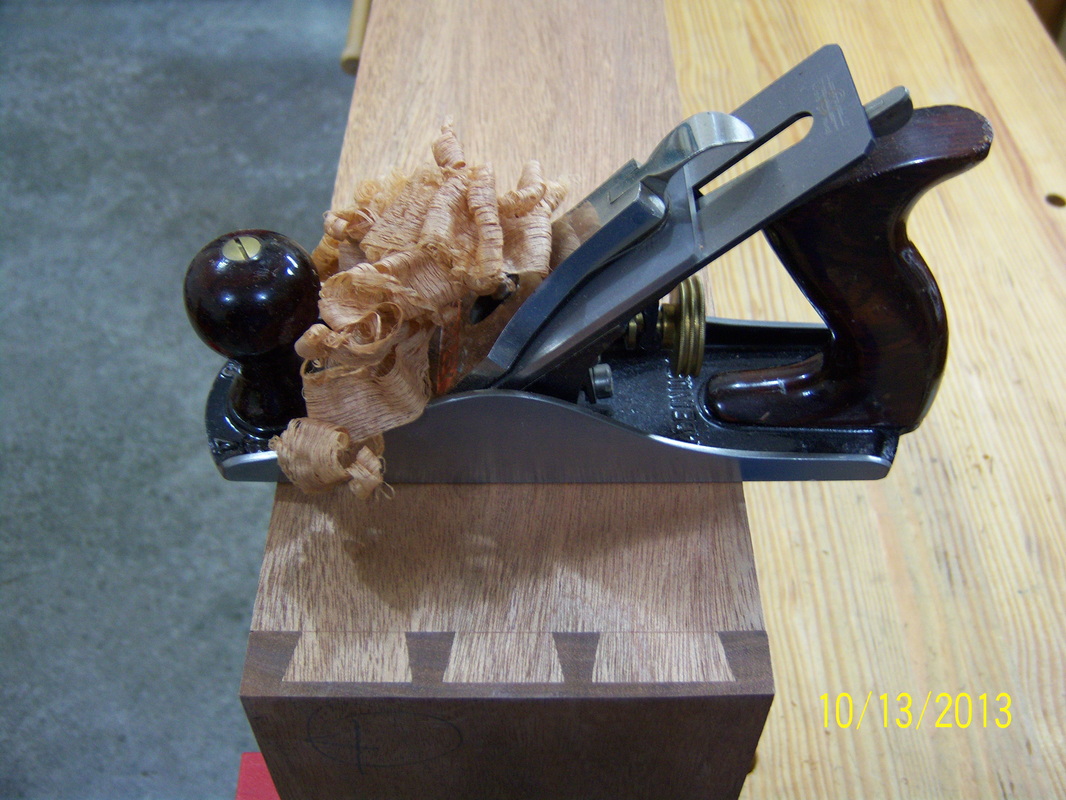
Using a #4 Stanley smoothing plane, I cleaned up the half-blind dovetail joints.
Mahogany Saber Case
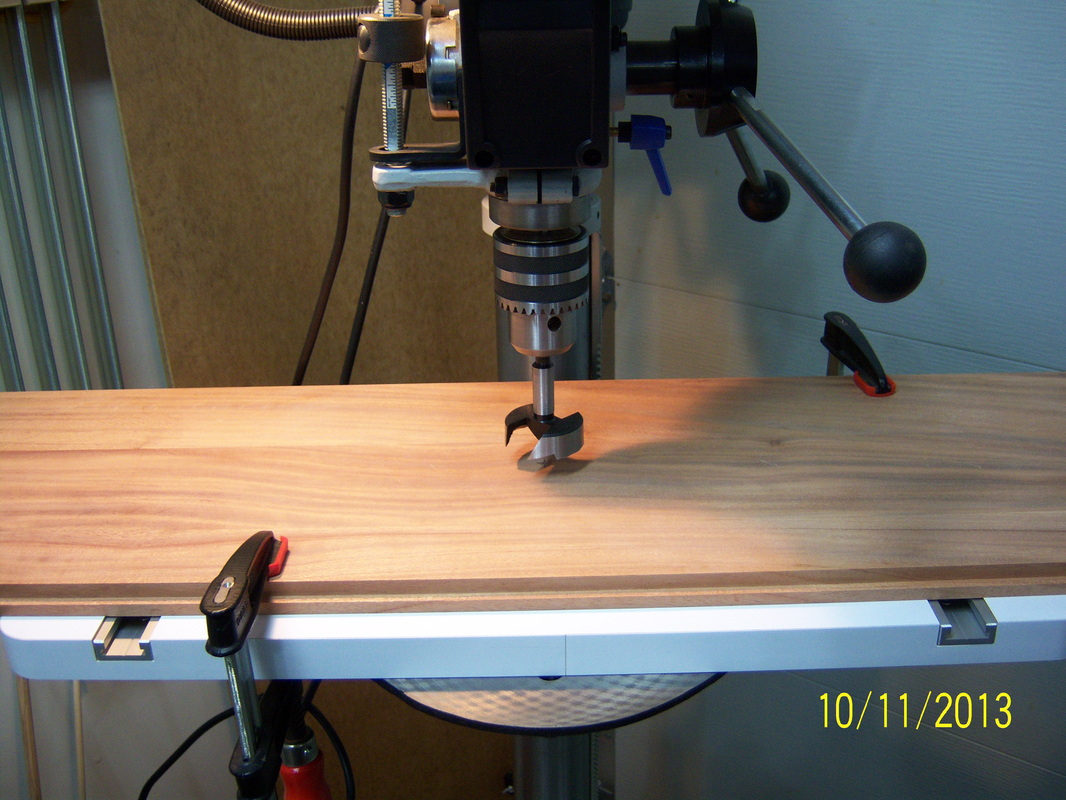
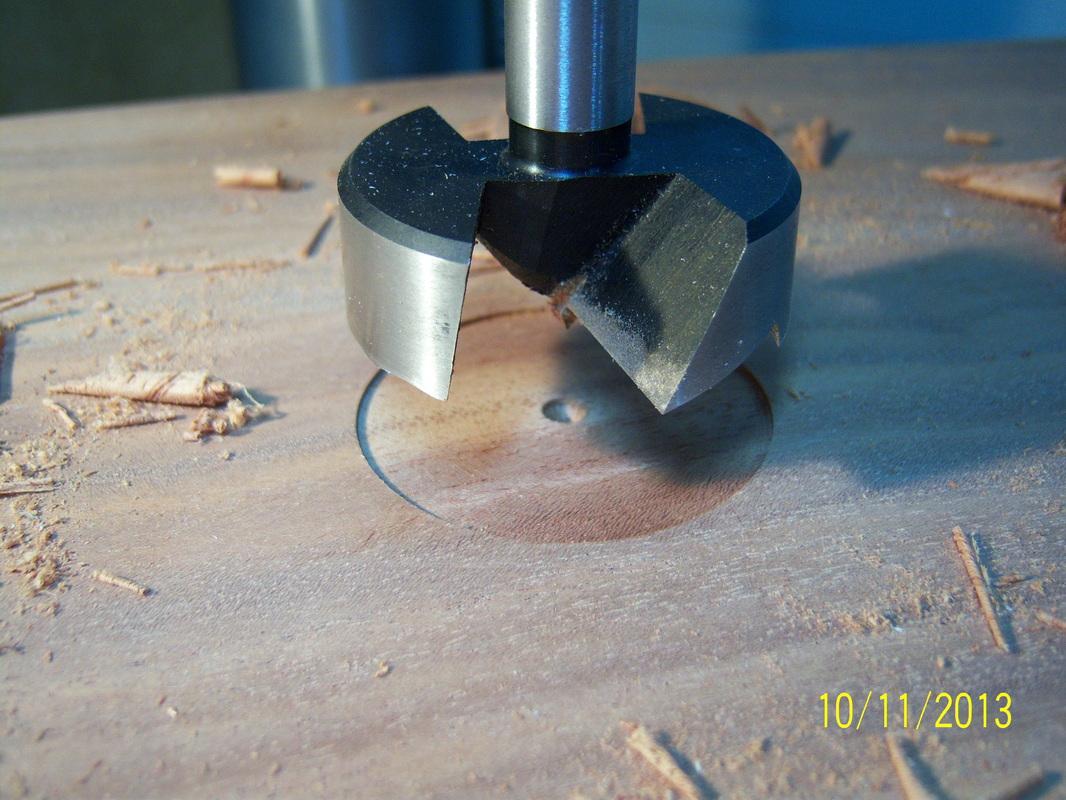
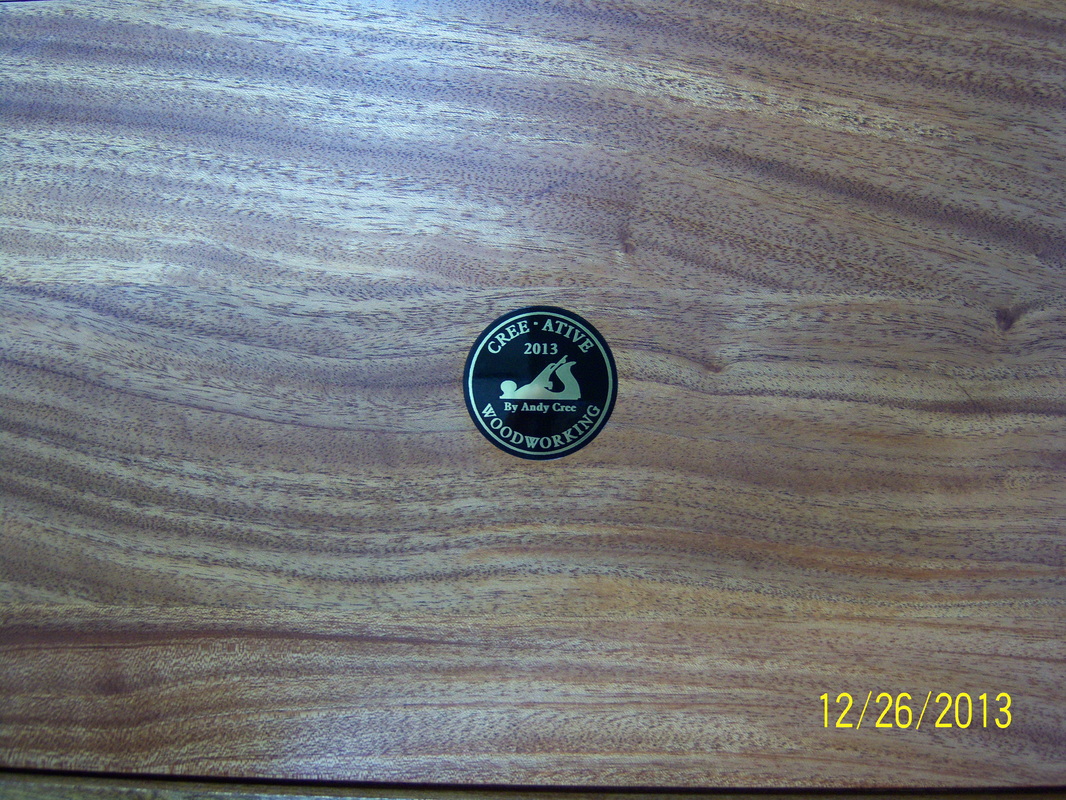
Using the drill press and a 2" forstner bit, I cut a slight recess into the back
of the panel to insert a project medallion.
of the panel to insert a project medallion.
Mahogany Saber Case
Mahogany Saber Case

The medallion is held in place using a fast set, two-part epoxy.
Mahogany Saber Case
After the glue dried the clamps were removed and some time was spent cleaning up my work area since space is a premium.
Mahogany Saber Case
After both the top and bottom joints were planed smooth, I then used both a block plane and a smoothing plane to make sure the four edges of the case were flush.
Mahogany Saber Case

Mahogany Saber Case
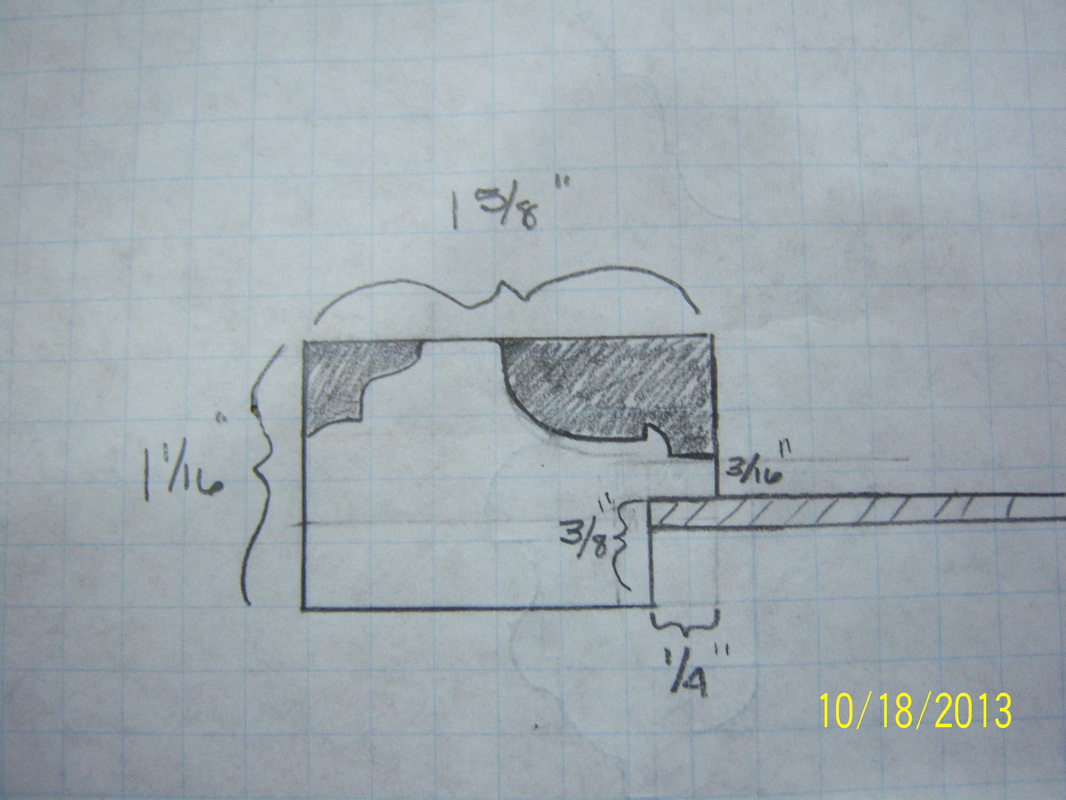
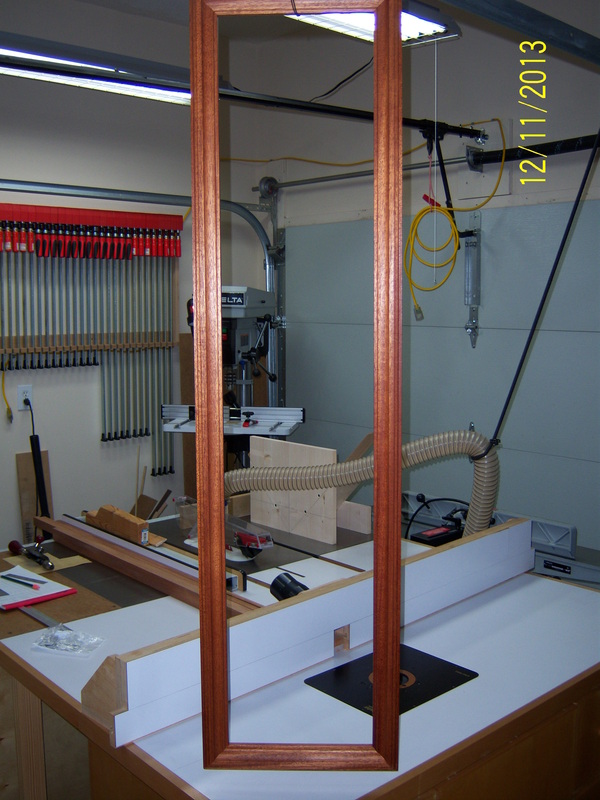
After the case was assembled, it was time to turn some attention toward creating the profile that will be on the hinged door frame that will hold a piece of 1/8" tempered glass.
I spent some time with a few different router bits and came up with a profile that I like and sketched it out to scale.
I spent some time with a few different router bits and came up with a profile that I like and sketched it out to scale.
Mahogany Saber Case
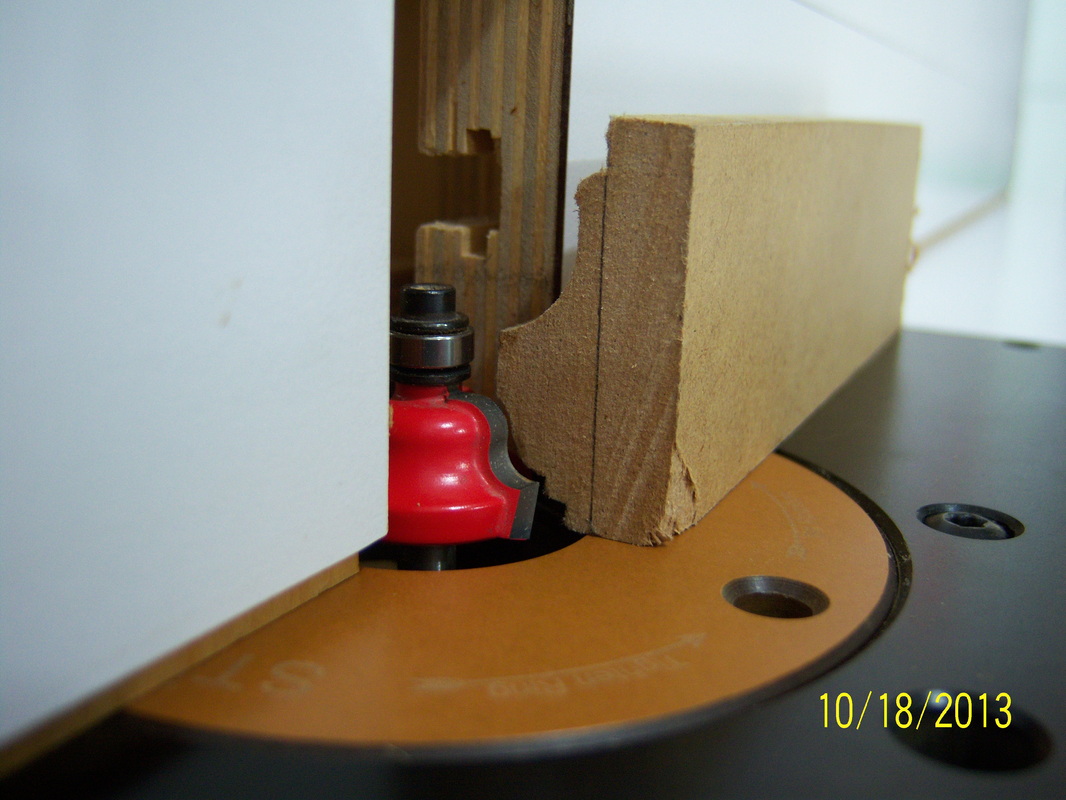
Using a scrap piece of MDF, I laid out the steps it would take to actually create the profile. Three different router bits were used: a flat dado bit, a roman ogee bit, and a cove bit.
Mahogany Saber Case
Mahogany Saber Case
I jointed and planed four different pieces of mahogany down to a thickness of 1 1/16". Just prior to the last pass through the planer, I marked all of the boards to ensure that they were flat across their entire width and were all the same thickness.
Mahogany Saber Case
After dimensioning the boards, they were cut to a few inches longer than needed.
Mahogany Saber Case

Due to being of various widths, each piece was ripped to exactly 1 5/8" wide.
Mahogany Saber Case
The already profiled test piece made set-up a lot easier to repeat.
Mahogany Saber Case
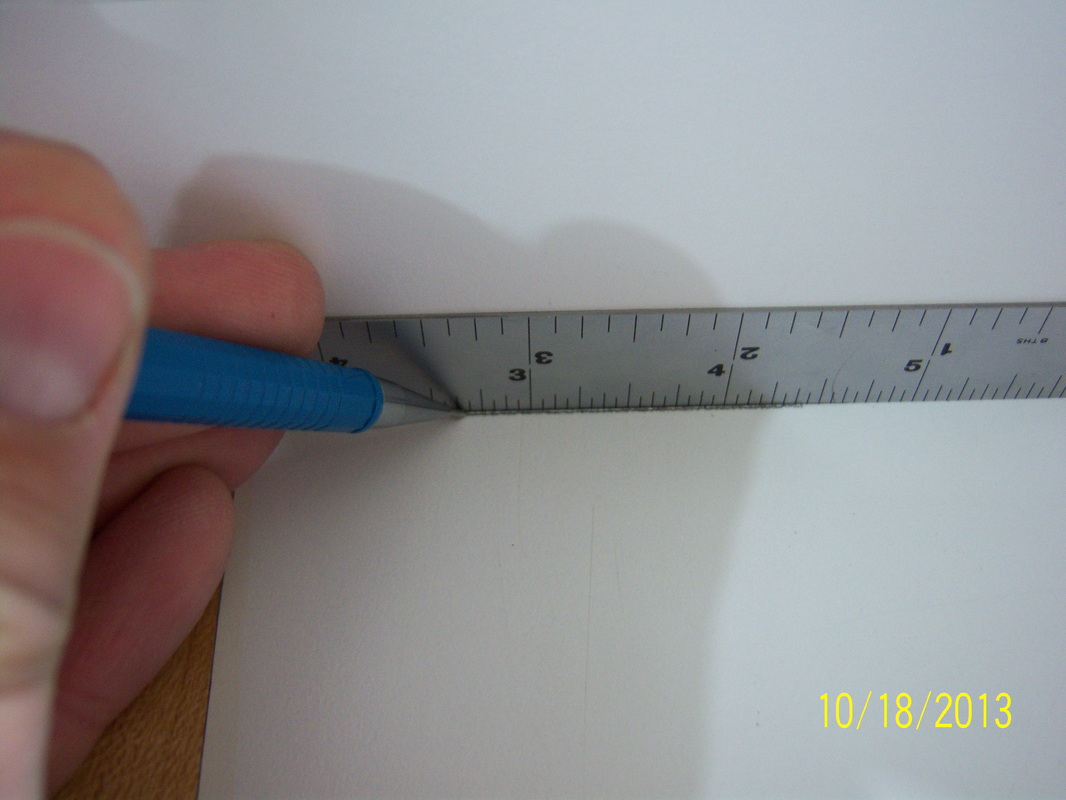
A couple of the routing cuts require the fence to be in the same position. To make resetting things easier, I drew a line on the routing table once the initial setting was determined. (The ruler was only there to cover the void created by the dust recess in the fence.)
Mahogany Saber Case

This was the first cut of the profile which was done using the dado router bit.
Mahogany Saber Case
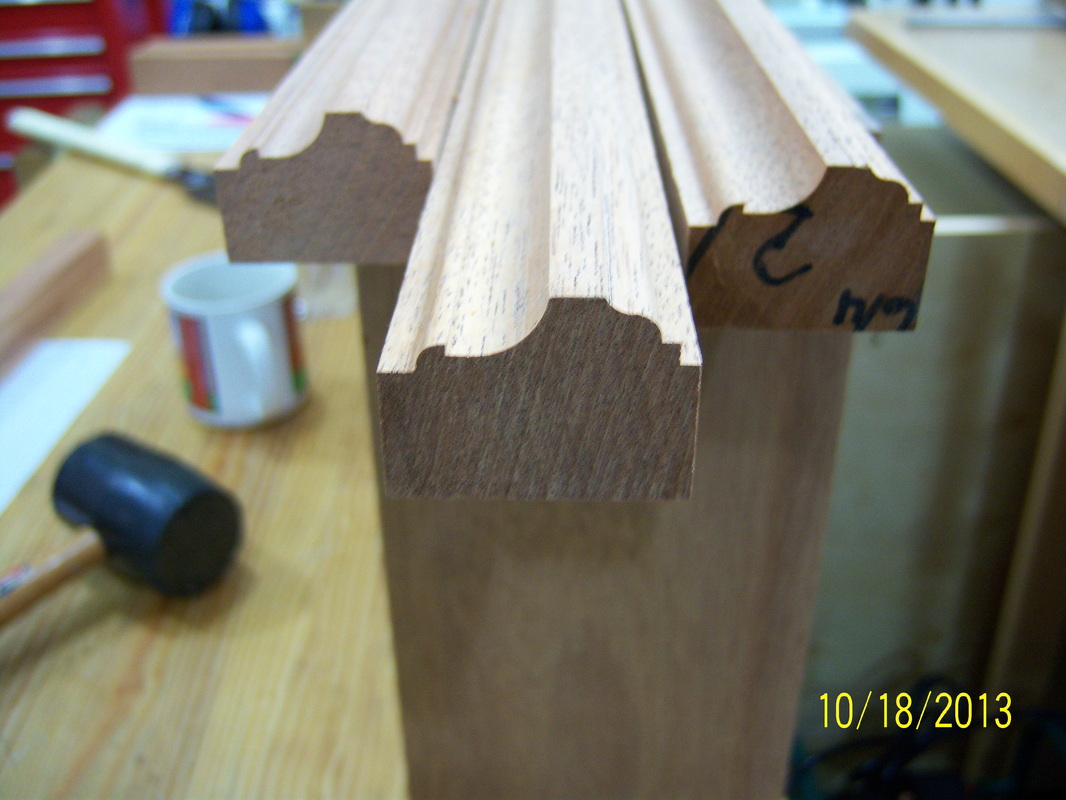
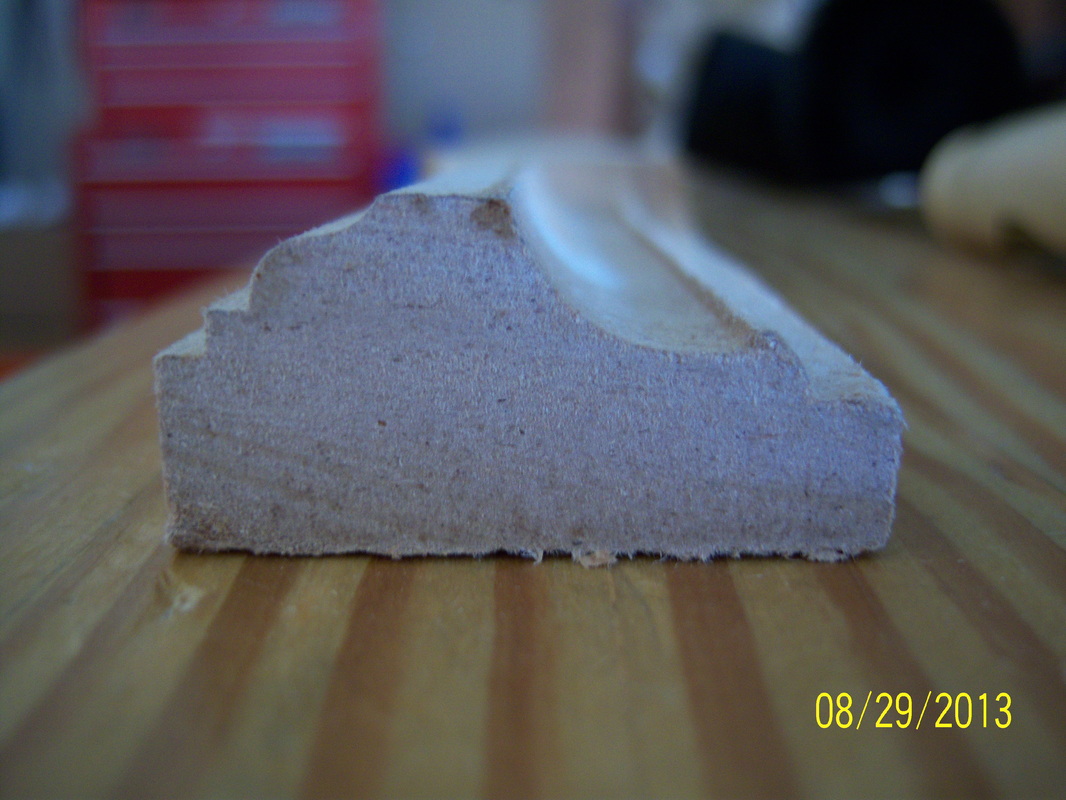
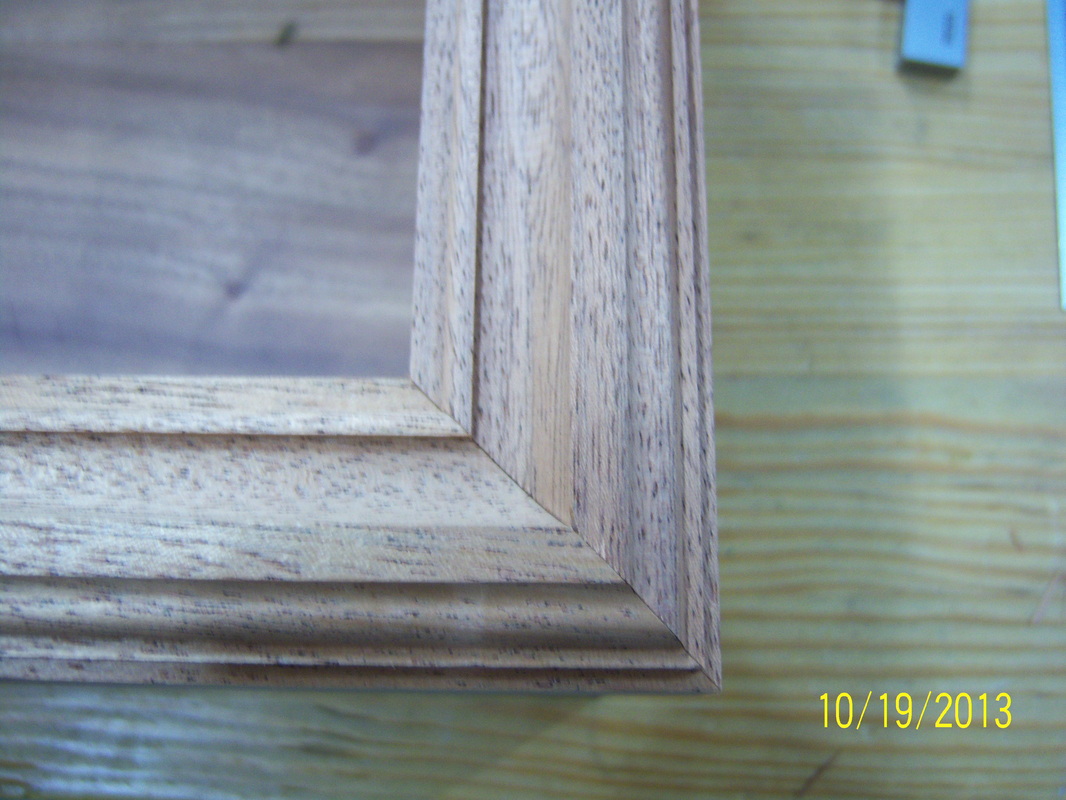
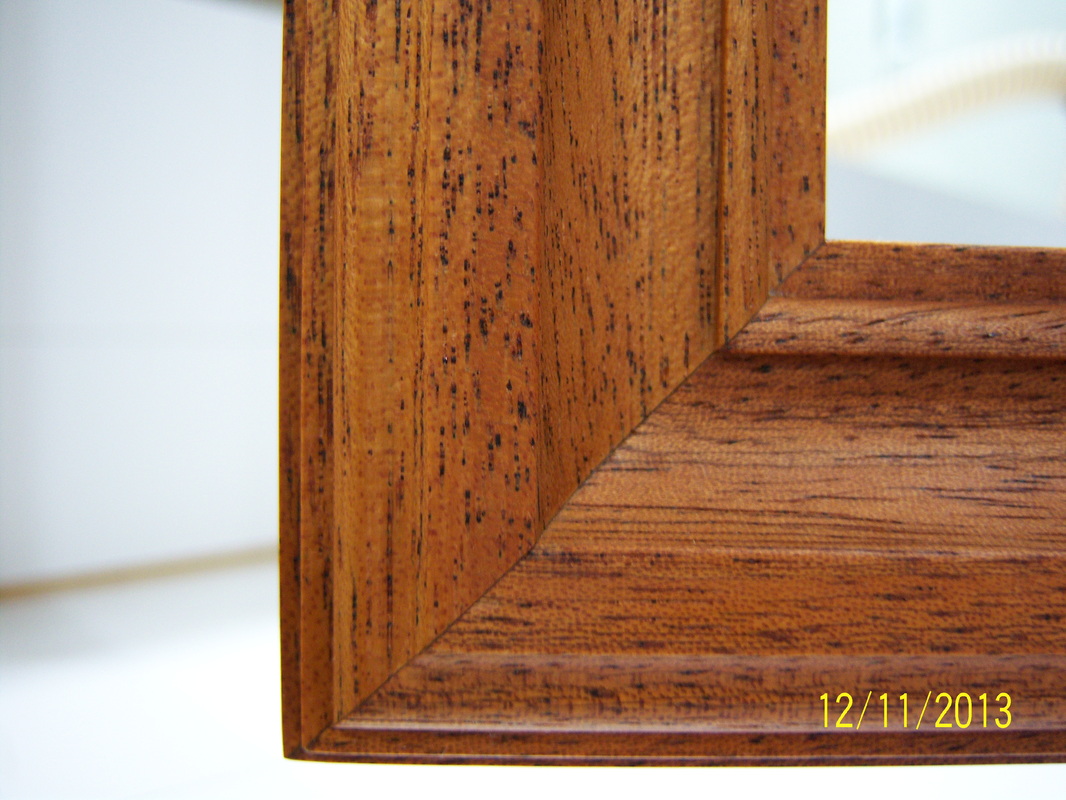
Here is the finished profile. Starting from right to left, the first notch was the dado, followed by the roman ogee, then the cove, and finished up with the bottom portion of the roman ogee bit. After the first two cuts were done, the board was flipped over for the remaining two cuts.
Mahogany Saber Case
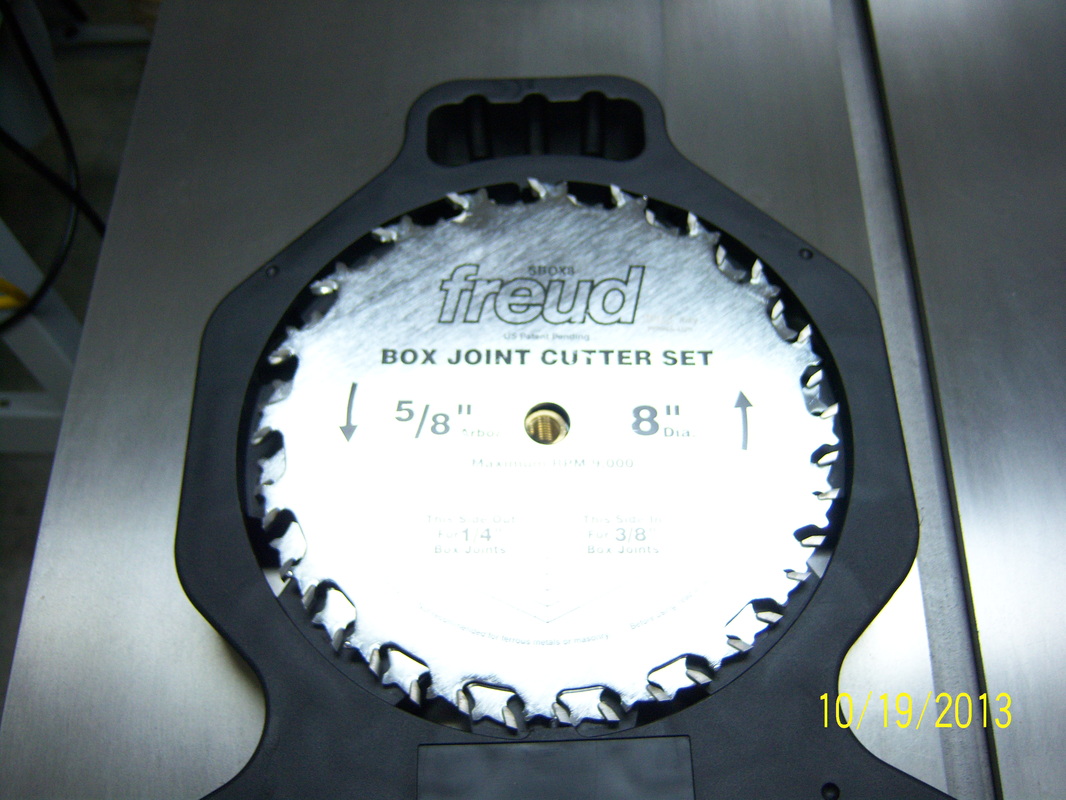
I needed to make a 1/4" wide by 3/8" tall rabbet to hold the glass in the case door, so I used a Freud "Box Joint" blade set. Set-up was as easy as installing both blades together.
Mahogany Saber Case
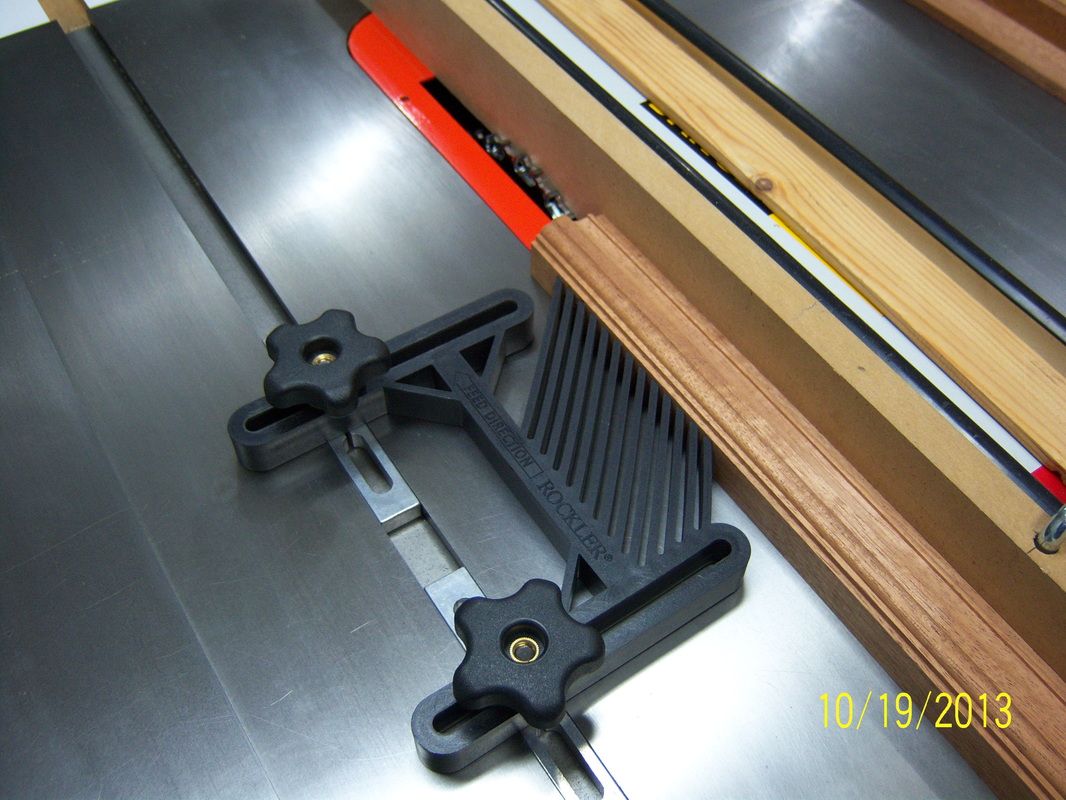
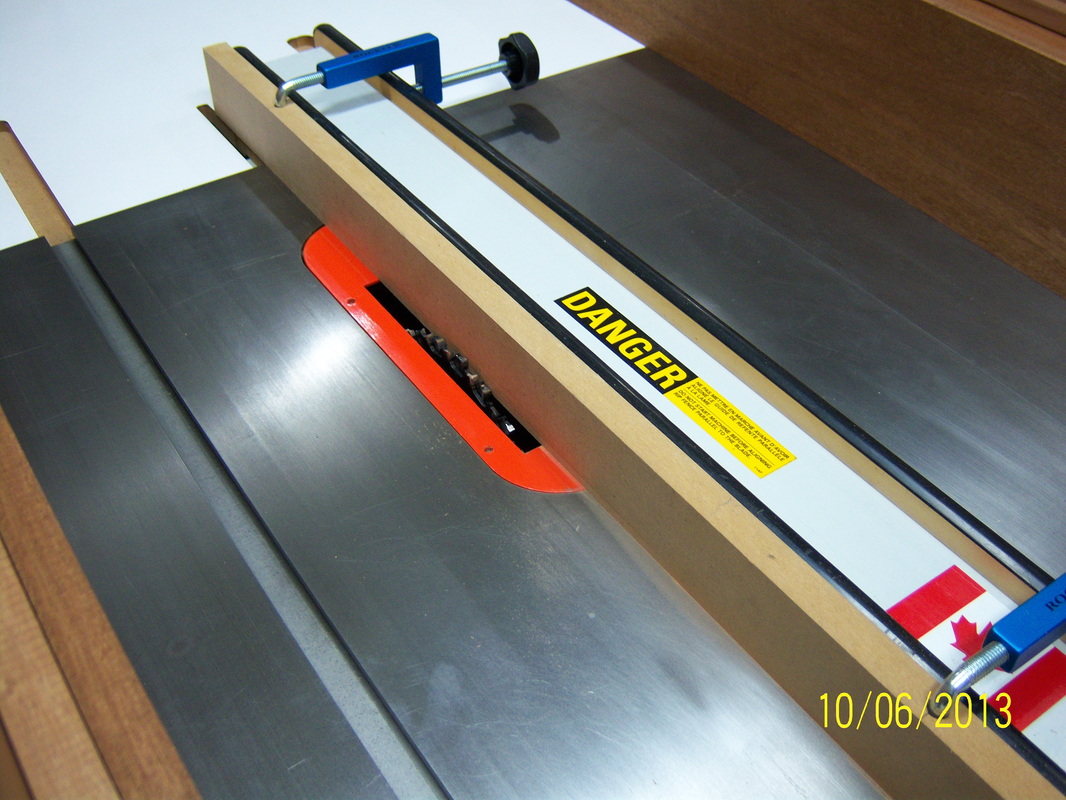
After installing the blade set, I used a sacrificial board in conjunction with my saw's rip fence to set the width of the cut. Since the blade set is already 1/4" in width, all I needed to do was to set the fence close to the blade. I also used a feather board to make sure the stock stayed tight against the fence.
Mahogany Saber Case

Mahogany Saber Case
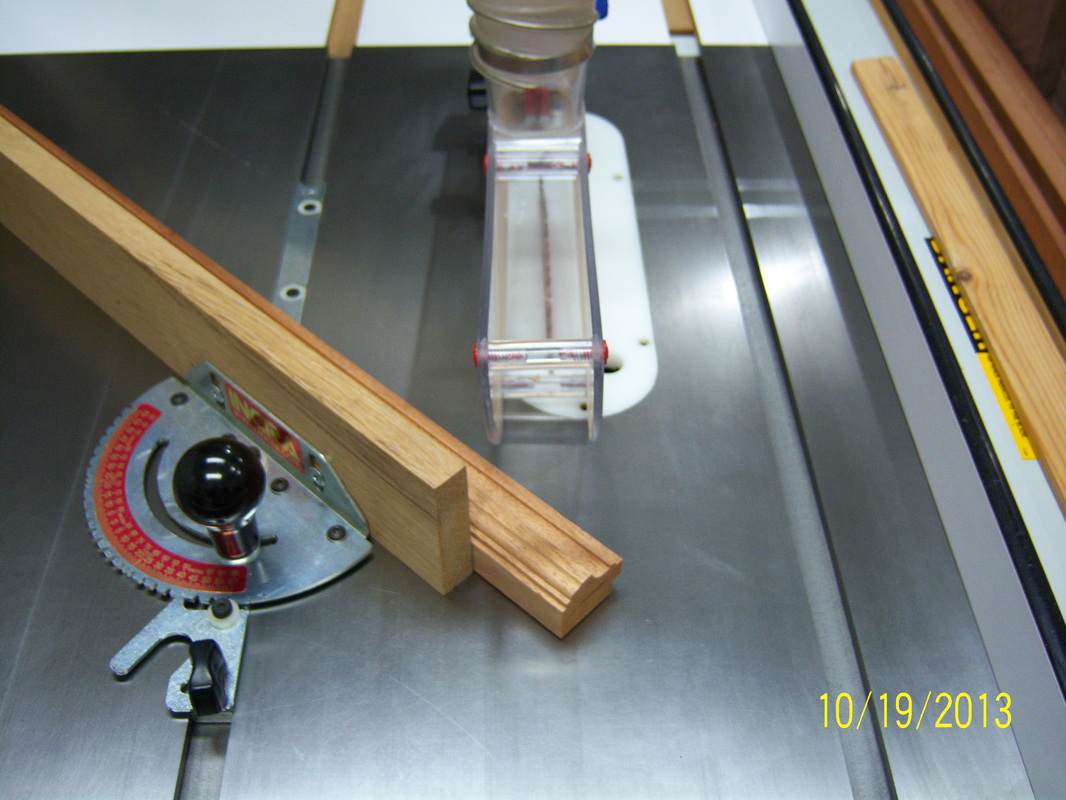
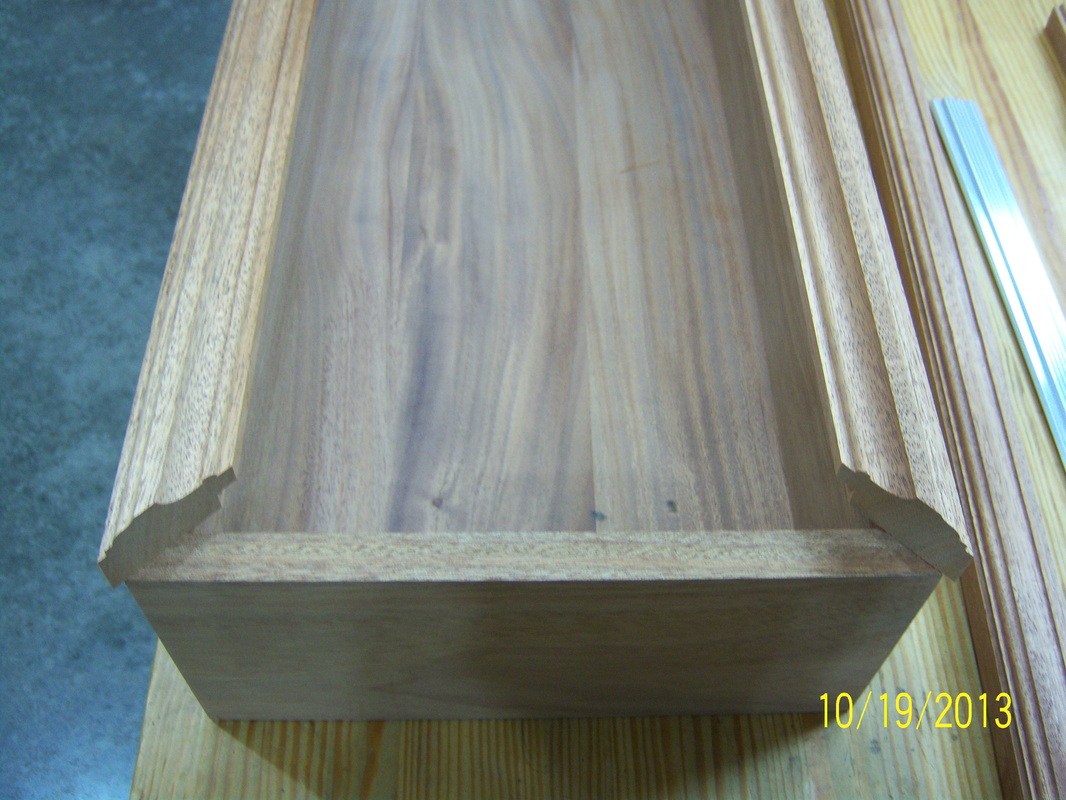
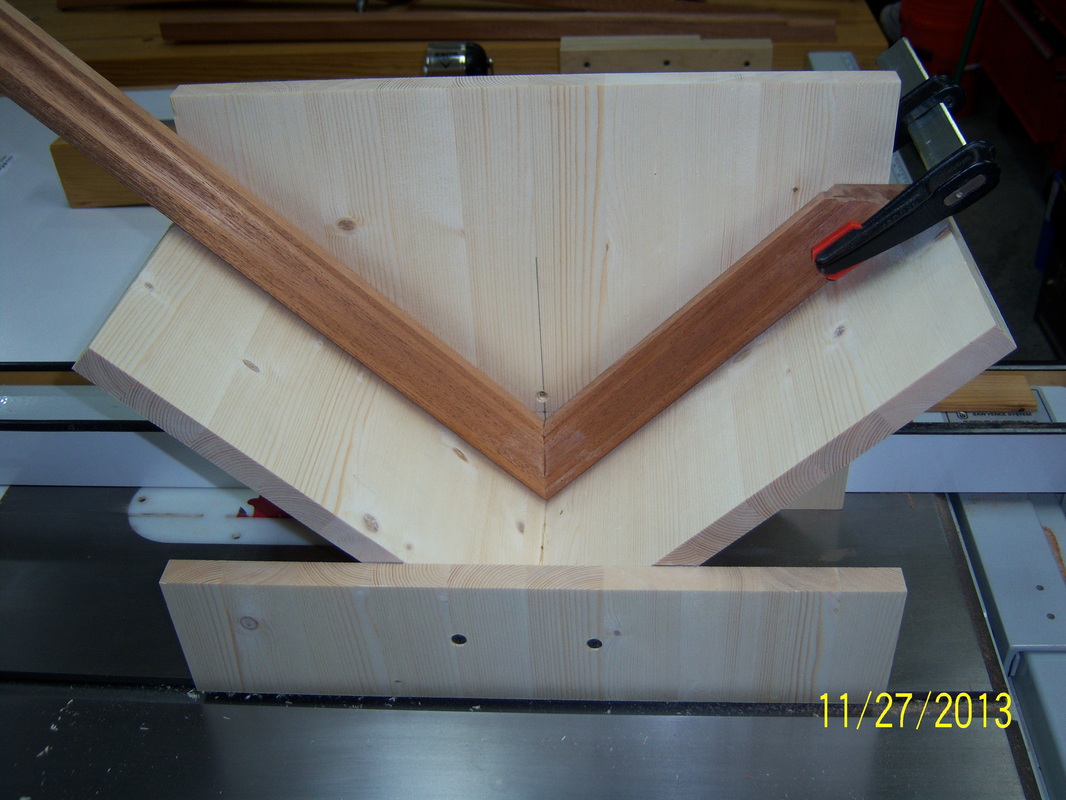
After all of the rabbets were cut, I began to cut the miters.
Mahogany Saber Case
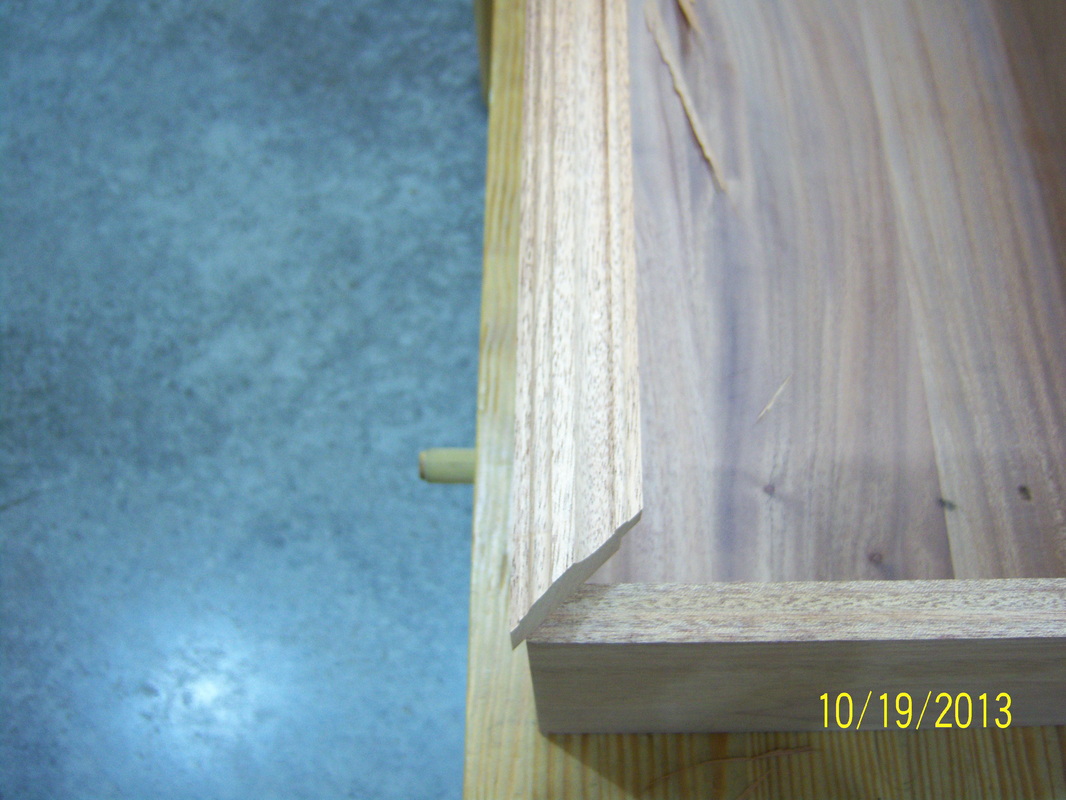
I planned the dimensions of the case door to have a 1/8" reveal all the way around. Not only does this look nice, it also takes the frustration out of trying to perfectly match the edge of the door to the case.
Mahogany Saber Case
Mahogany Saber Case
Mahogany Saber Case
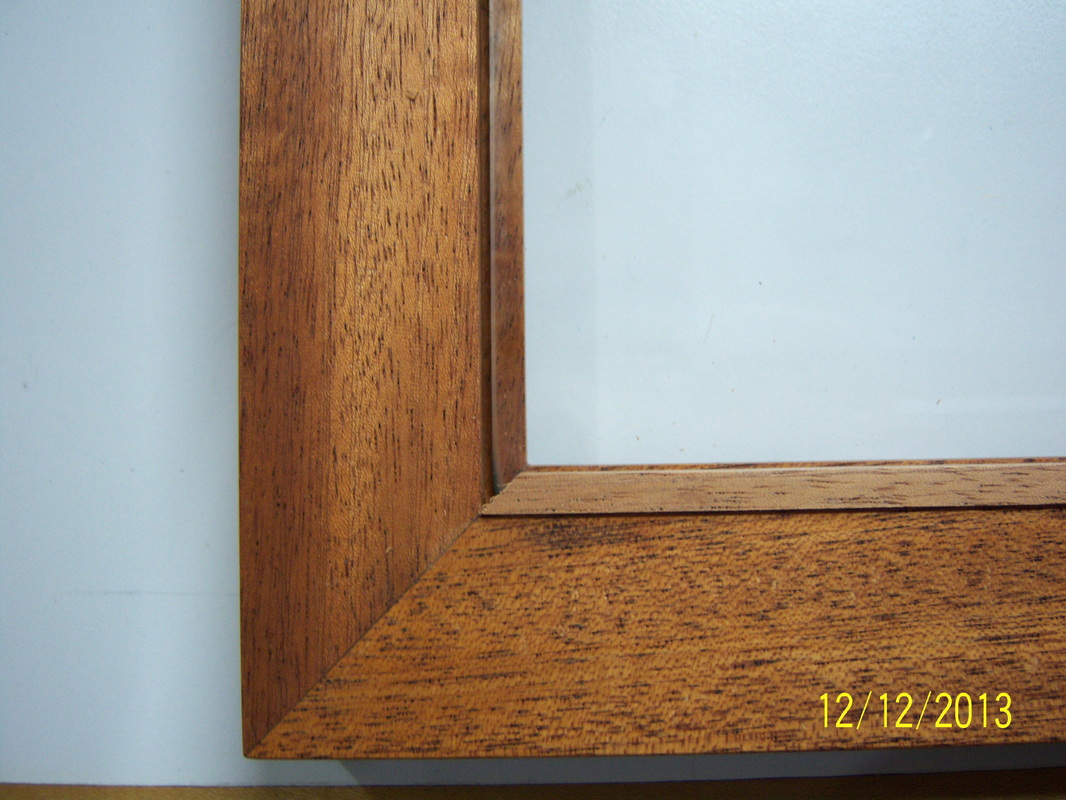
The miters turned out pretty well are just being test fitted at this point. - no glue yet.
Mahogany Saber Case
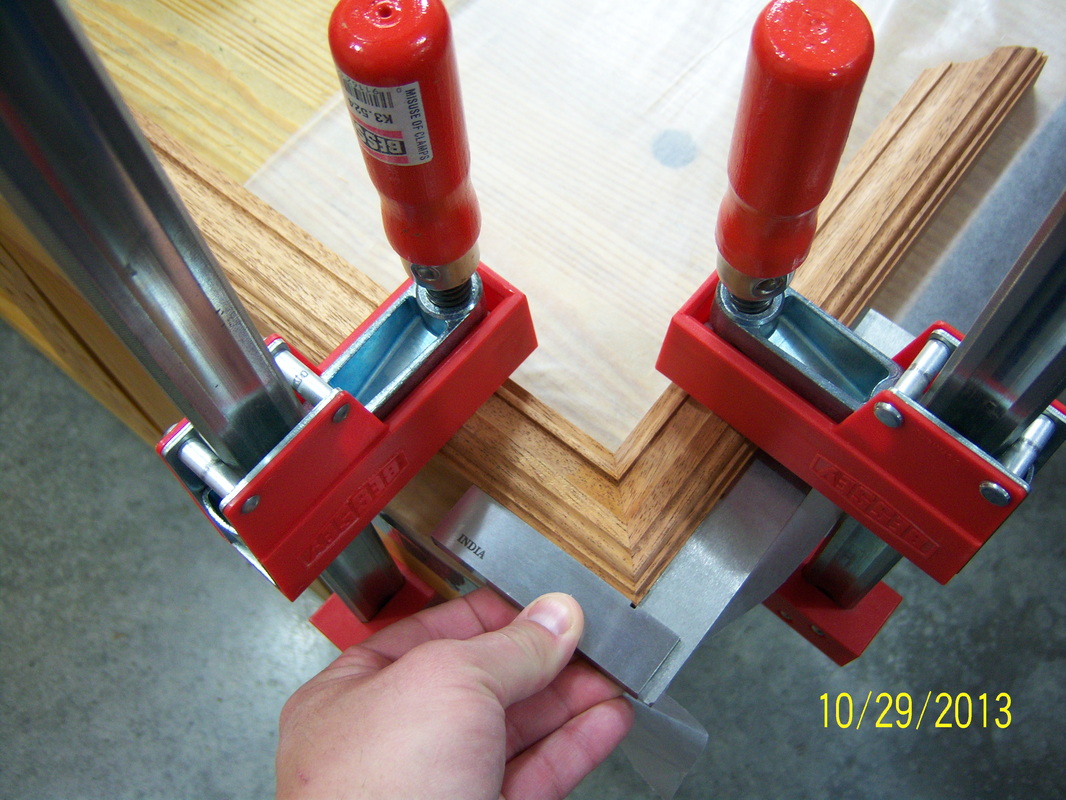
I applied glue to the two mating pieces and clamped them to the work bench. Once the clamps were in place, I made sure the pieces were still square.
Mahogany Saber Case
To reinforce the miter joints, I cut slots into the end of the door frame so splines could be added.
Mahogany Saber Case
Mahogany Saber Case

Due to the depth of the cut, I needed to make splines that were at least an inch thick.
Mahogany Saber Case
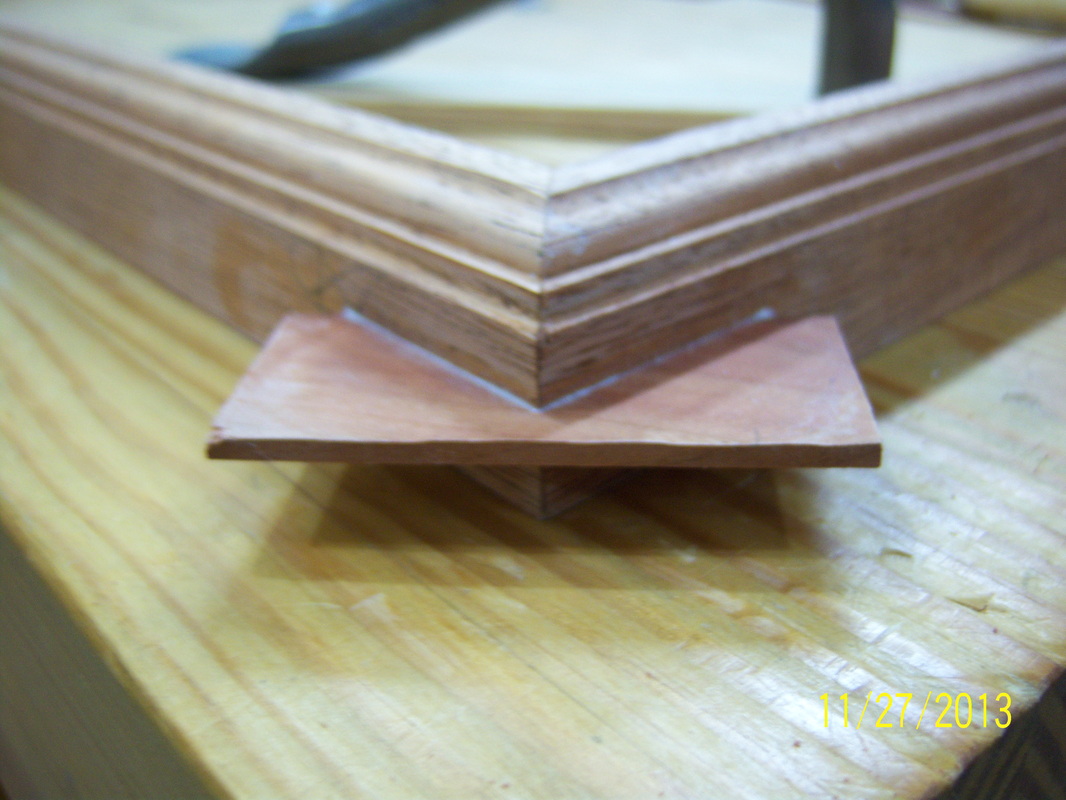
After a few test cuts, I finally dialed in the proper thickness of the spline. Glue was applied to both the cut and the spline. A few light taps with a mallet bottomed-out the spline.
Mahogany Saber Case
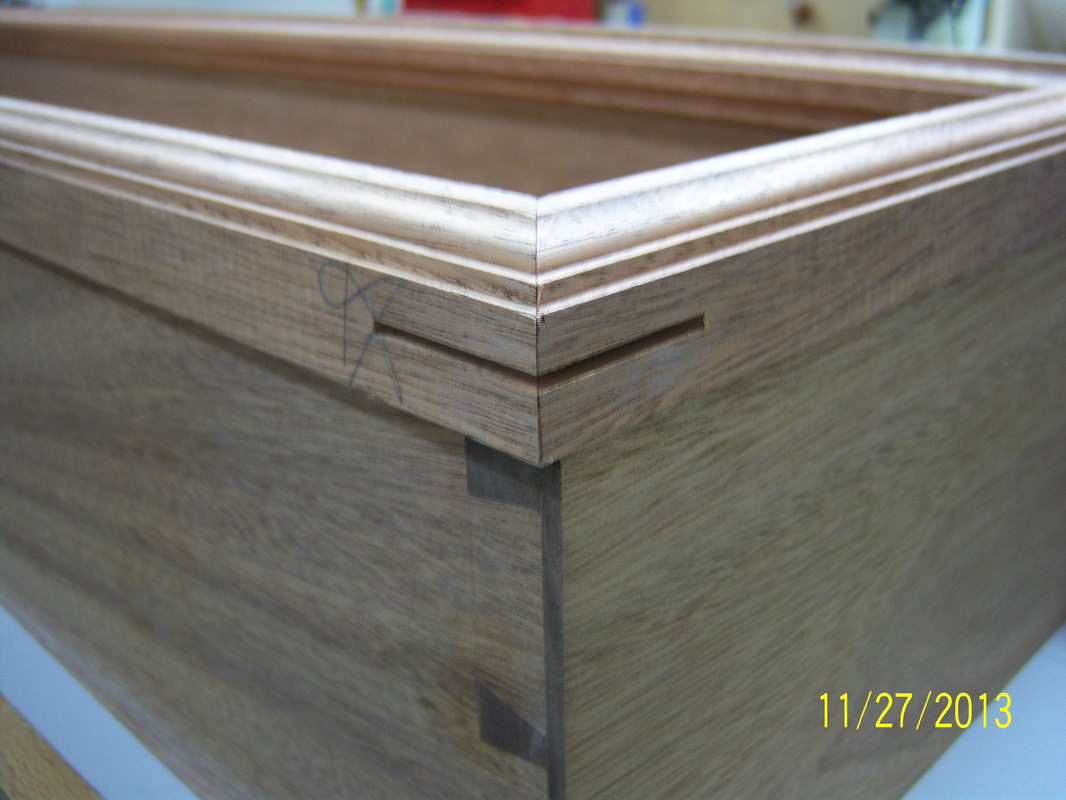
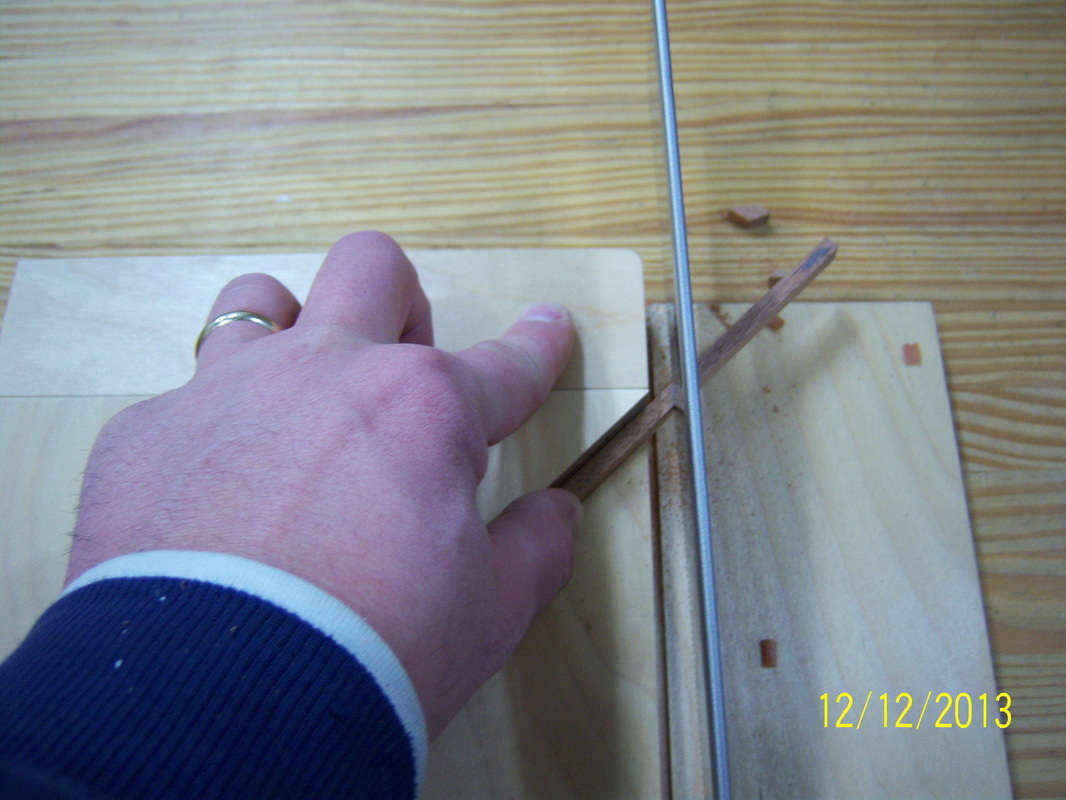
The bulk of the splines were removed with a flush cut saw.
Mahogany Saber Case
The remaining portion of the splines were planed flush using a block plane.
Mahogany Saber Case
Mahogany Saber Case
After all of the splines were leveled, I used a block plane to remove some of the tool marks that were still present along the edge of the frame. The ends of the frame were planed while the frame was lying flat on the bench.
Mahogany Saber Case
The long edges of the frame where planed while the frame was held upright utilizing the leg vice, deadman, and an extra clamp.
Mahogany Saber Case
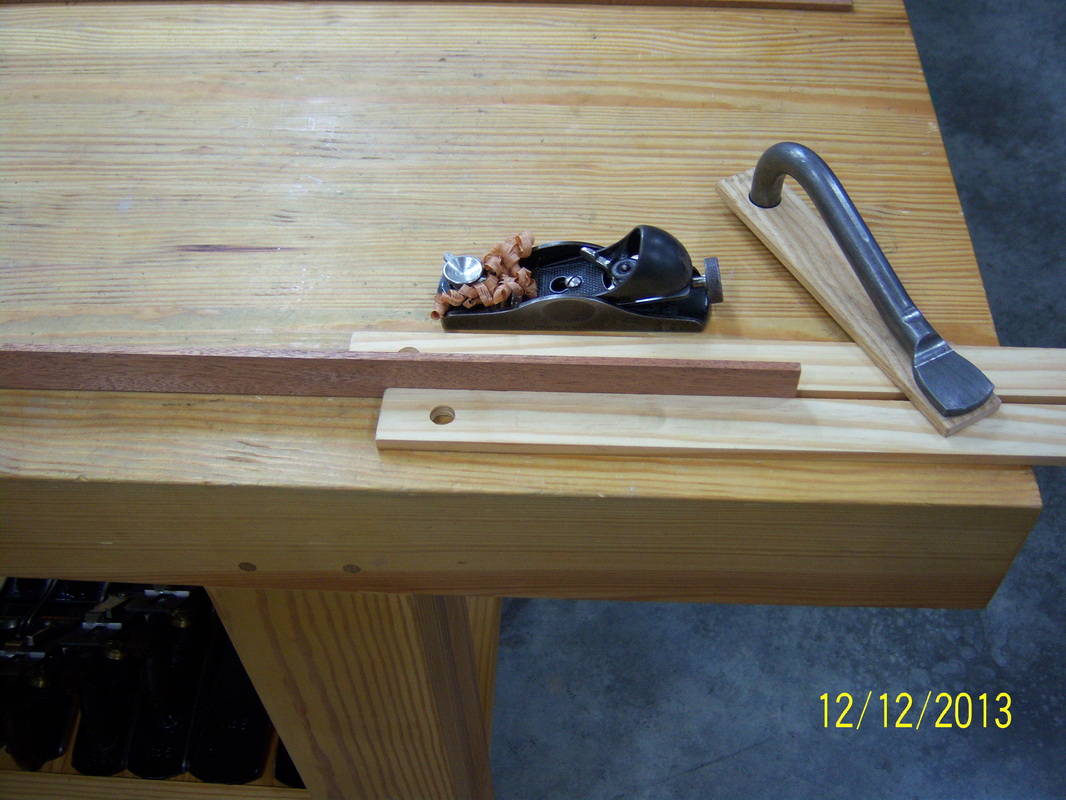
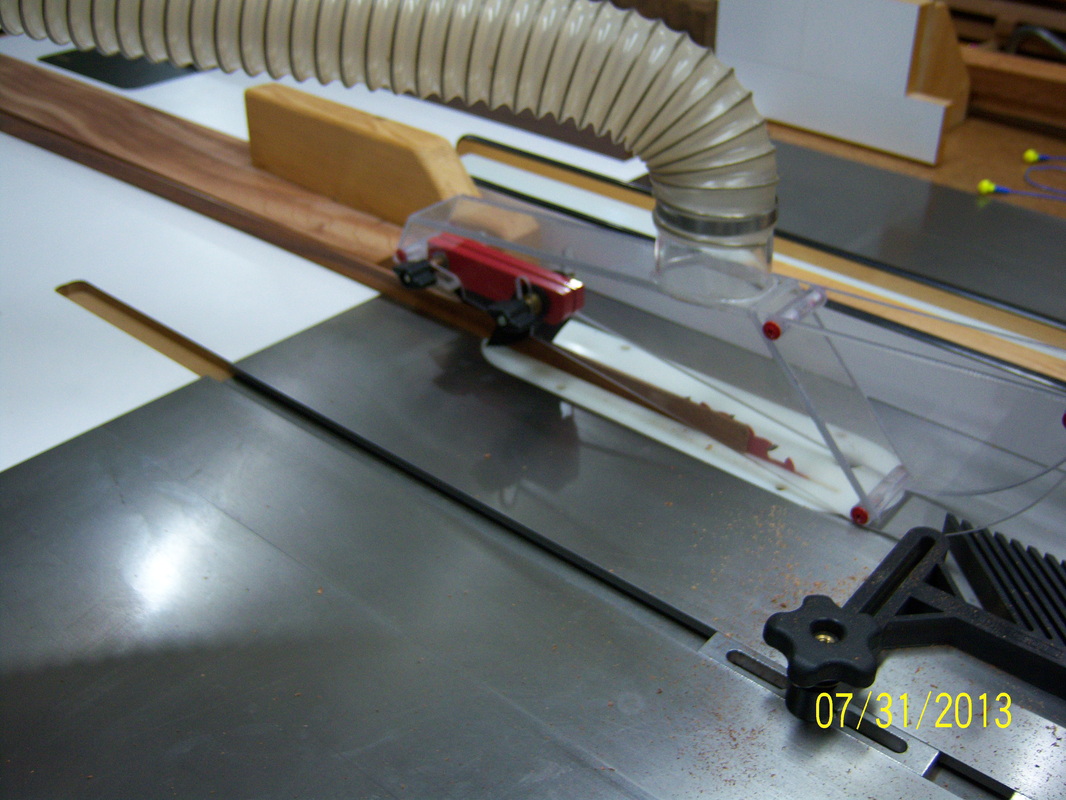
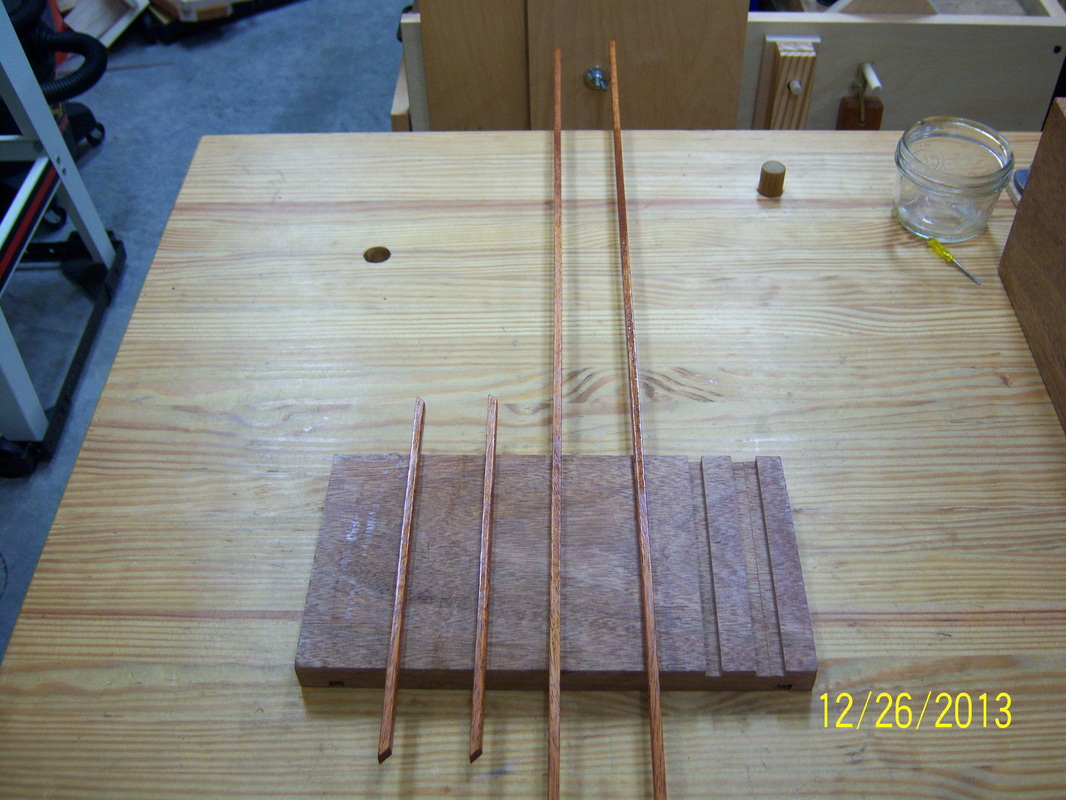
I am using a small strips of wood to hold the glass into place within the door. I ran a piece of mahogany through the thickness planer until it was 1/8" thick. I then planed one edge smooth prior to heading to the table saw.
Mahogany Saber Case
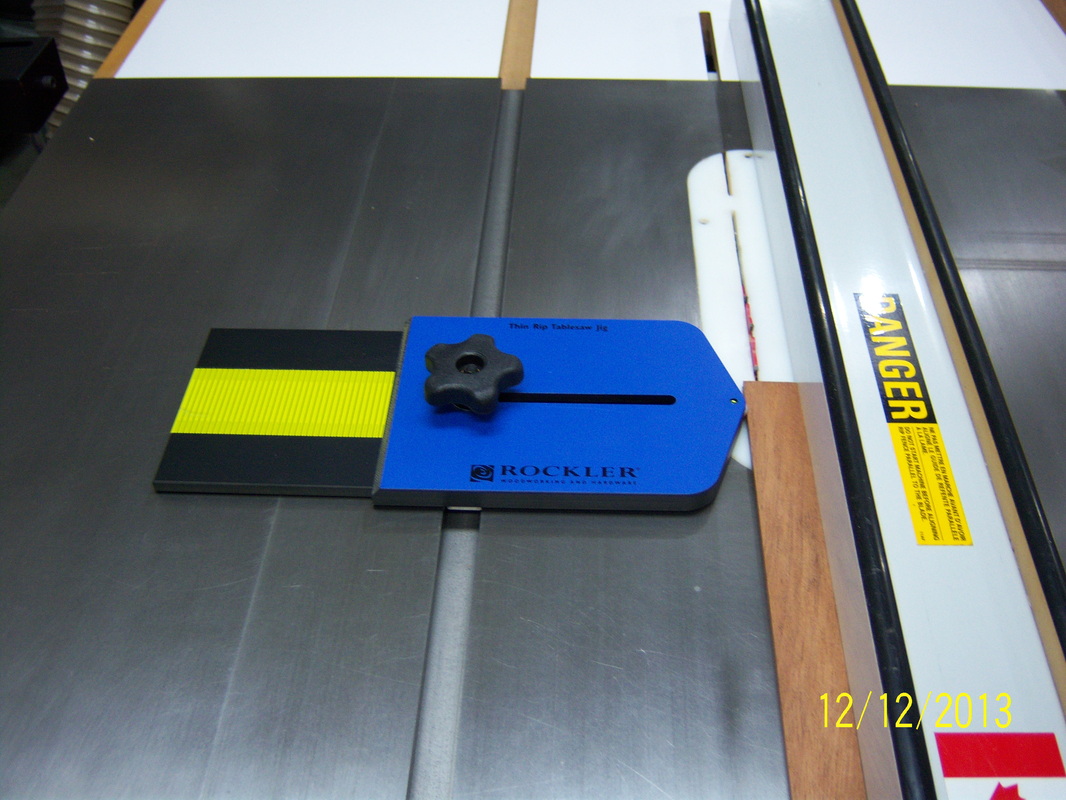
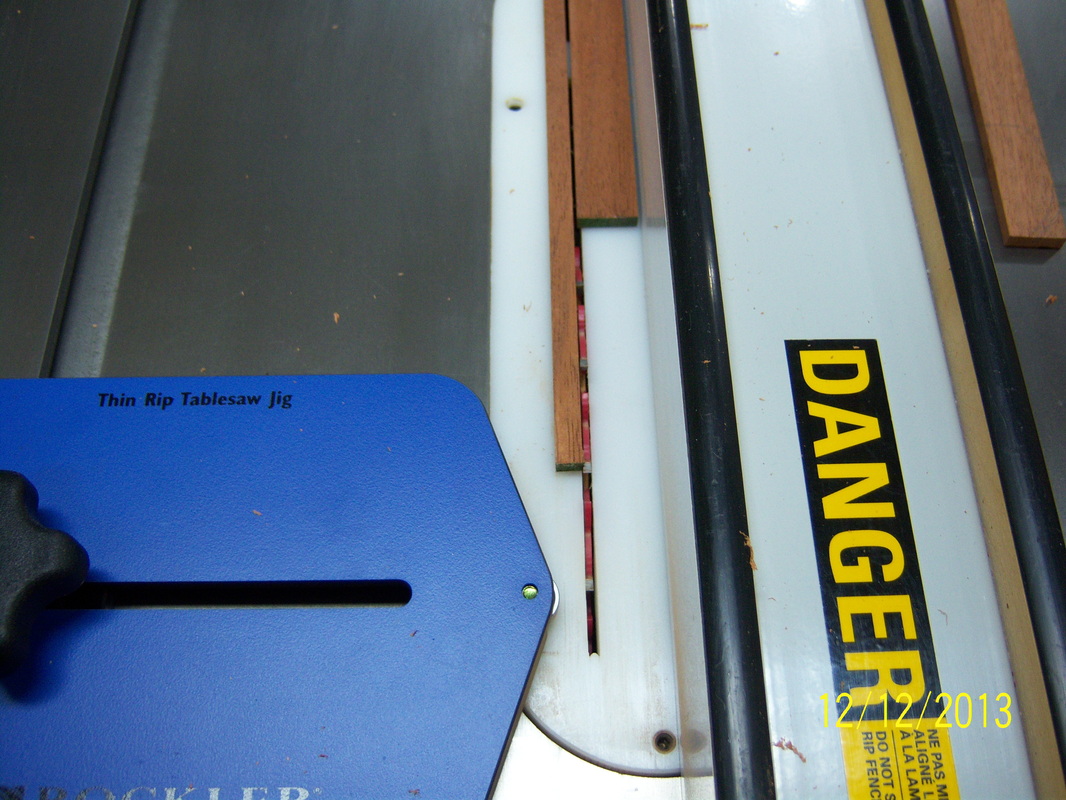
This Rockler thin strip jig works great and is inexpensive. The point that contacts the wood contains a bearing that allows the wood to pass smoothly, but maintains its position.
Mahogany Saber Case
Mahogany Saber Case
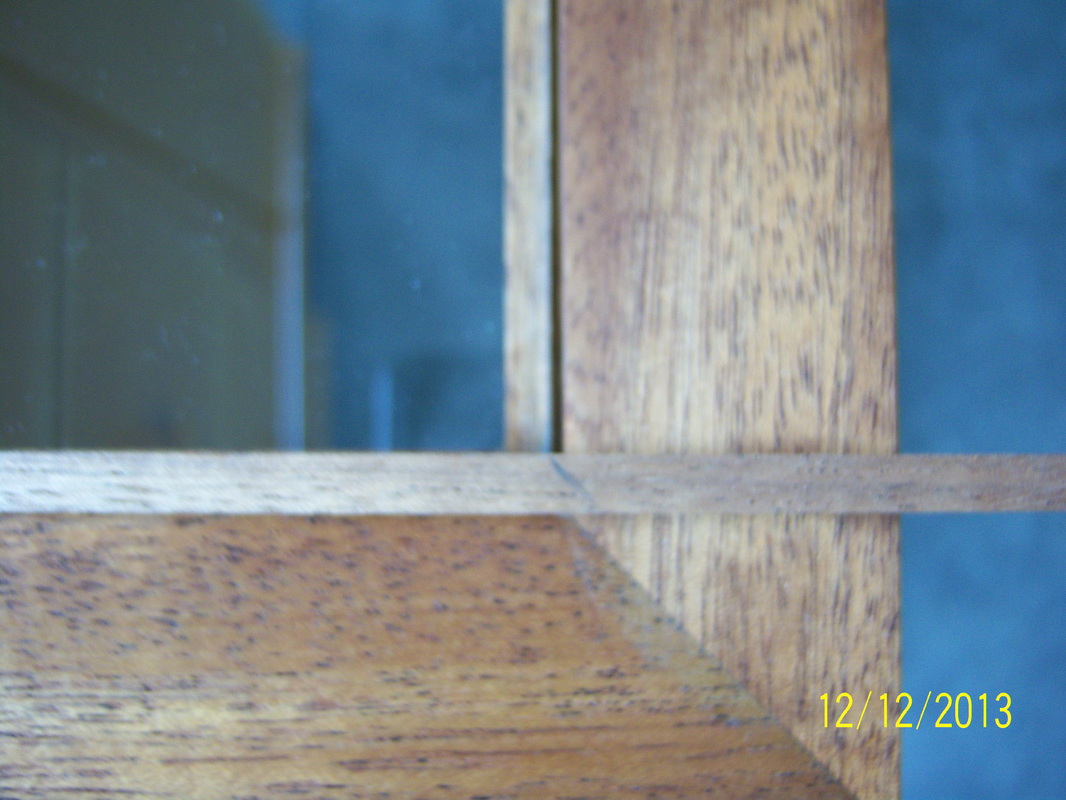
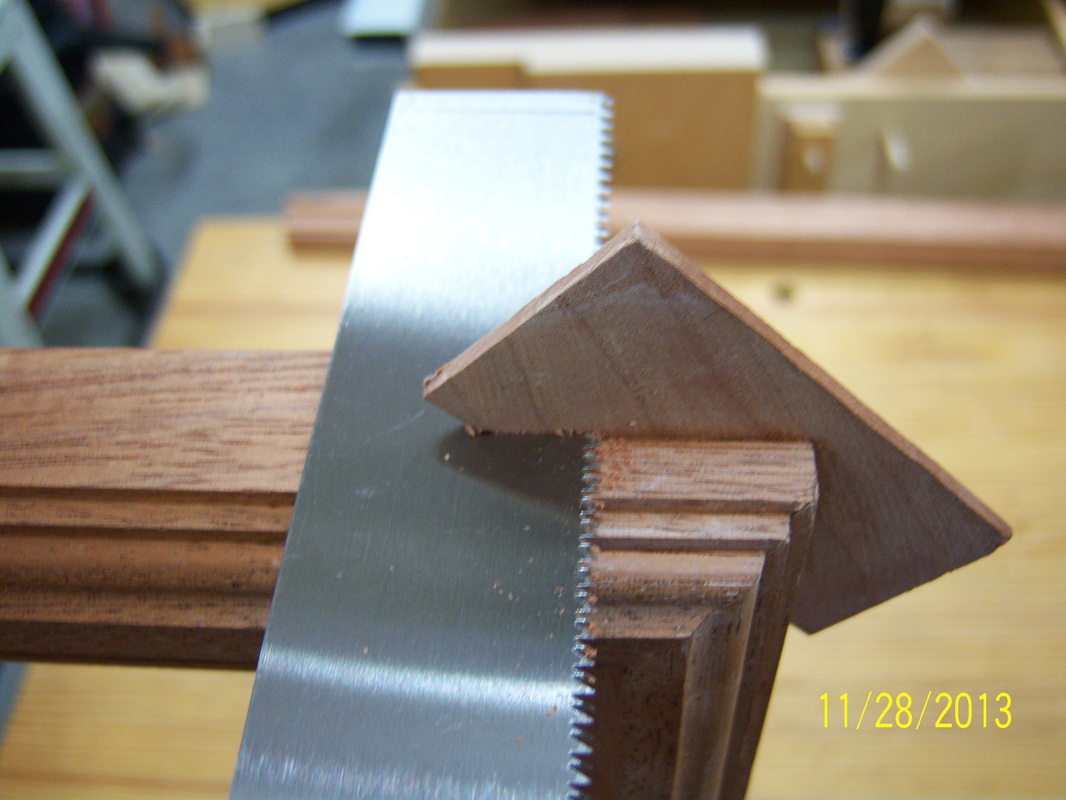
I marked the mitered ends just proud of where they needed to be so that I could clean them up on the shooting board.
Mahogany Saber Case
I used the shooting board to help hold the thin pieces while they were cut to rough length. After they were cut to length, I snuck up on the final line using a plane on the shooting board.
Mahogany Saber Case
With the glass in place, I cut one of the longer pieces to size.
Mahogany Saber Case

I then used that piece to judge where the next pieces needed to be mitered. All four pieces were completed and will later be tacked in place with brass escutcheons.
Mahogany Saber Case
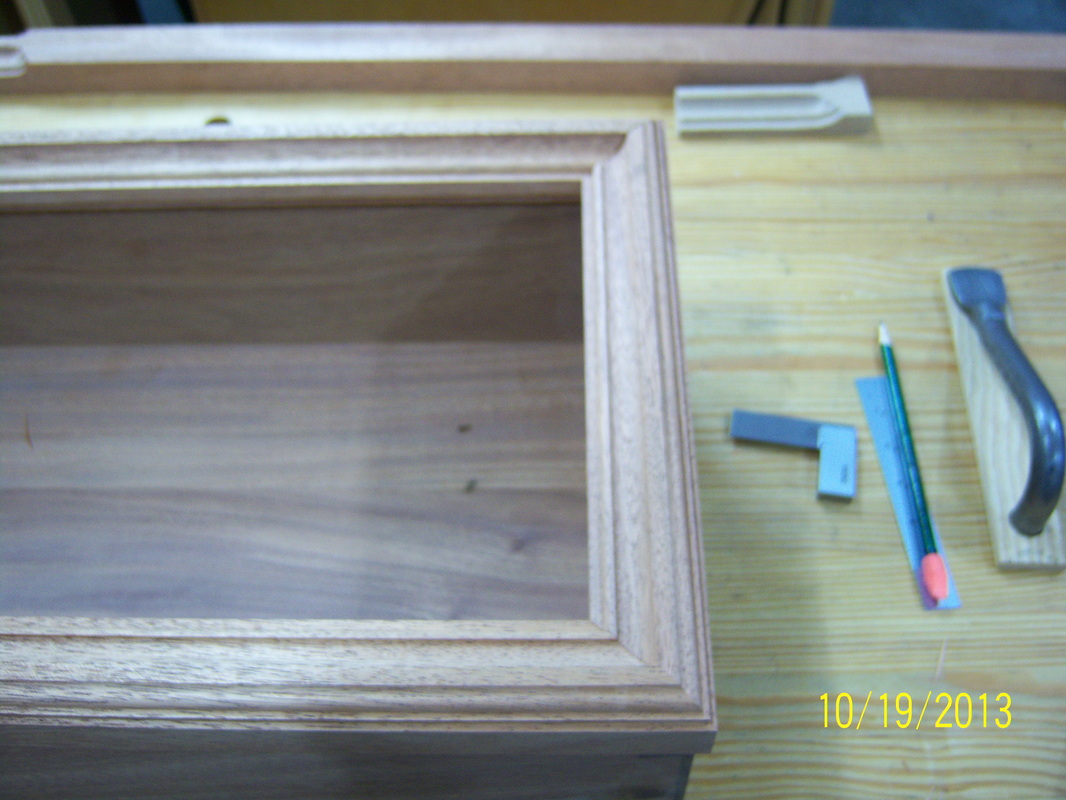
With the glass not installed, the door frame was positioned on top of the case. After confirming a 1/8" reveal, the door was clamped into place.
Mahogany Saber Case
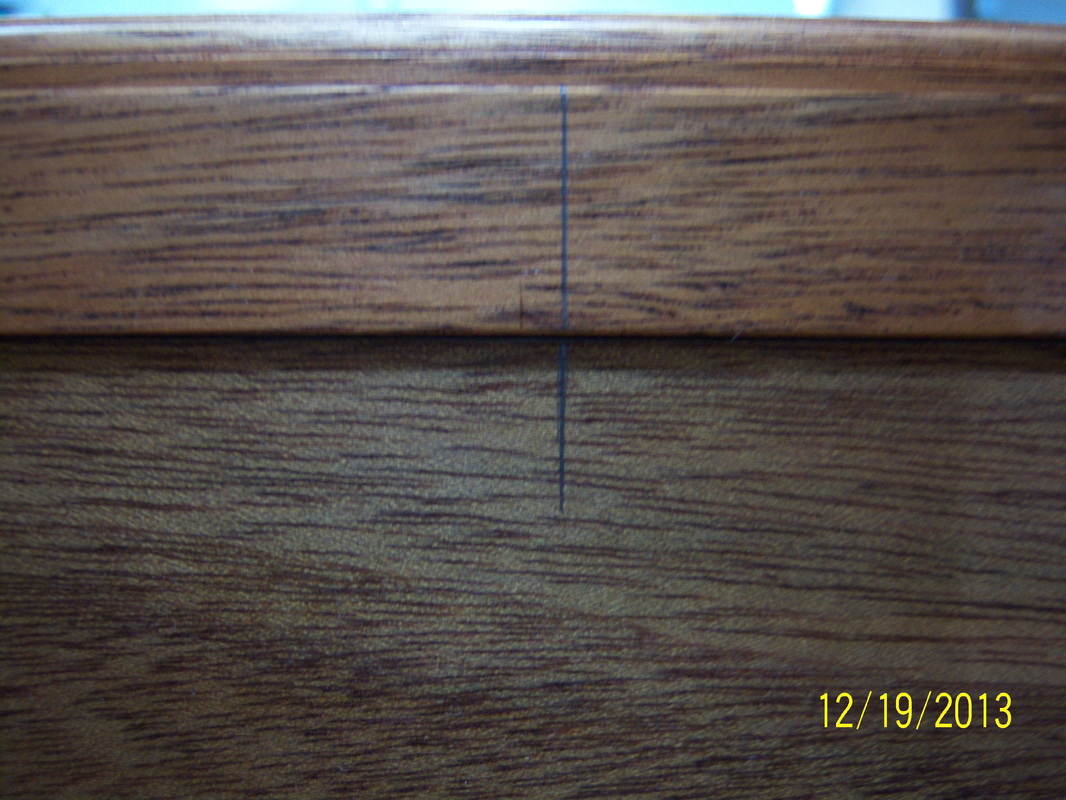
After determining where I wanted the hinges to be installed, I transferred a line from the case to the door. Both lines were then carried across the two mating surfaces.
Mahogany Saber Case
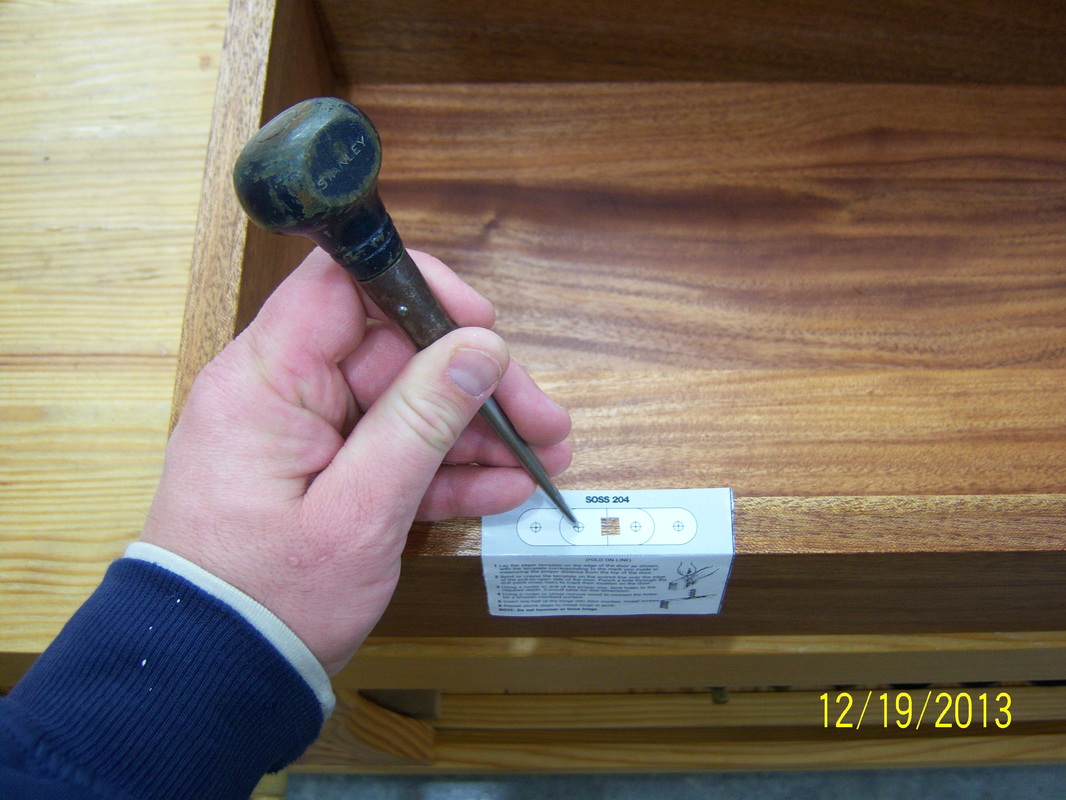
Using the template provided with the SOSS brand hinges, I transferred the marks from the template to the case using a sharp awl.
Mahogany Saber Case

To make positioning the template a little easier, I drew a line across the center point of the template. Using a sharp chisel, I cut out a window in the template so that I could see the center mark on the edge of the case.
Mahogany Saber Case
Since the SOSS hinges need to be inset 1/8" from the edge of the case, I used a marking gauge to cut a straight edge on both the inside and outside of the hinge position. This was done to keep the edge of the recess sharp when the waste was removed.
Mahogany Saber Case
I was careful not to run the marking gauge all of the way to the end of the hinge position due to the hinge being rounded on the ends.
Mahogany Saber Case
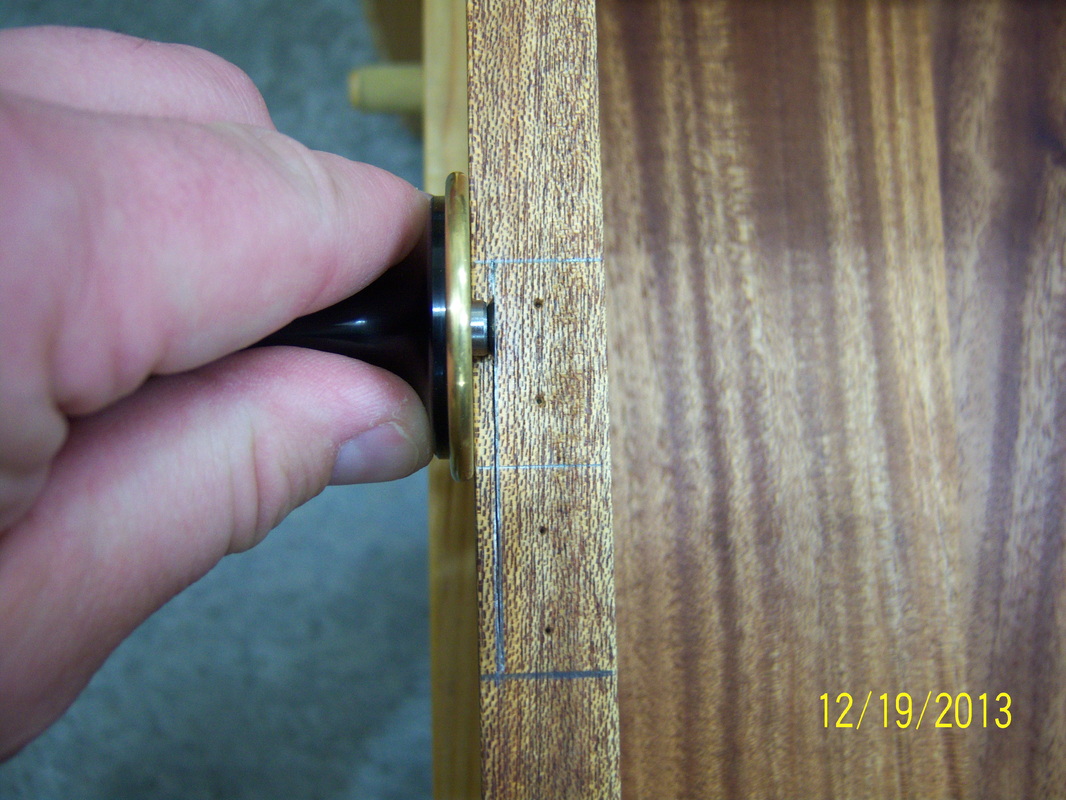
Though it is a bit hard to tell, the dark color on the cutting end of the 1/2" forstner bit was made with a marker to set the 1/4" drilling depth for the outer template marks.
Mahogany Saber Case
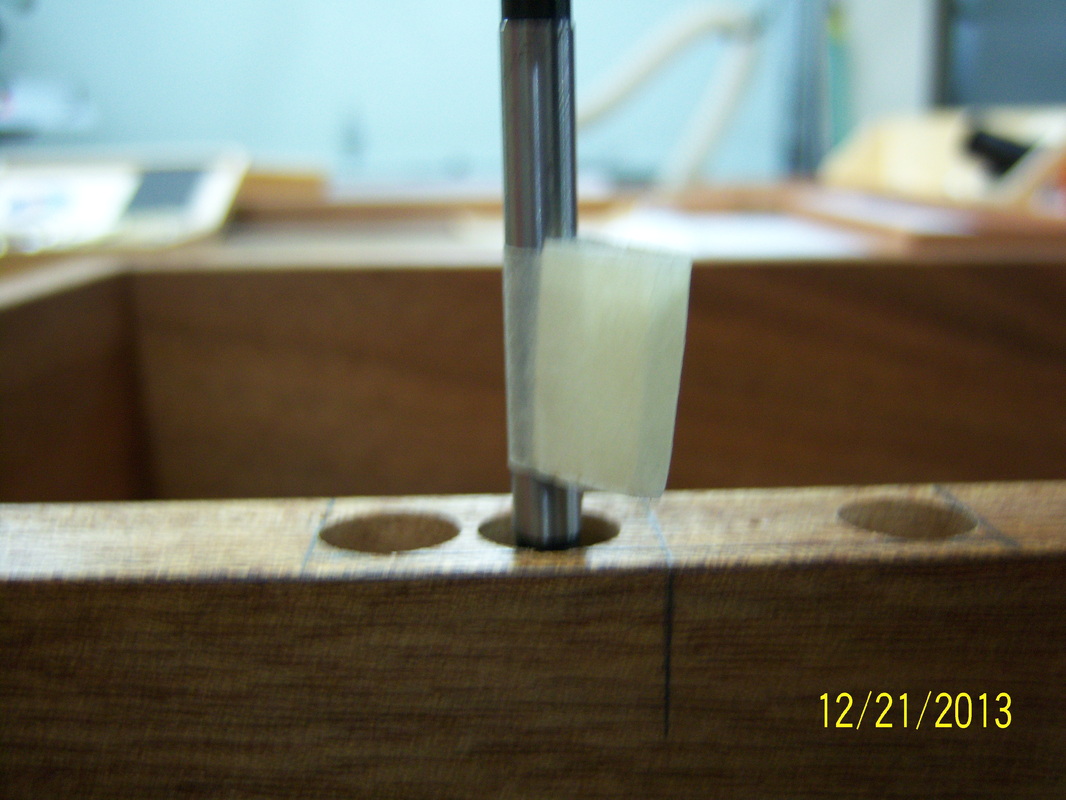
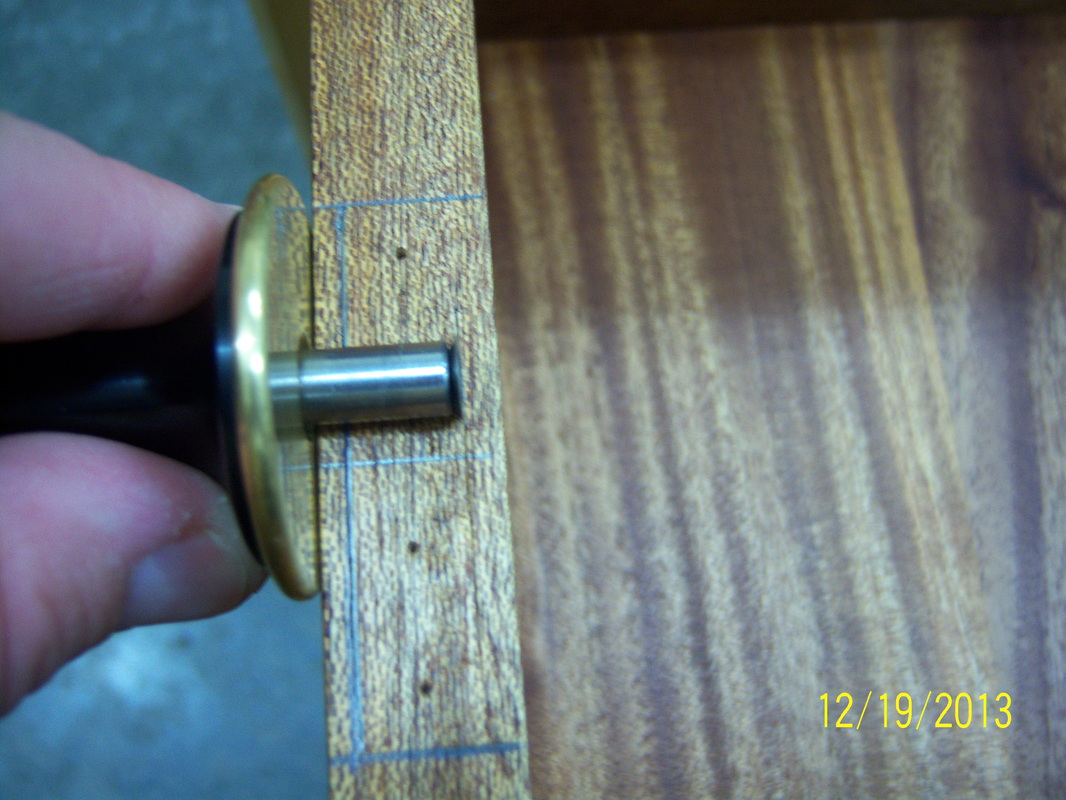
The inner template markes get drilled to a depth of 3/4". I used a piece of tape to set that depth on the bit.
Mahogany Saber Case
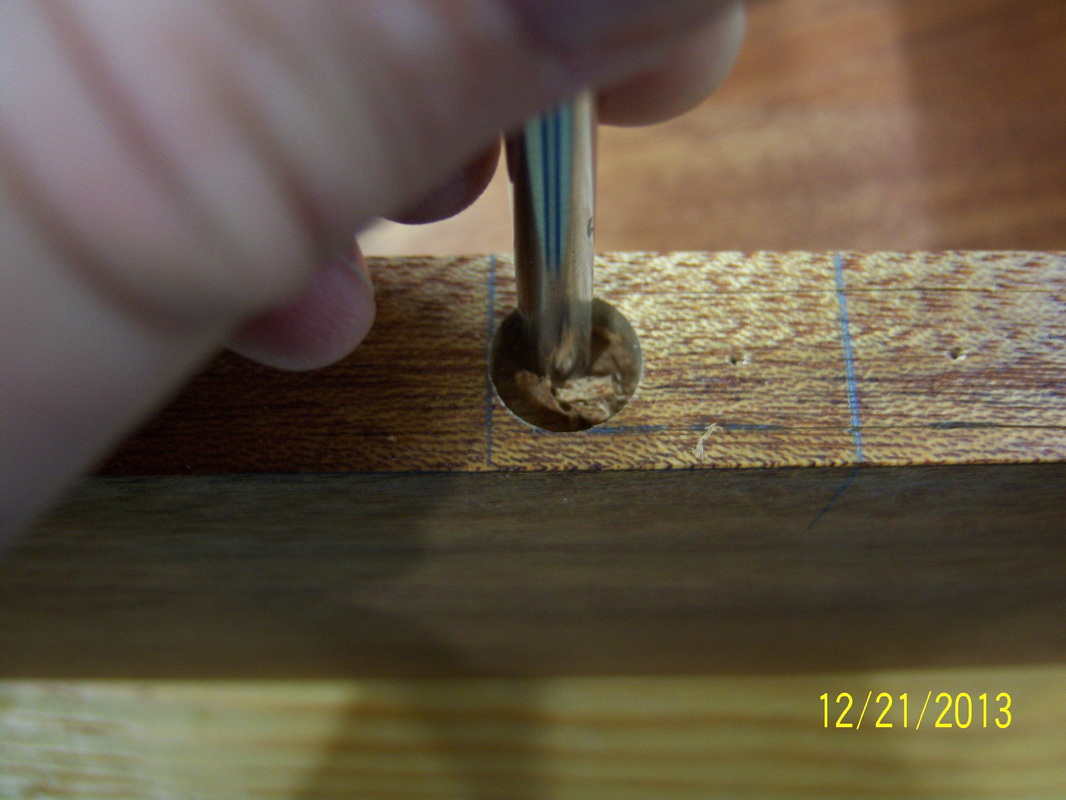
I grabbed a disposable acid brush (glue brush) to help break free some of the shavings in the bottom of the hole left by the forstner bit. Since the handle of the brush is made from a thin, open-ended, rolled piece of metal, it made cutting the small wood fibers and shavings fairly easy.
Mahogany Saber Case
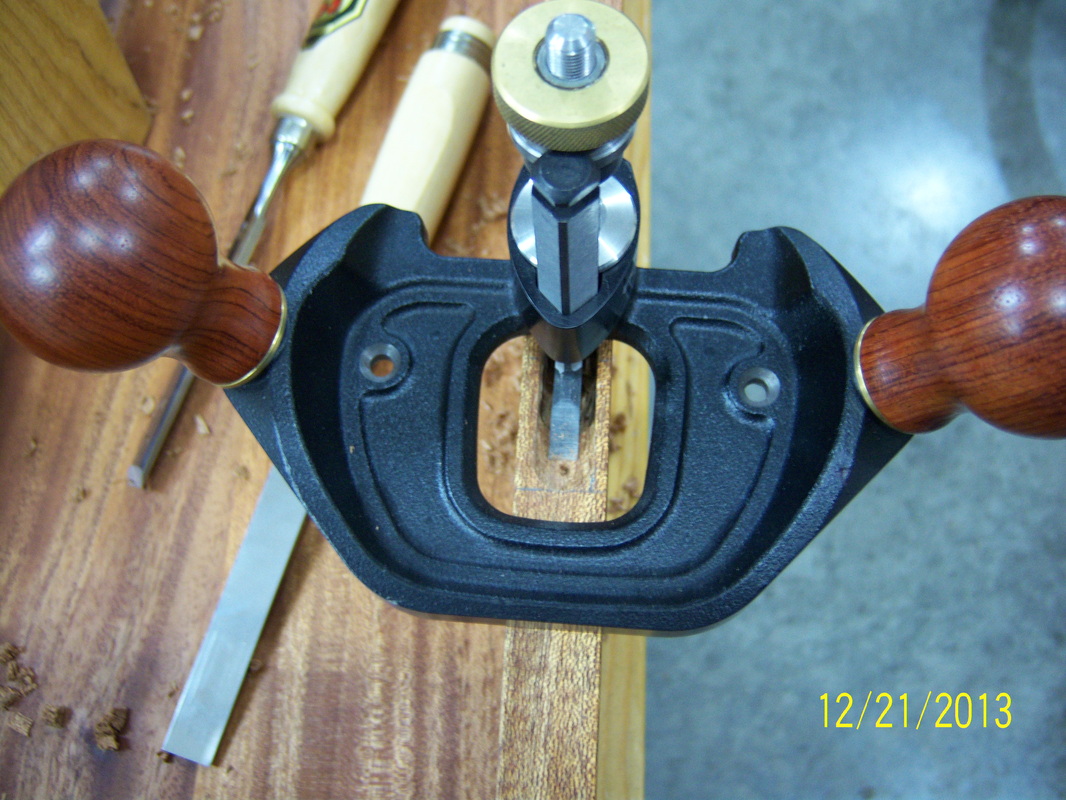
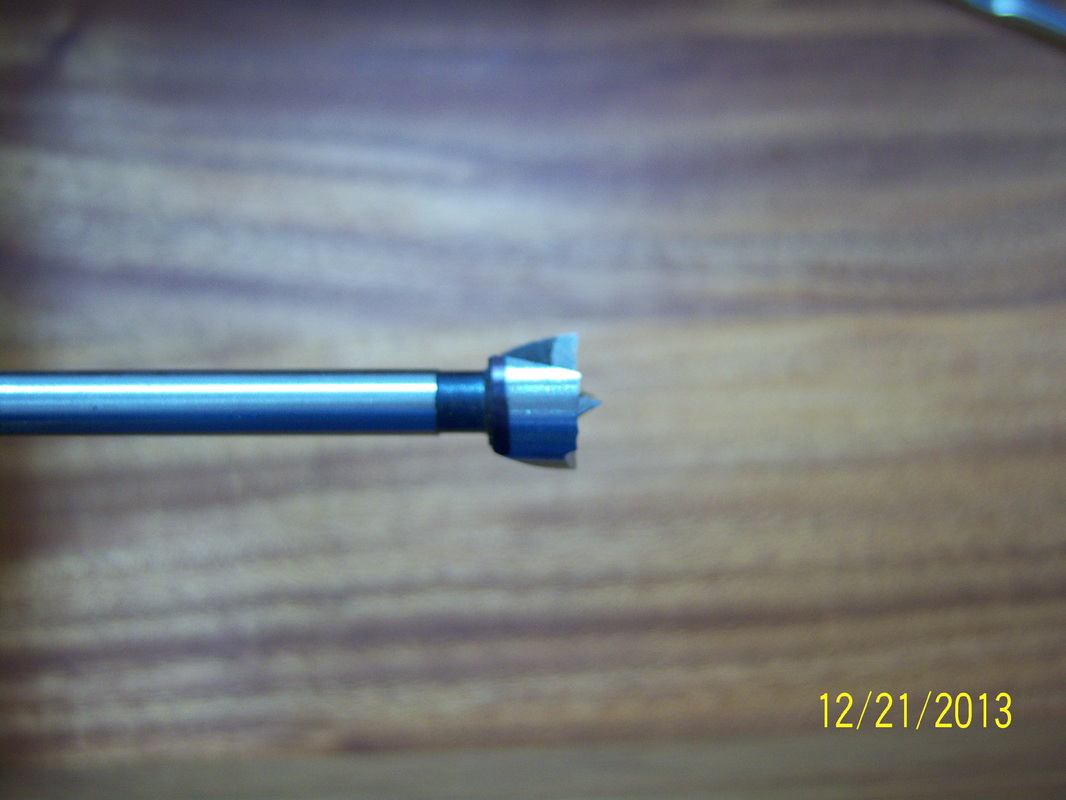
After removing the bulk of the waste with the forstner bit and chisels, I used a 1/4" cutter on the router plane to cut the depth of the outer hinge recess to an even 1/4". This is the area of the case that will hold the hinge and be where the screws are installed.
Mahogany Saber Case

Mahogany Saber Case

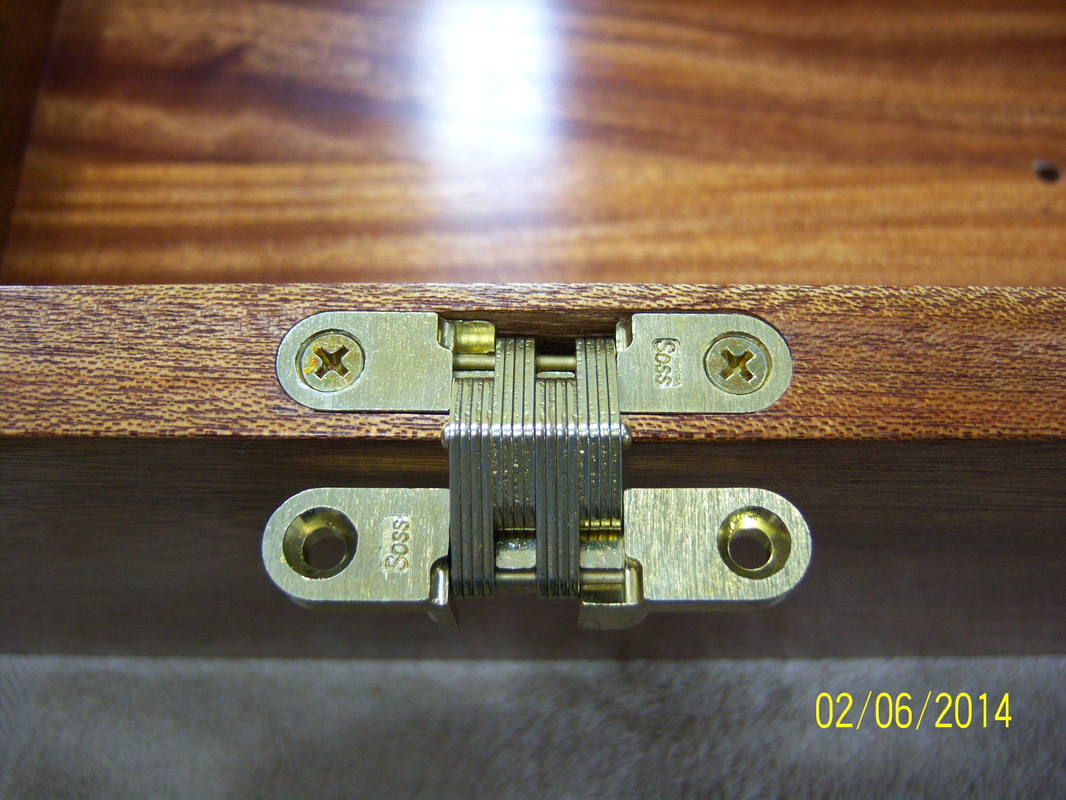
After the recess was cleaned up. I test fitted the hinge. Thanks to the included layout template, the hinge fits well.
Mahogany Saber Case

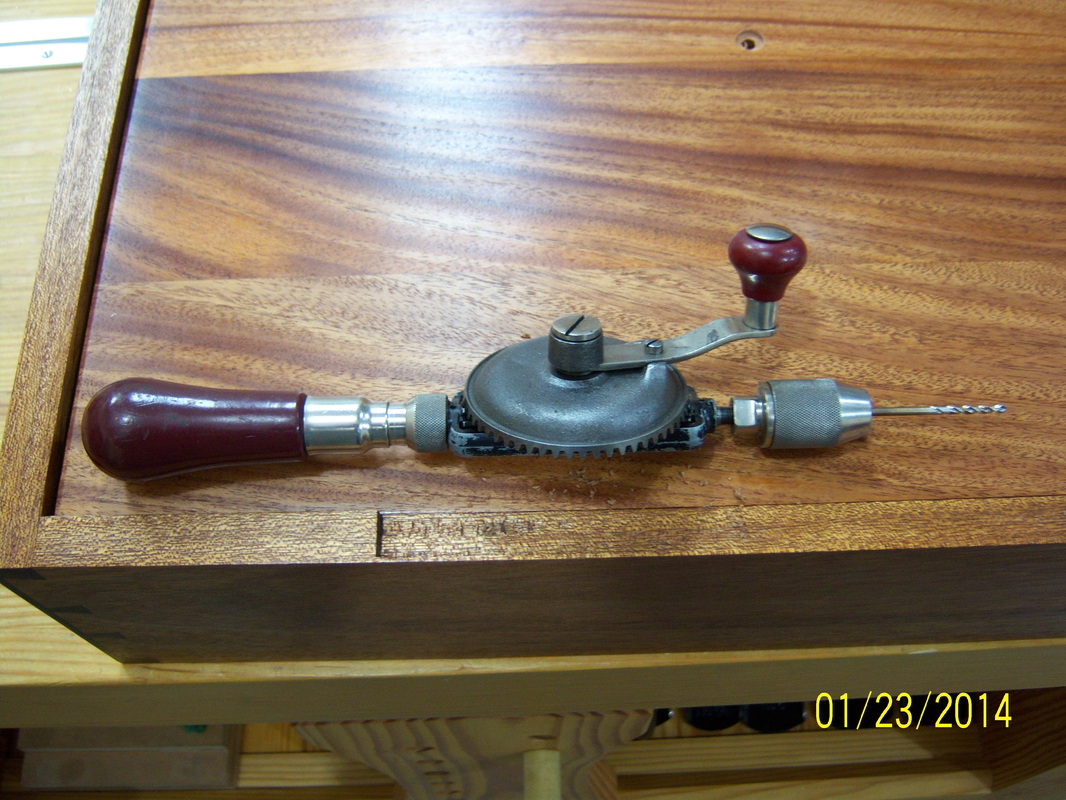
The pilot holes for the screws were drilled using a hand drill.
Mahogany Saber Case
Mahogany Saber Case
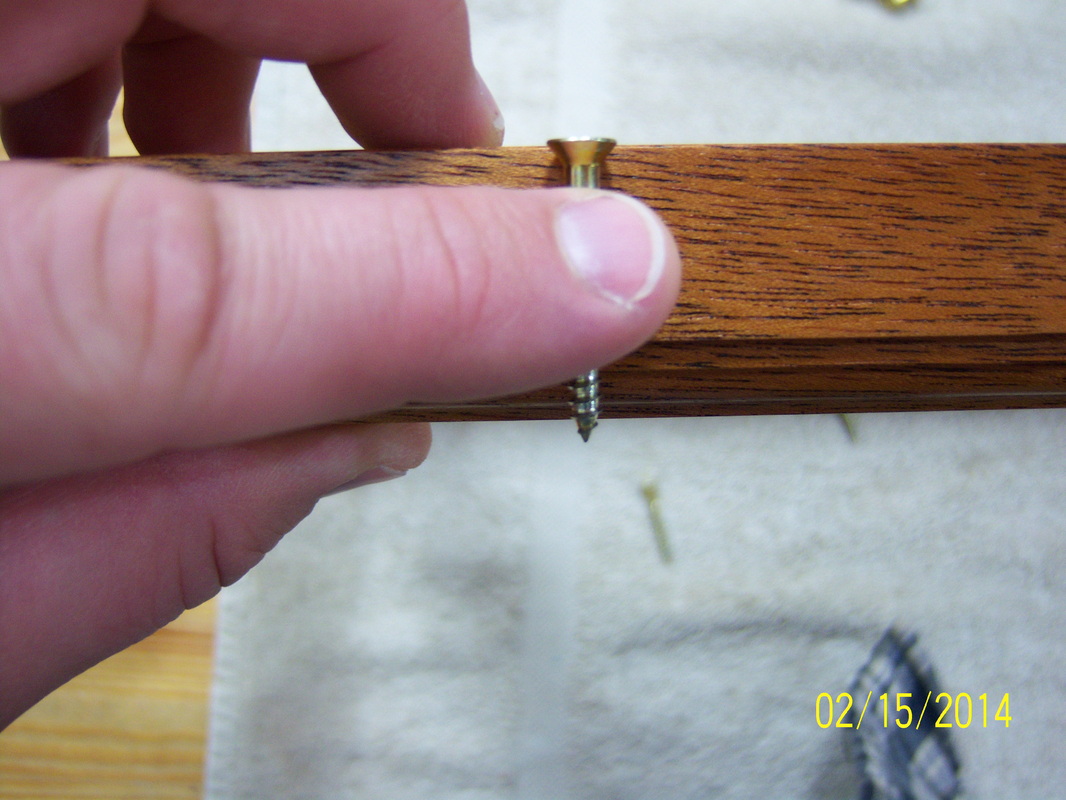
The included screws for the SOGG hinges were too long to install in the case door.
Mahogany Saber Case
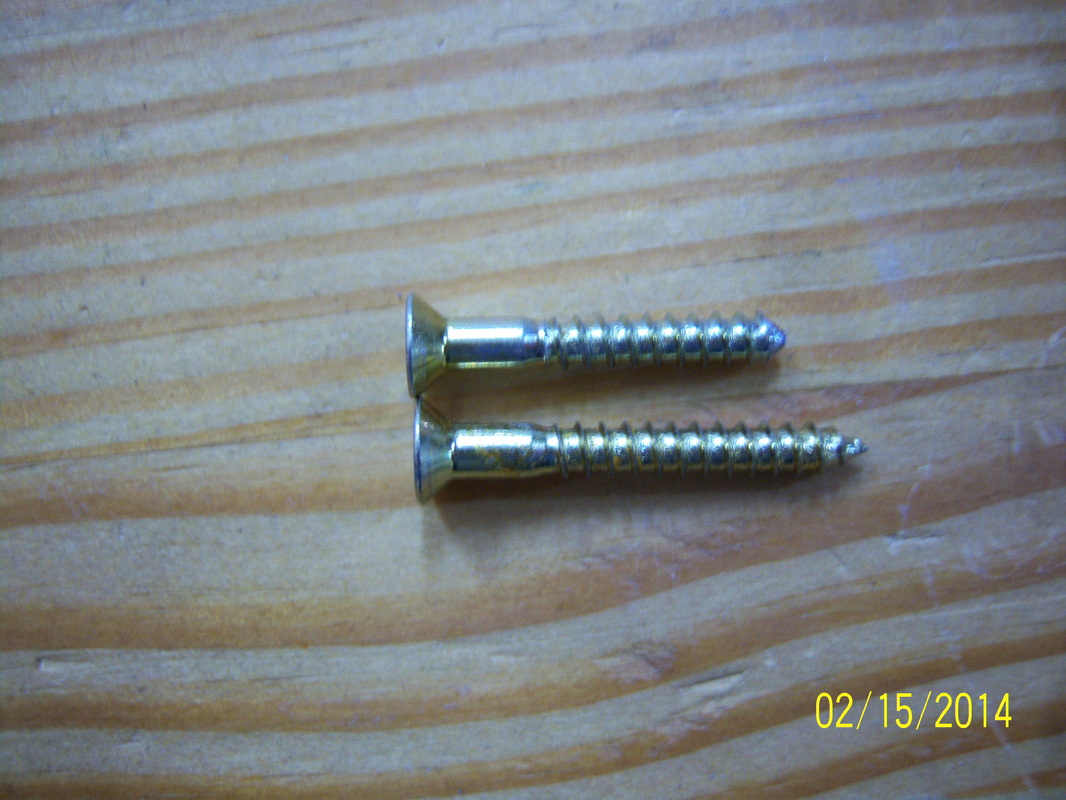
Each of the four screws were shortened by about 1/8" with a small bolt cutter and shaped to a point on the grinder.
Mahogany Saber Case
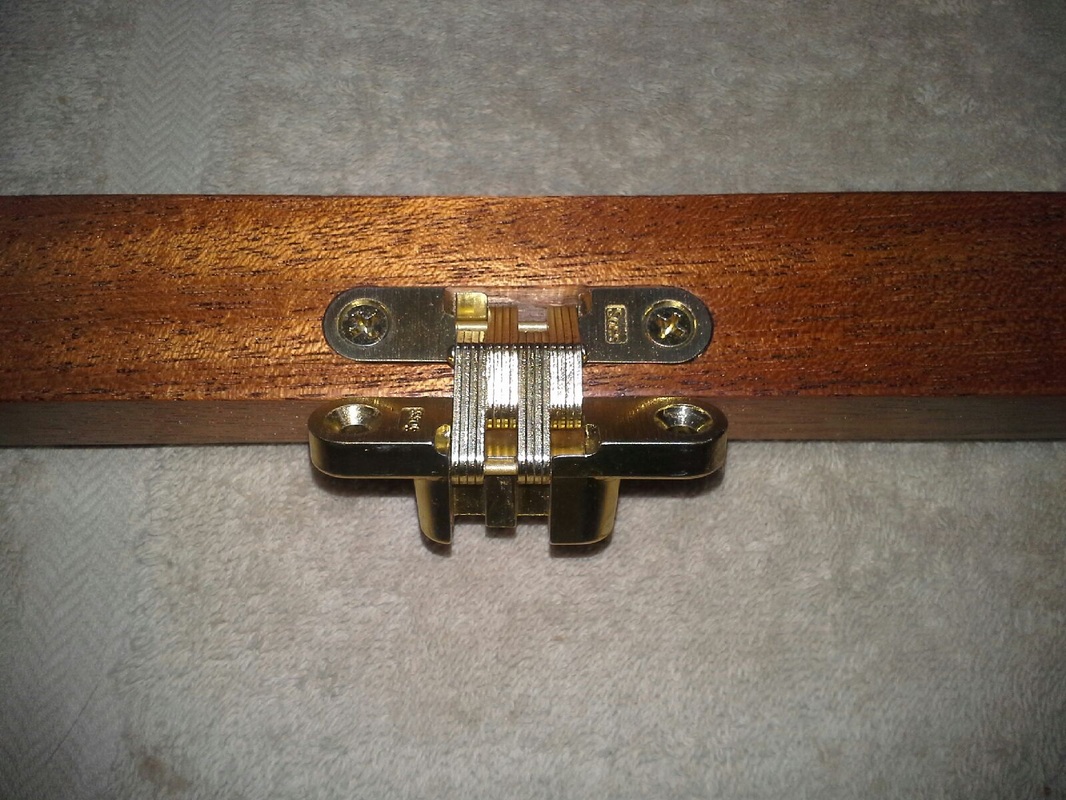
The SOSS hinges were mounted in the framed door. When it is time for the framed door to be attached to the case, I will just have to slip the hinges into the recess cut into the case.
Mahogany Saber Case

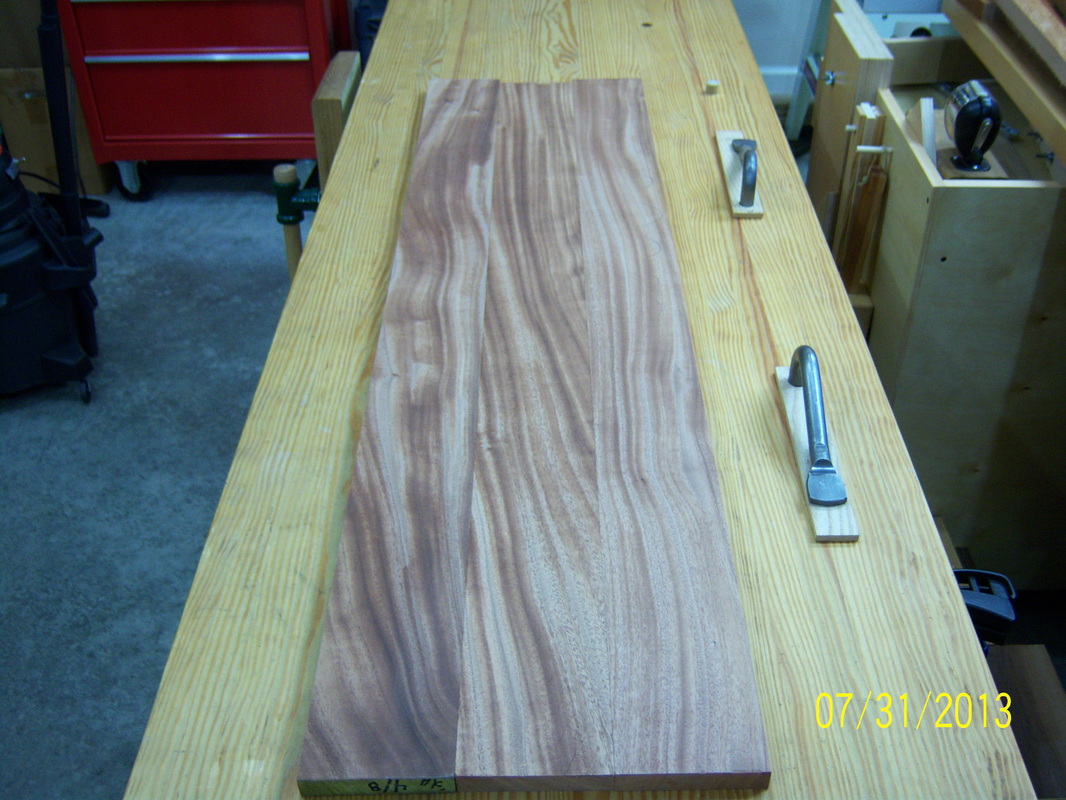
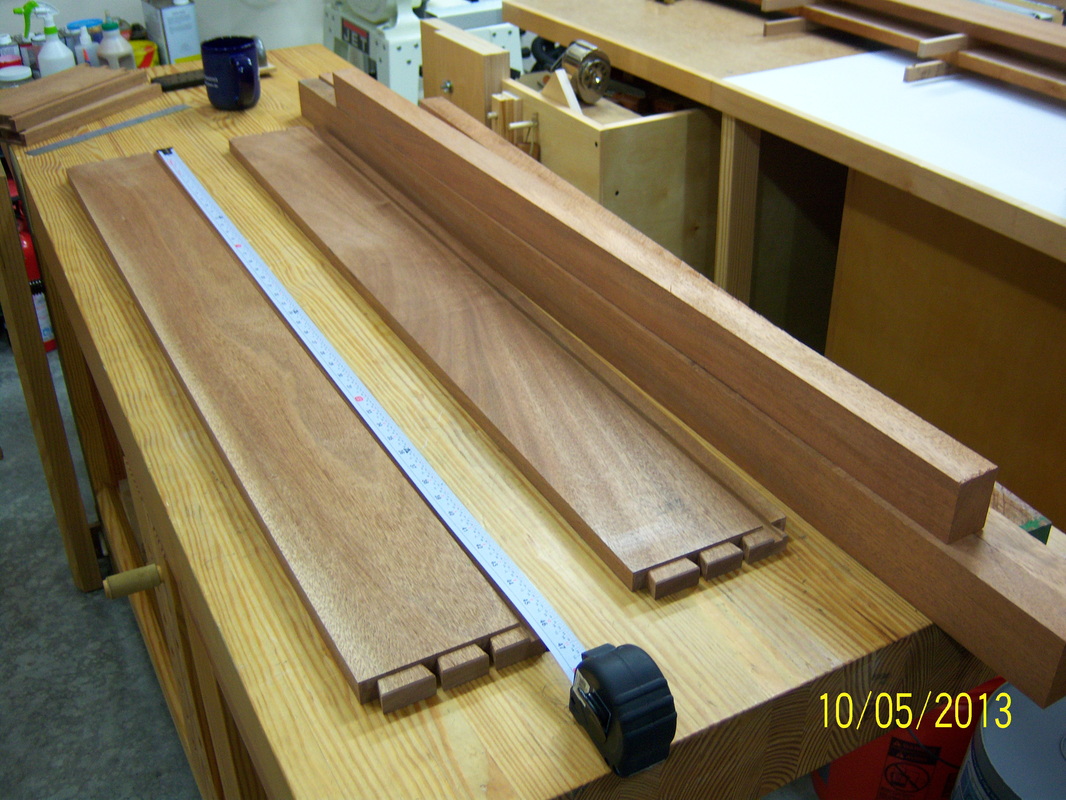
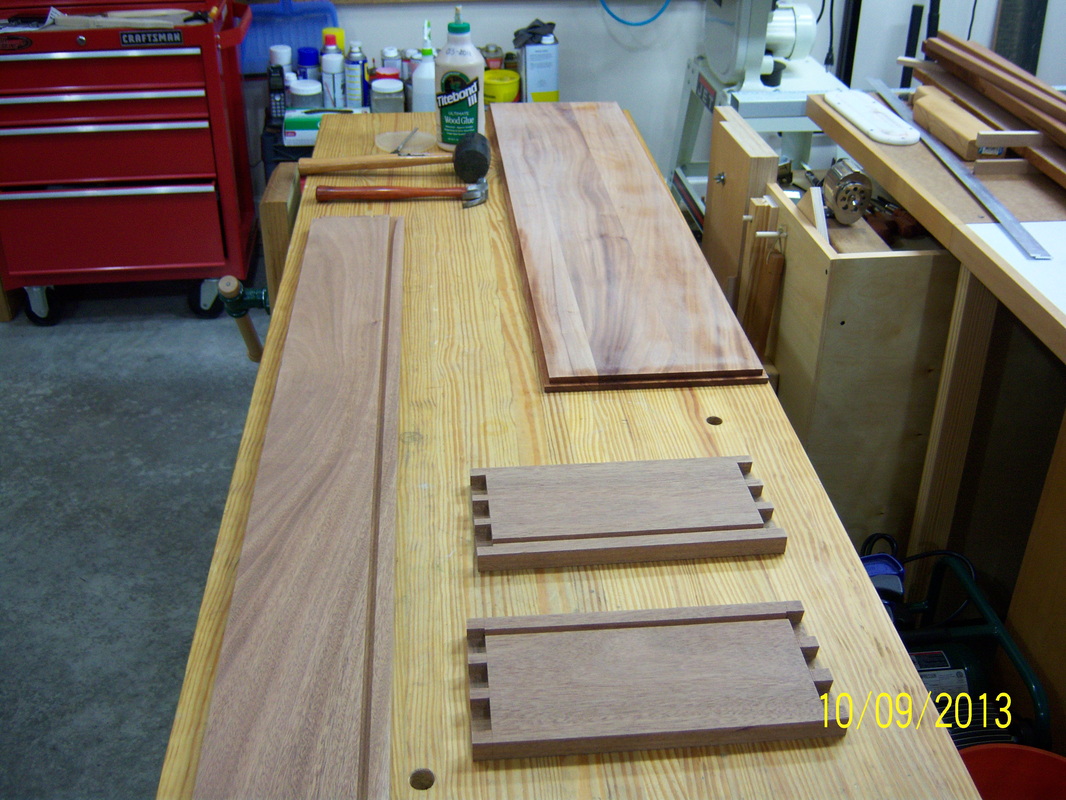
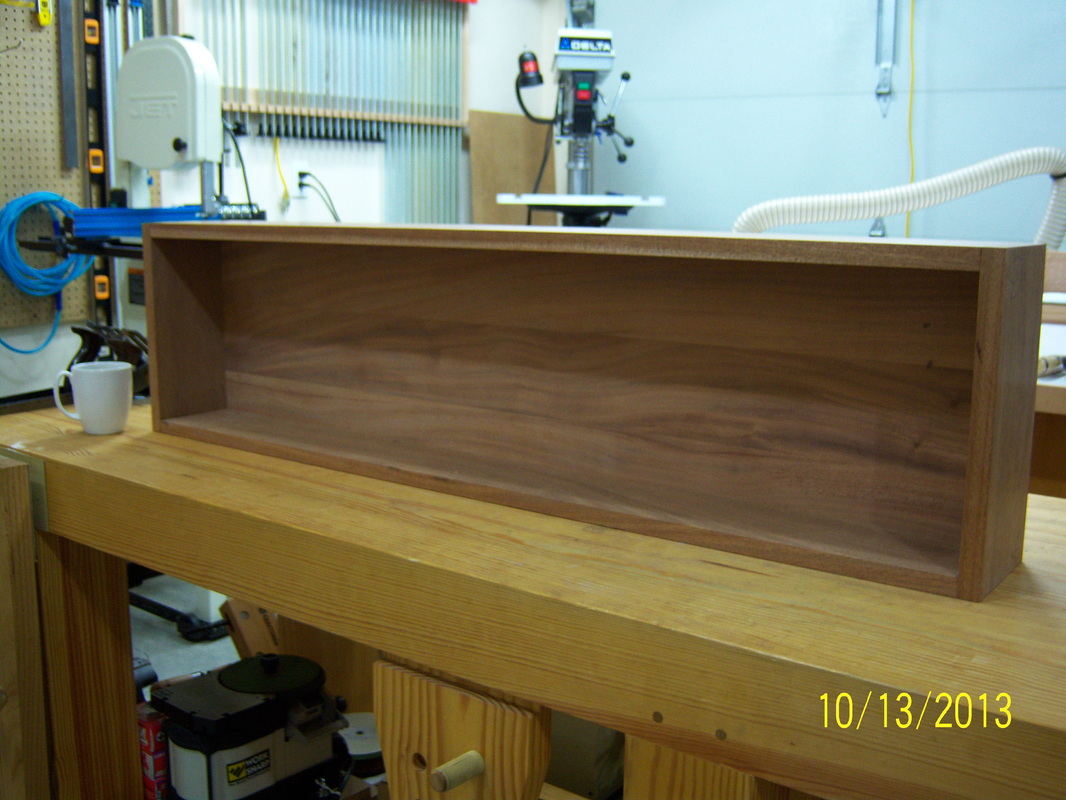
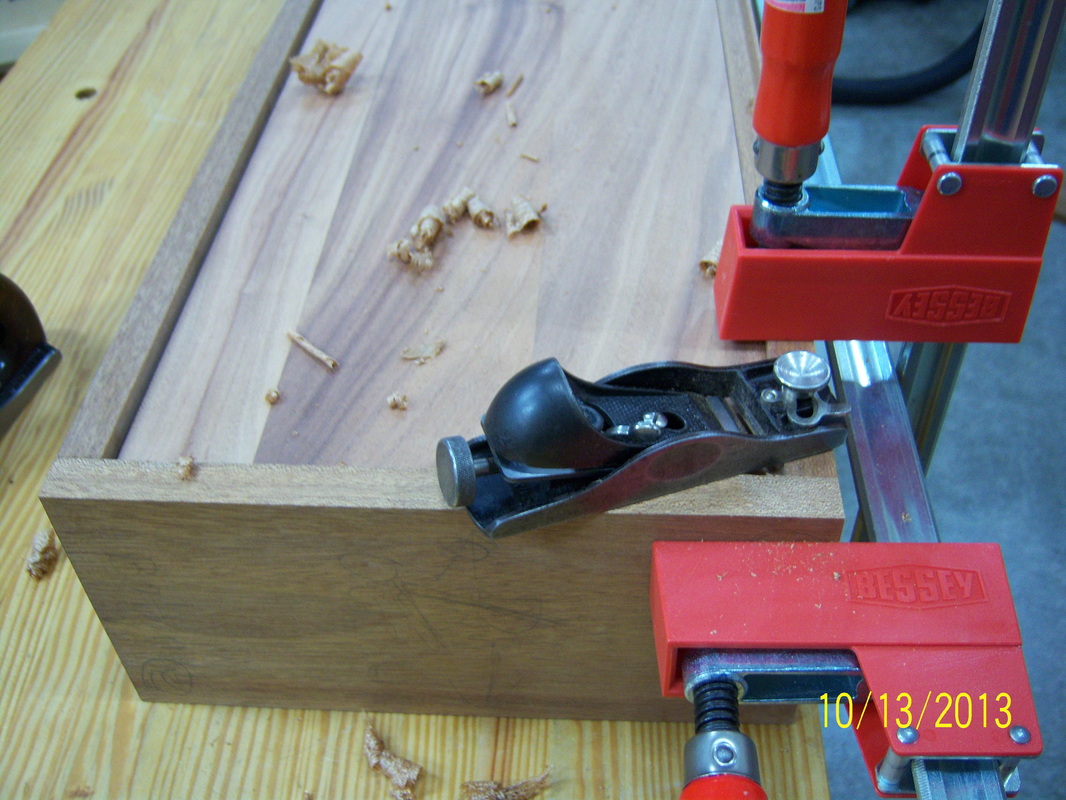
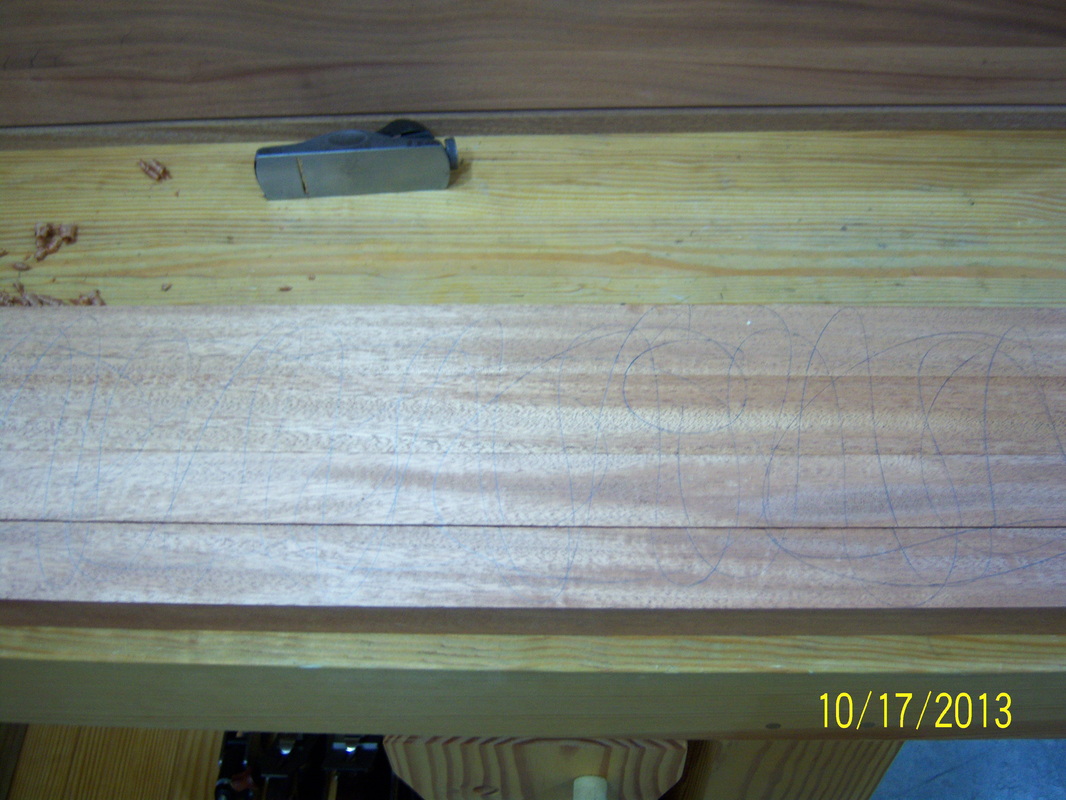
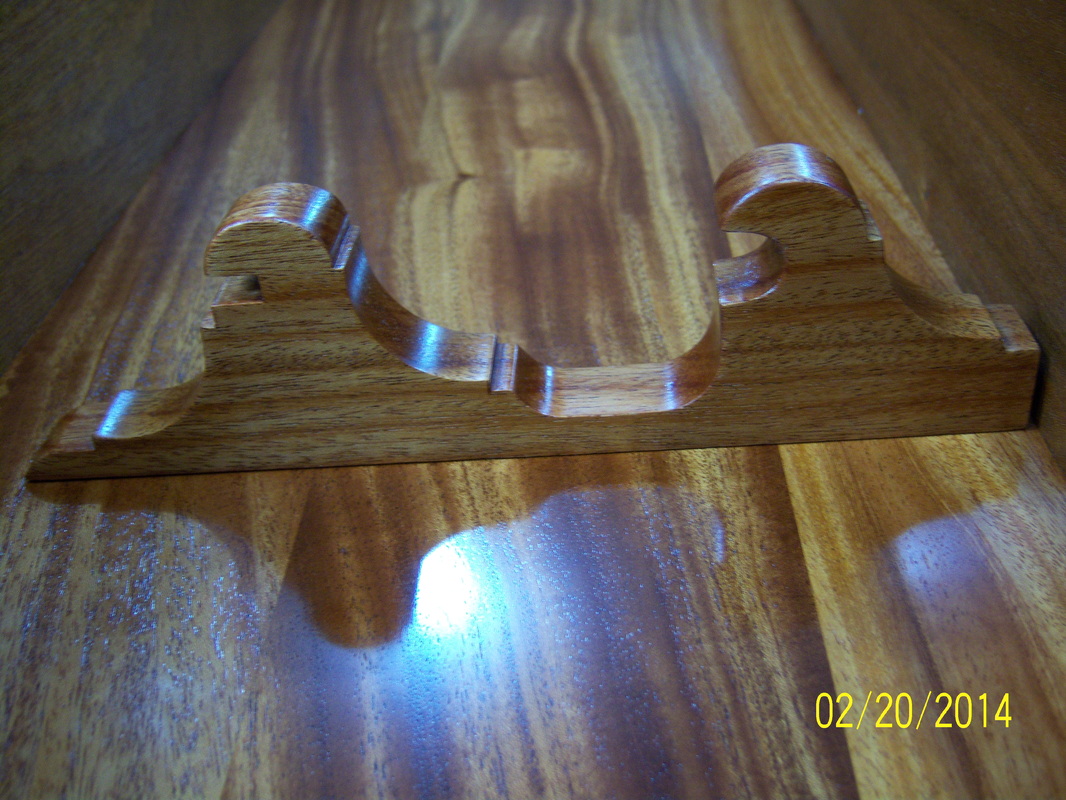
I planed a couple pieces of mahogany to approximately 3/4" thick and close to 3" wide. These pieces will be used to construct the vertical supports that will hold the saber and the sheath.
Mahogany Saber Case
Using a sharpened card scraper, I removed the machine marks left behind by the planer. After smoothing the faces of both pieces, they were cut to approximately 10 1/2" in length.
Mahogany Saber Case

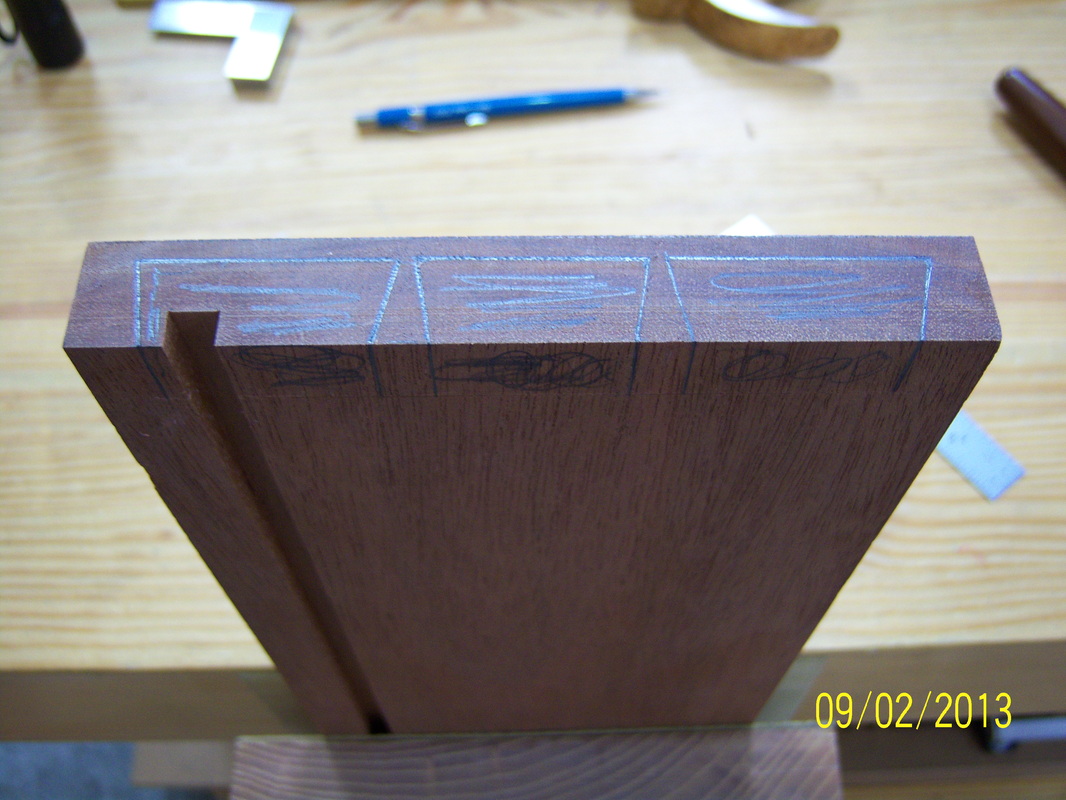
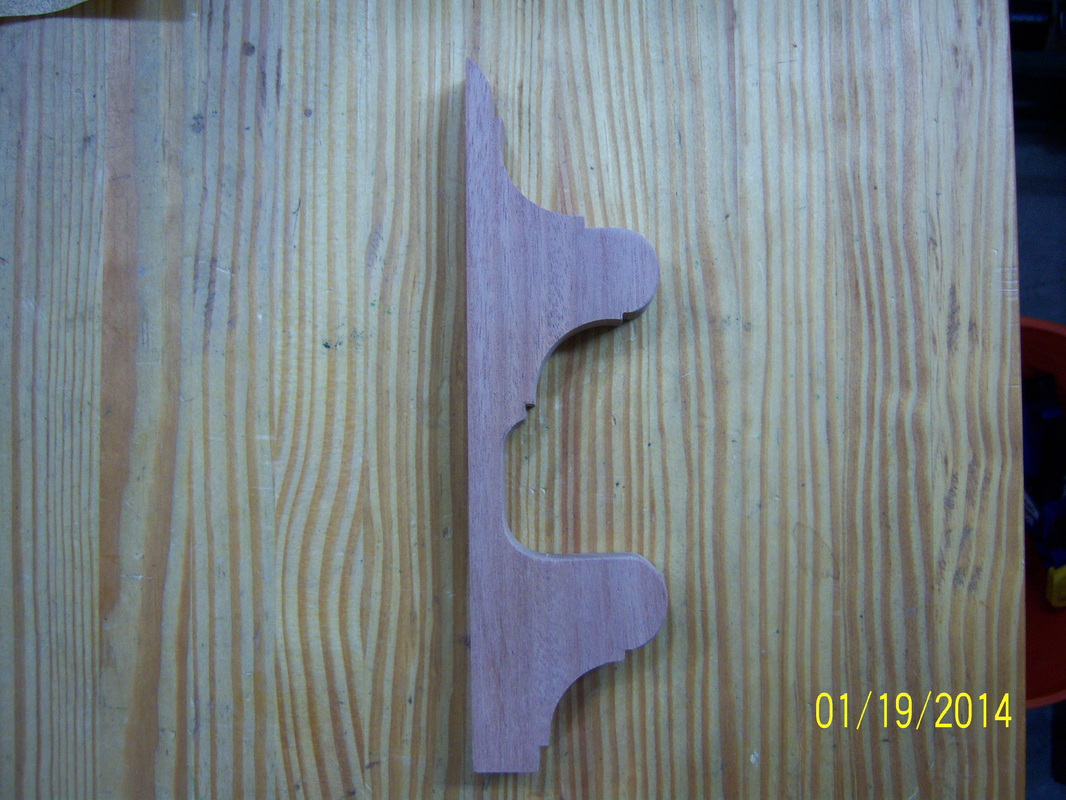
Using graph paper and drawing to scale, I worked on a design for the vertical supports. I wanted something that would add a bit of detail, but still fade into the background behind the saber.
Mahogany Saber Case

The large radiuses were bases on the various sized forstner bits that I had on hand. For the most part, with the exception of the two convex cuts, everything else could be cut with a forstner bit, it a straight cut.
Mahogany Saber Case
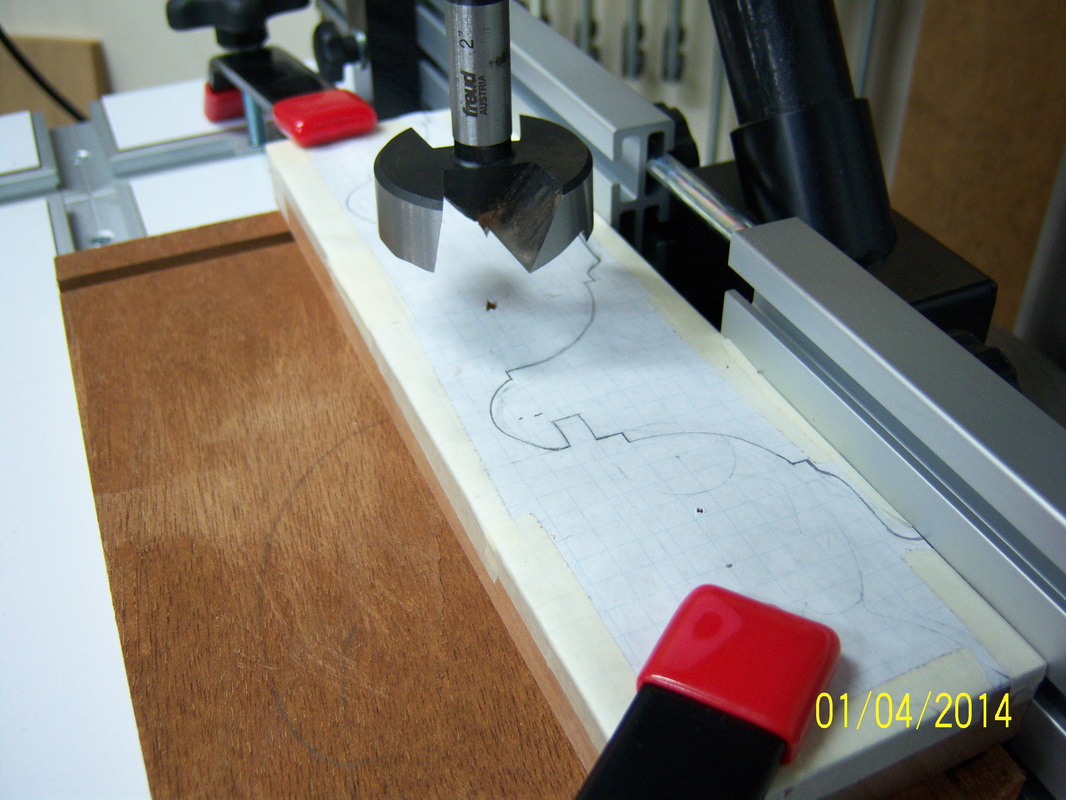
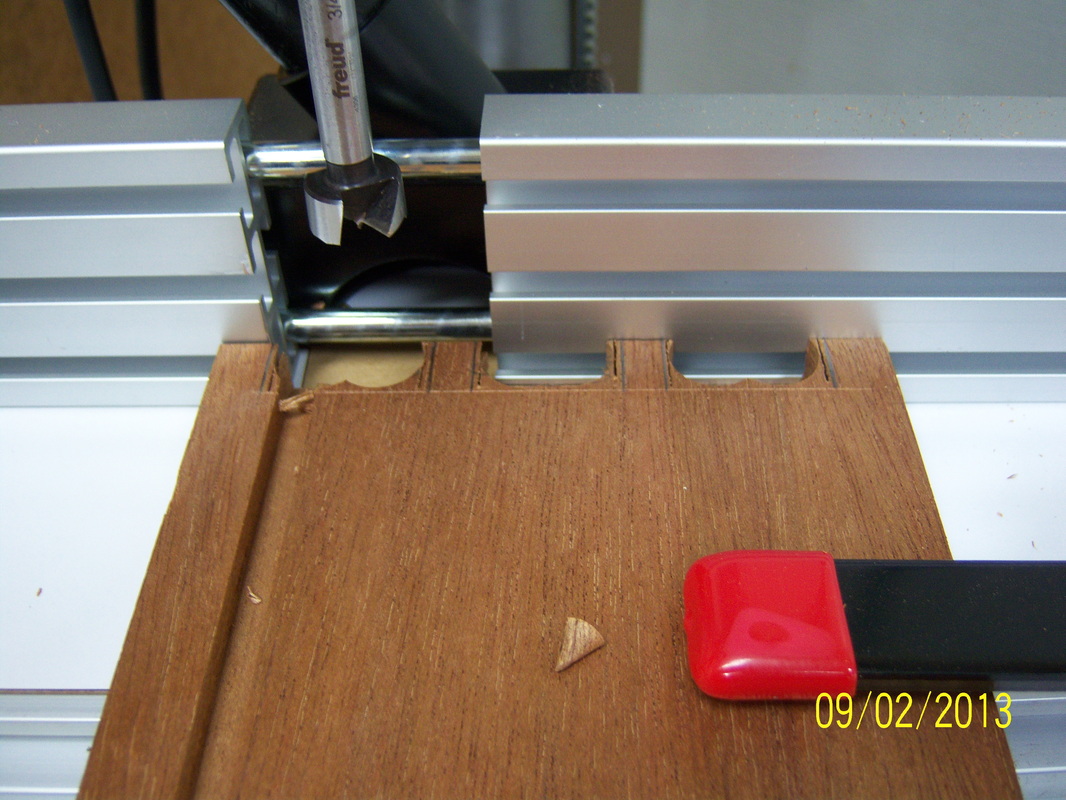
I taped the template onto the board and aligned the forstner bit with the pattern.
Mahogany Saber Case

Mahogany Saber Case
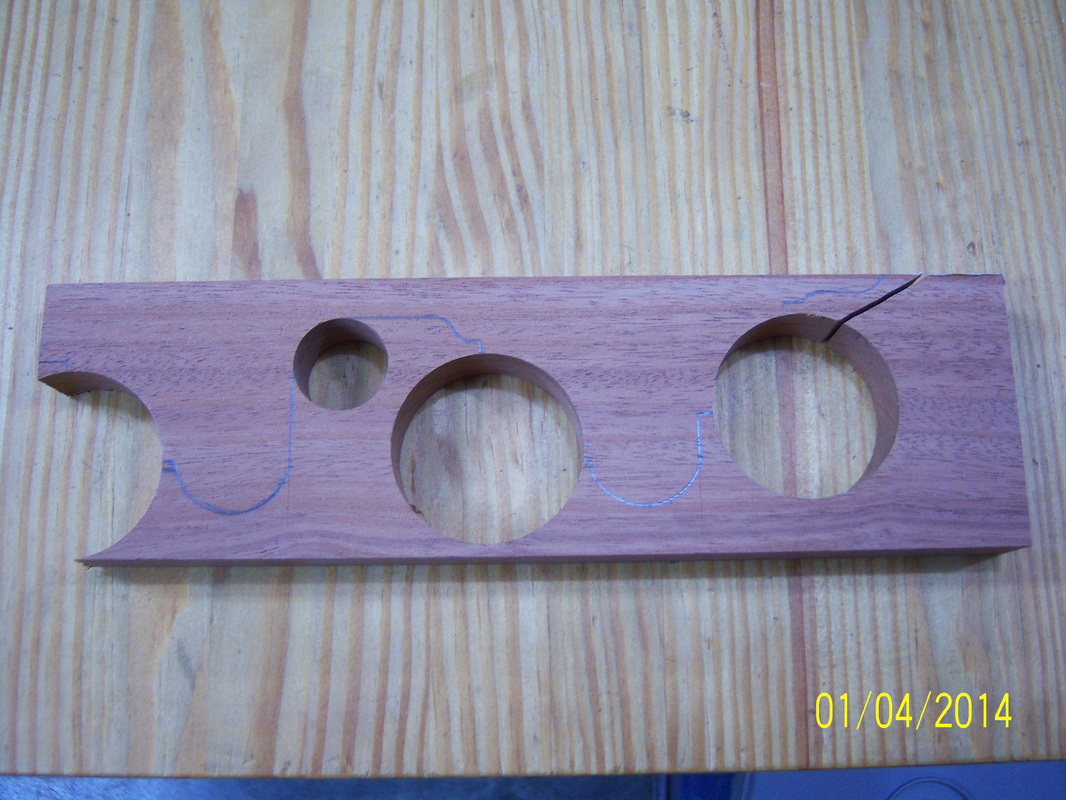
Three, 2" diameter holes were cut, as well as a single, 1" diameter hole for the concaved details.
Mahogany Saber Case

The bulk of the waste was removed on the bandsaw. I was able to utilize the miter gauge, as well as the fence, for most of the straight cuts.
Mahogany Saber Case
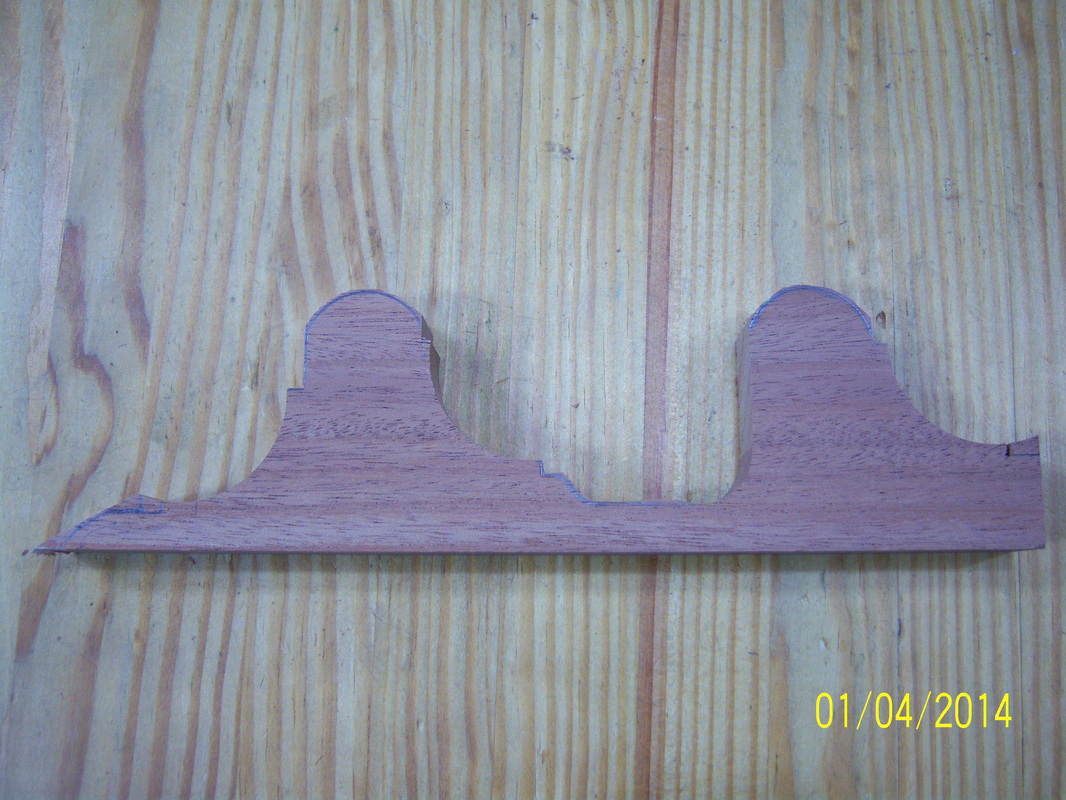
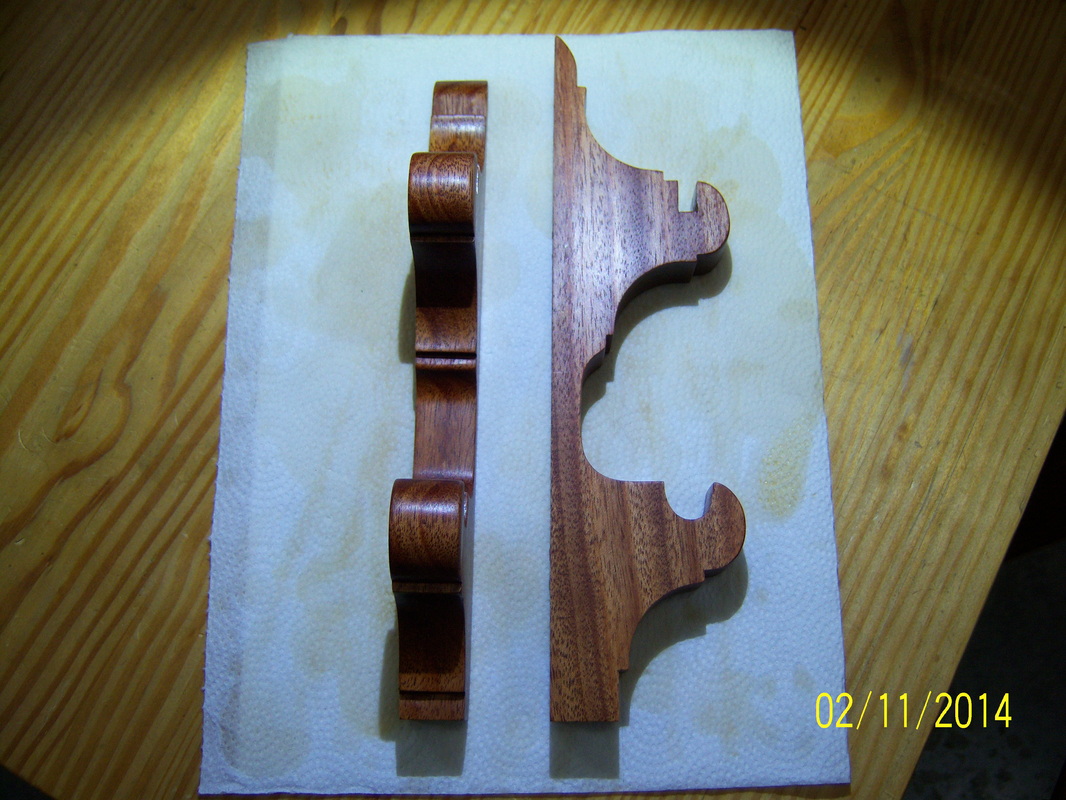
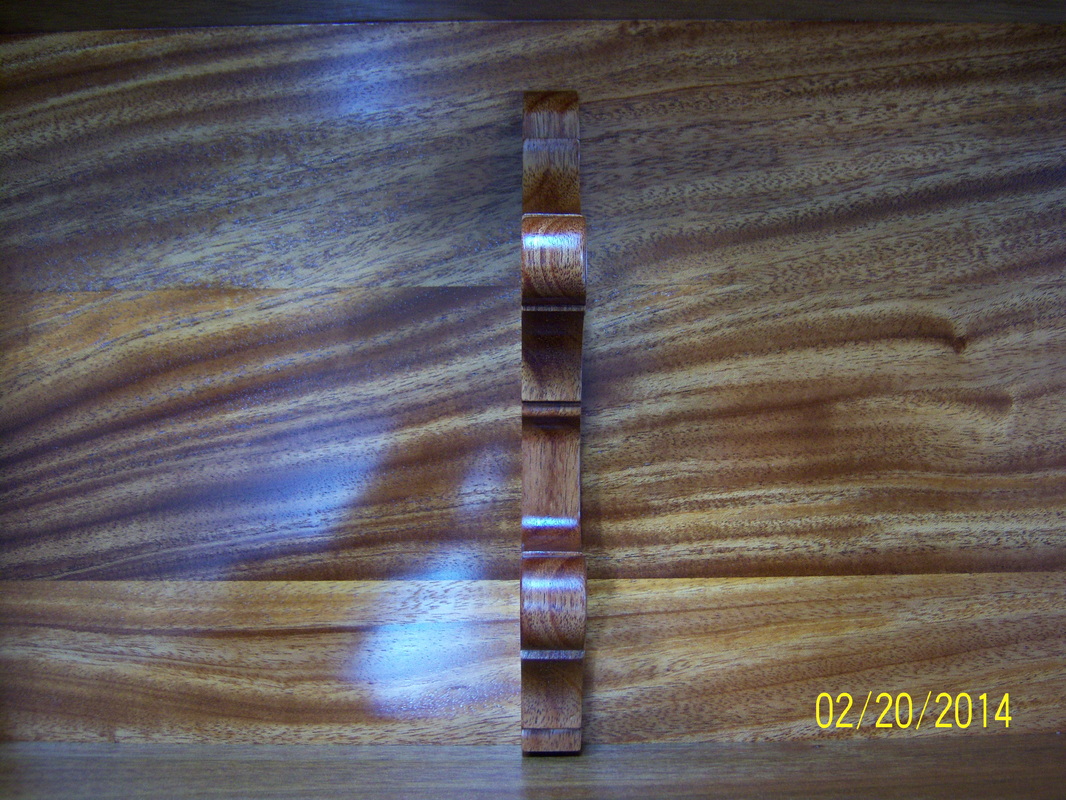
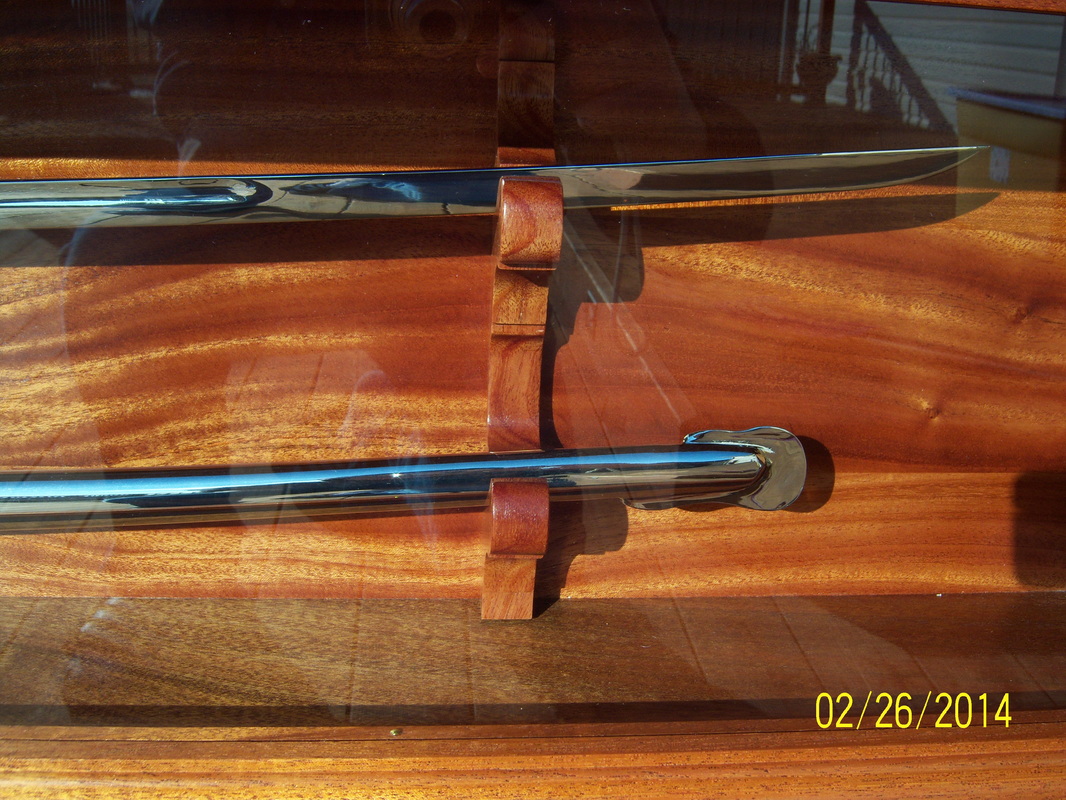
The recesses that will hold the saber and the sheath have yet to be cut, but will be located in the two protruding sections.
Mahogany Saber Case
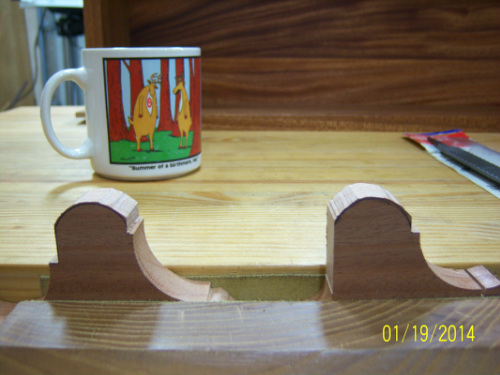
I mounted the support in the leg vise and used a couple of files to create the rounded profiles. I also used some 120-grit sandpaper wrapped around three different size pieces of scrap dowels to clean up the curves.
Mahogany Saber Case

Mahogany Saber Case
Mahogany Saber Case
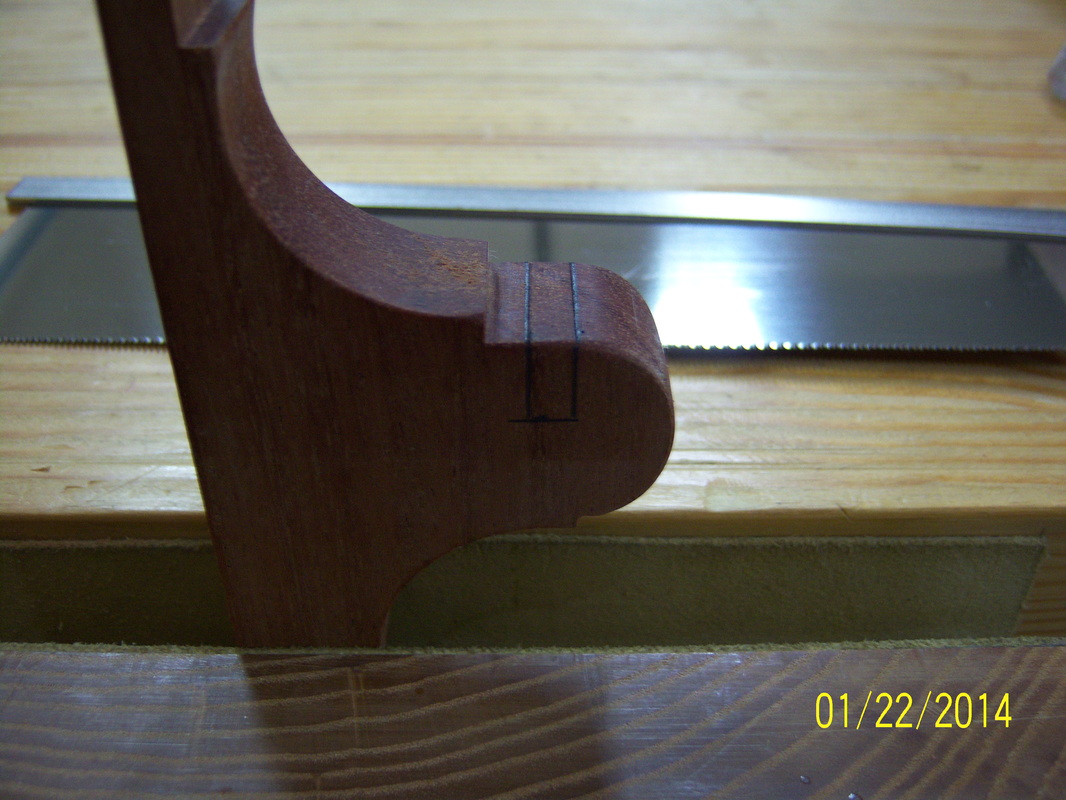
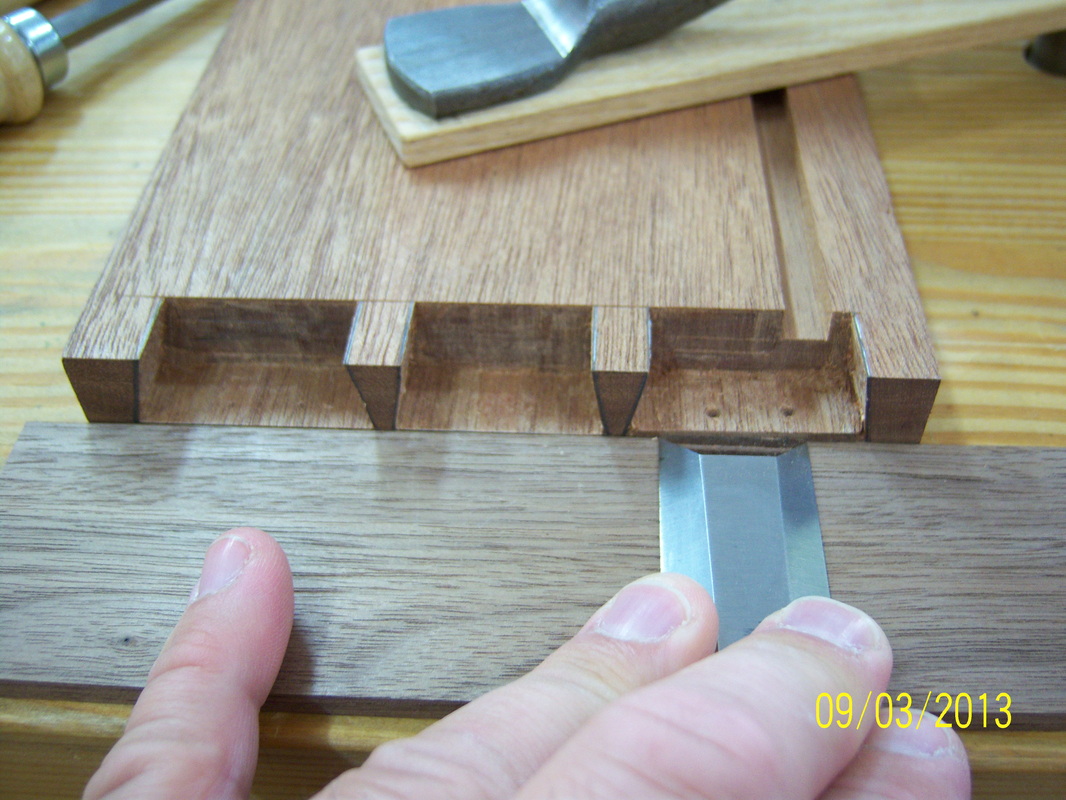
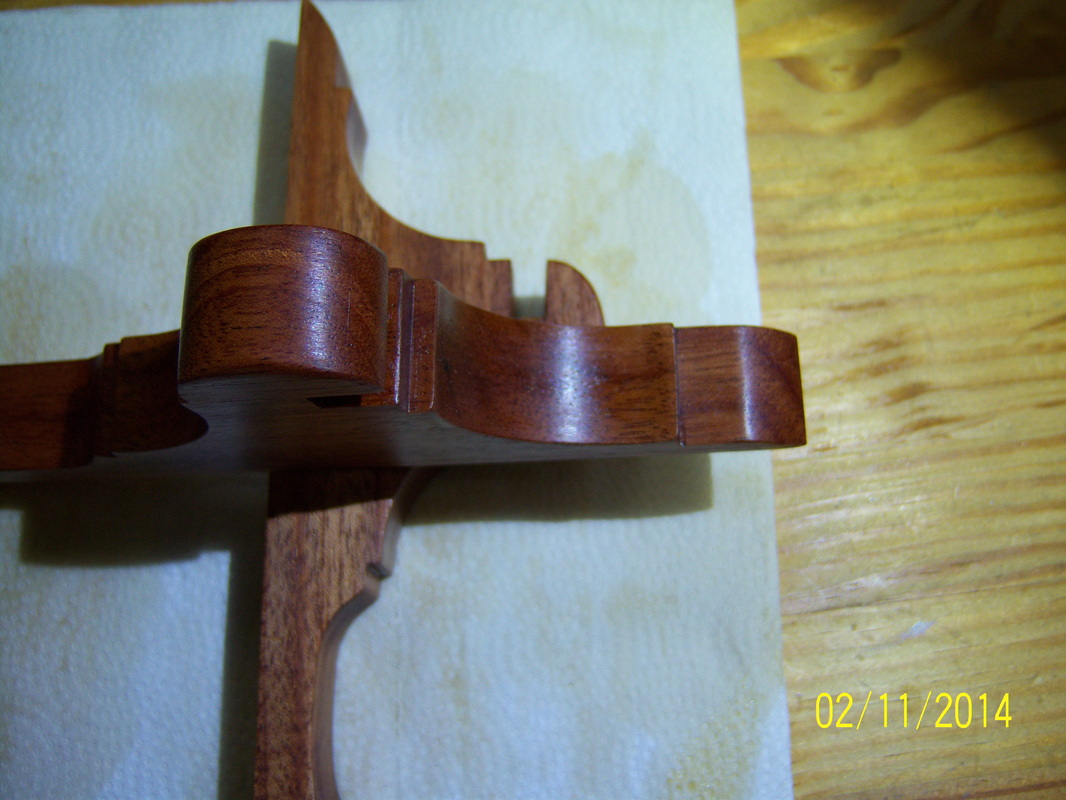
I measured the thickness of the saber's blade and marked the lines that would be needed for the cut. I made two vertical cuts with a Japanese pull saw then used a 1/4" chisel to clean out the waste.
(The darker color of the wood was caused by using some mineral spirits on a rag to clean of the dust after sanding.)
(The darker color of the wood was caused by using some mineral spirits on a rag to clean of the dust after sanding.)
Mahogany Saber Case

I used a chisel to clean the sides of the cut. I then used the edge of a flat file to clean the bottom of the slot.
Mahogany Saber Case
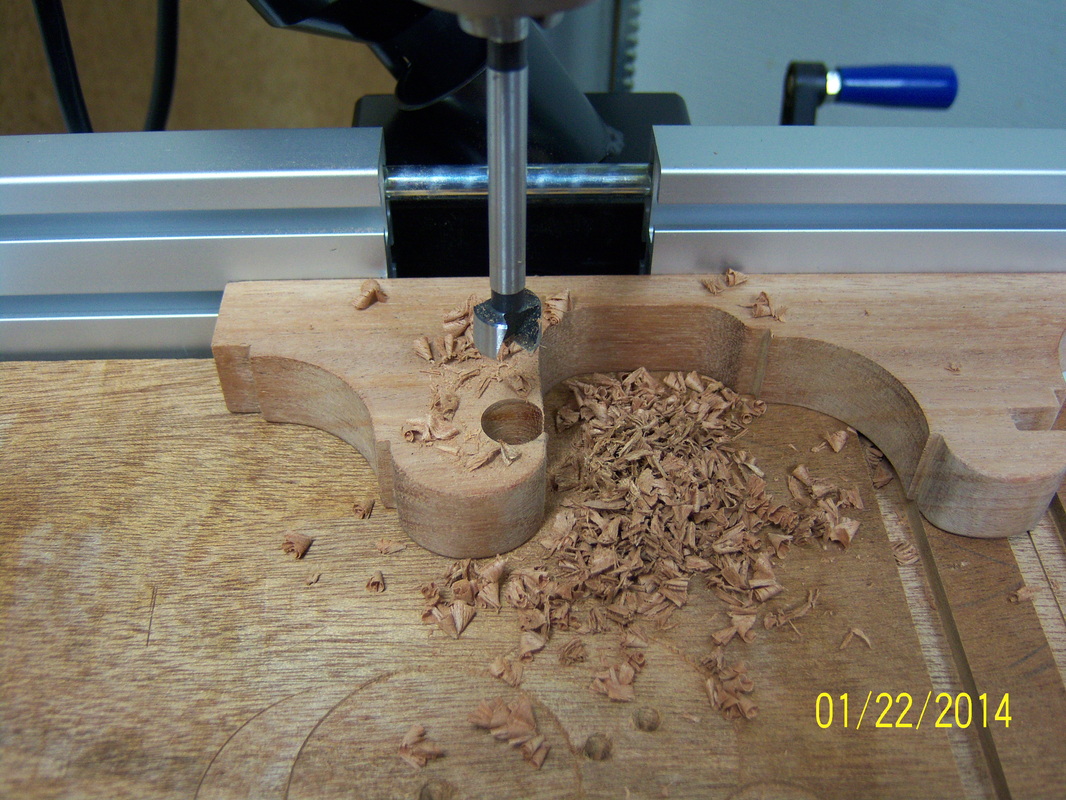
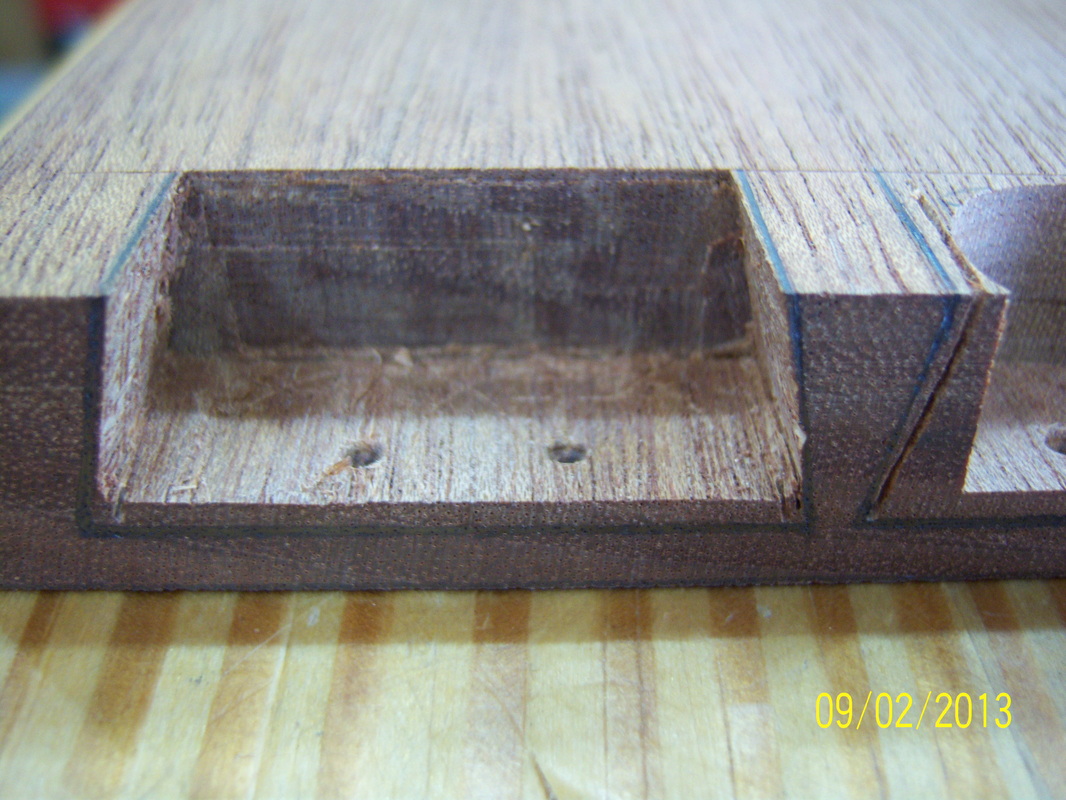
The sheath needed at least a 1/2" wide recess. Using a 1/2" forstner bit, I cut away the bulk of the material prior to cleaning up the recess with a chisel. The recess was shaped smoothed using a file and sandpaper.
Mahogany Saber Case
(Again, the darker color was due to using mineral spirits to remove the sanding dust.)
Mahogany Saber Case
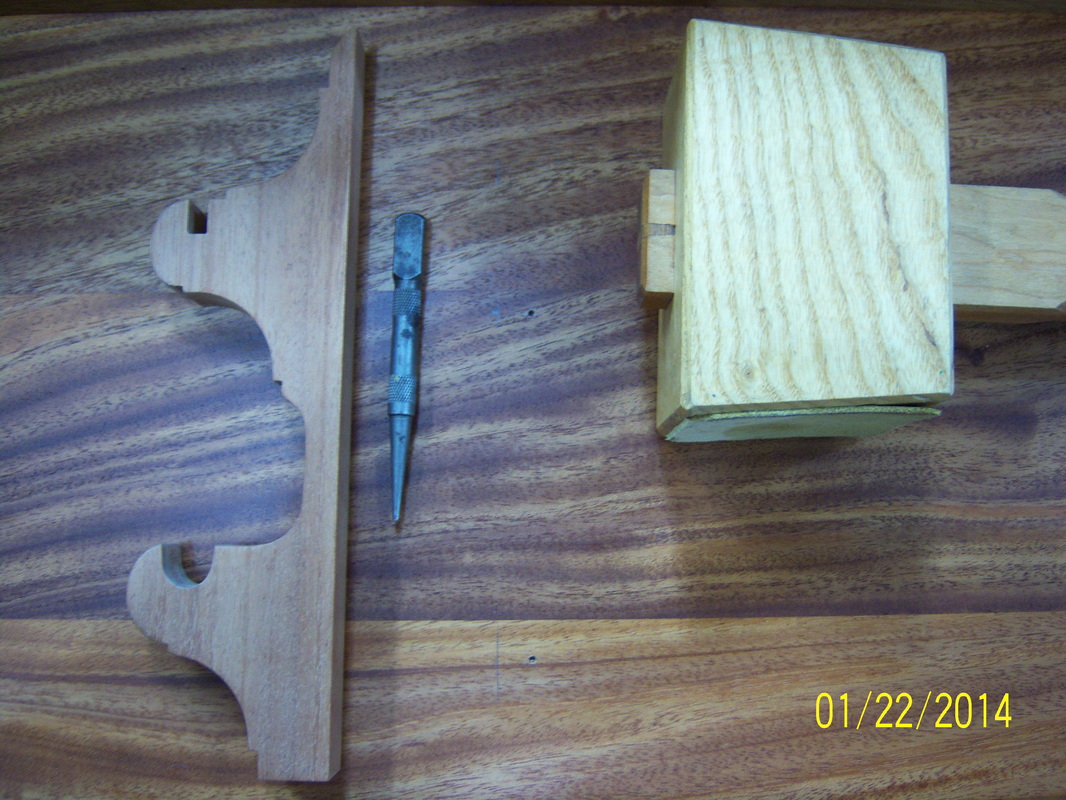
Using the vertical support as a guide, two locations were marked for drilling out the screw holes that will later hold the vertical support in place. Using a punch and a mallet, I created two small dents that will help guide a small drill bit.
Mahogany Saber Case
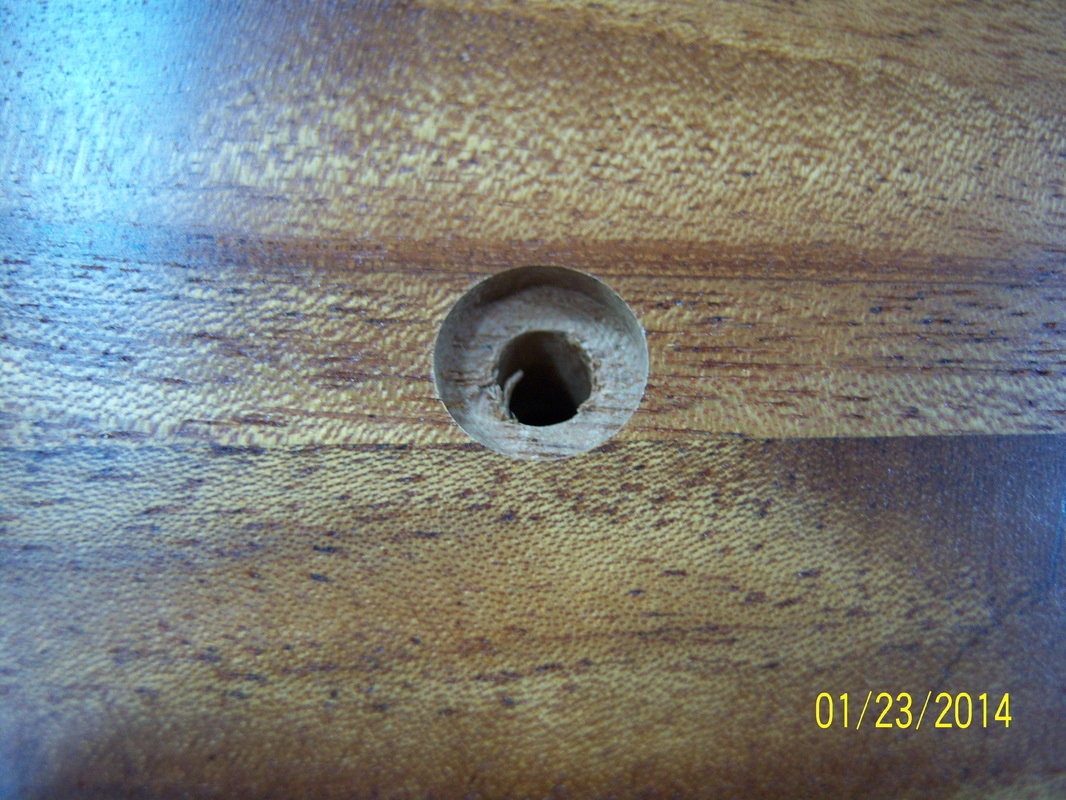
I used a very small drill bit to drill a pilot hole from the front of the case to the rear. I then used that pilot hole to guide a 1/2" forstner bit, the a 3/16" drill bit. The recess will hold a small washer, while the screw will pass freely through the hole and engage the vertical support.
Mahogany Saber Case
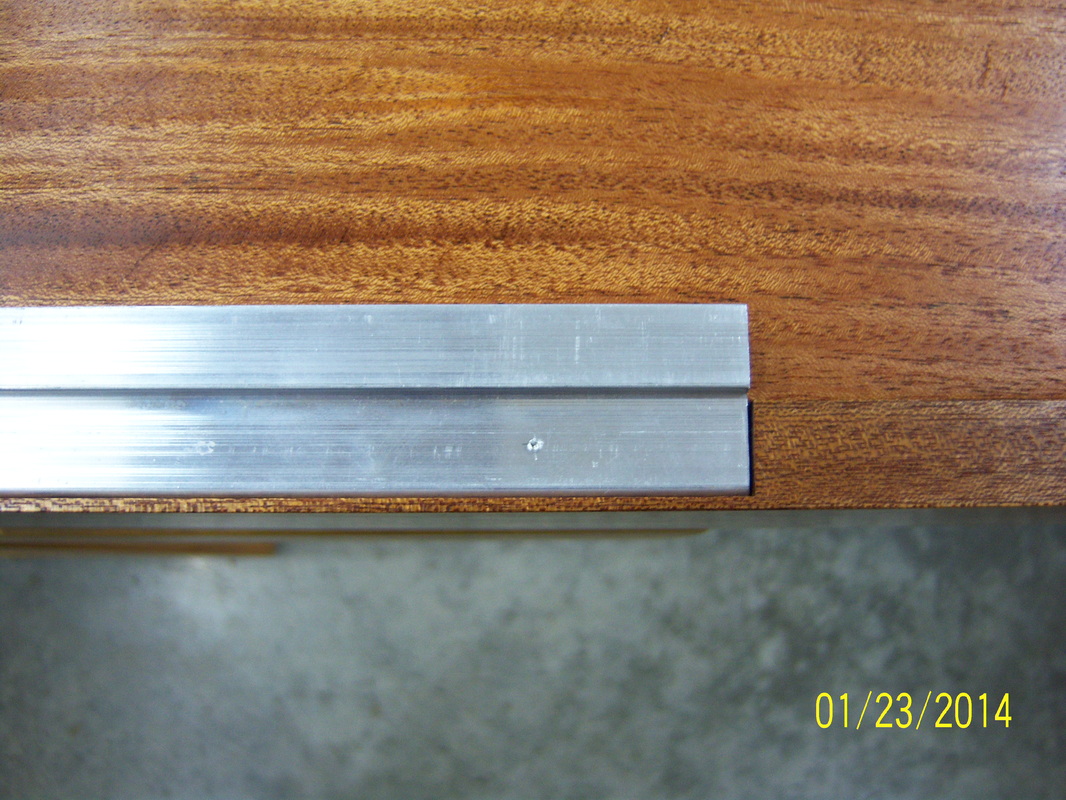
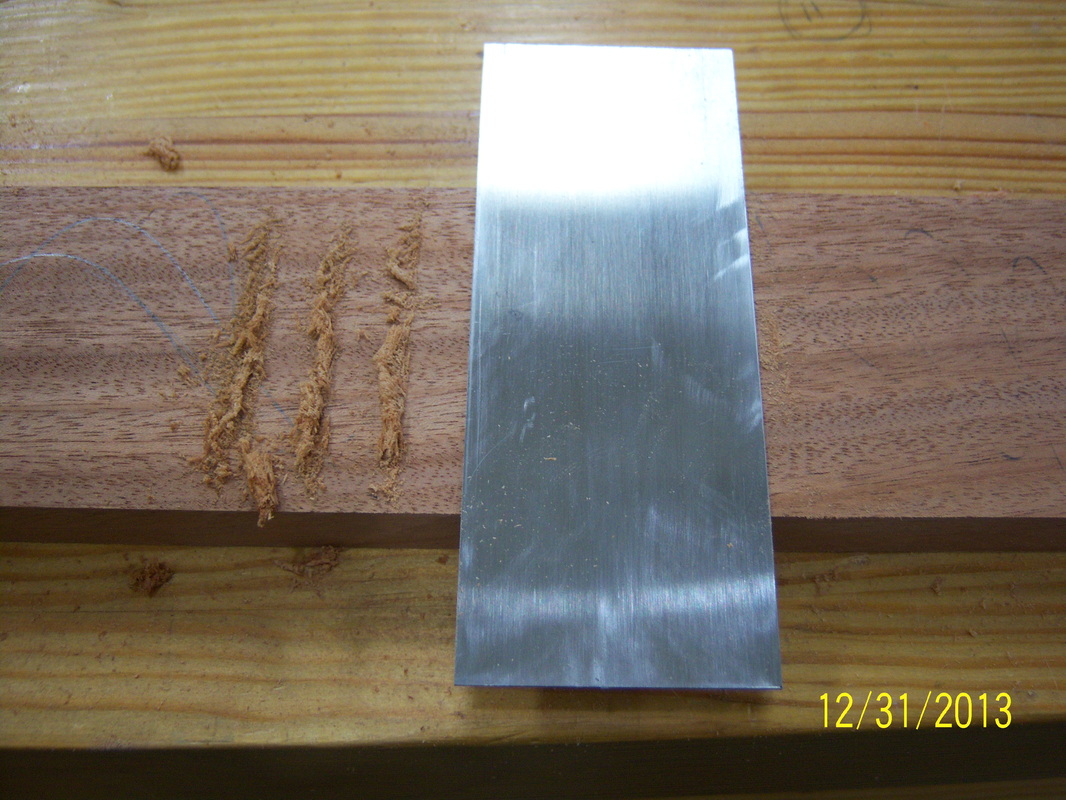
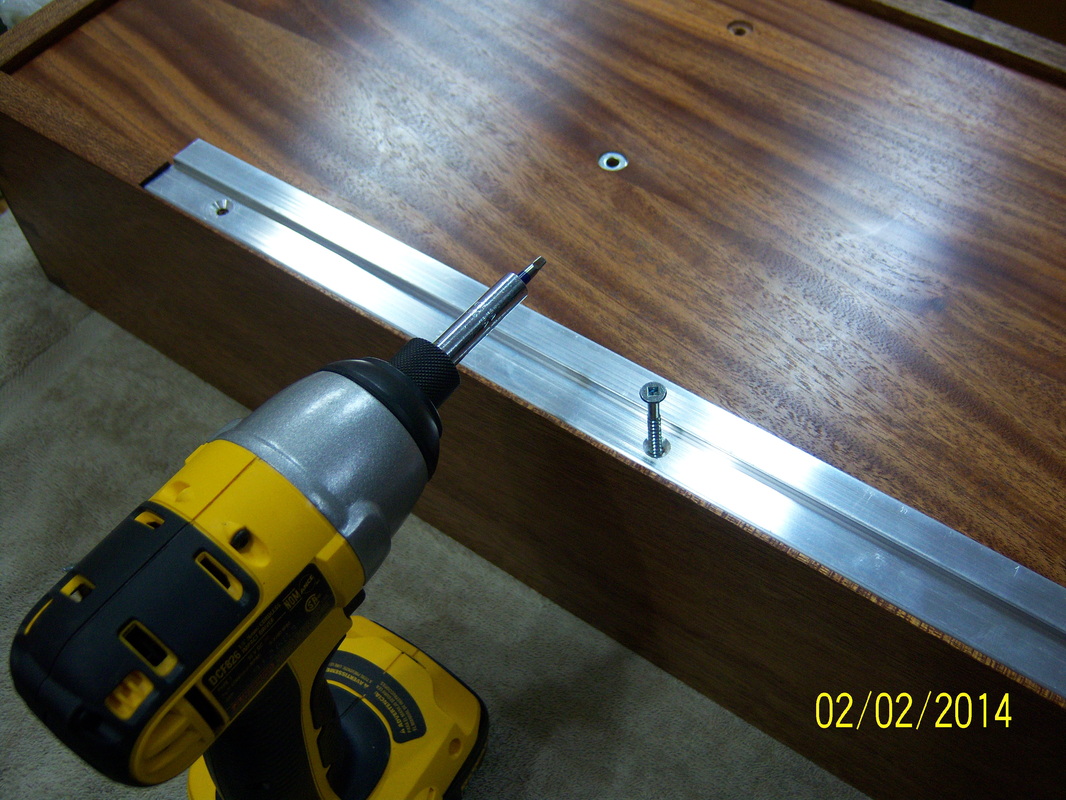
I marked out five, evenly spaced locations on the Z-Clip rail for the screw placement. Using a punch, I created a small dimple for the drill bit to catch at each marked location.
Mahogany Saber Case
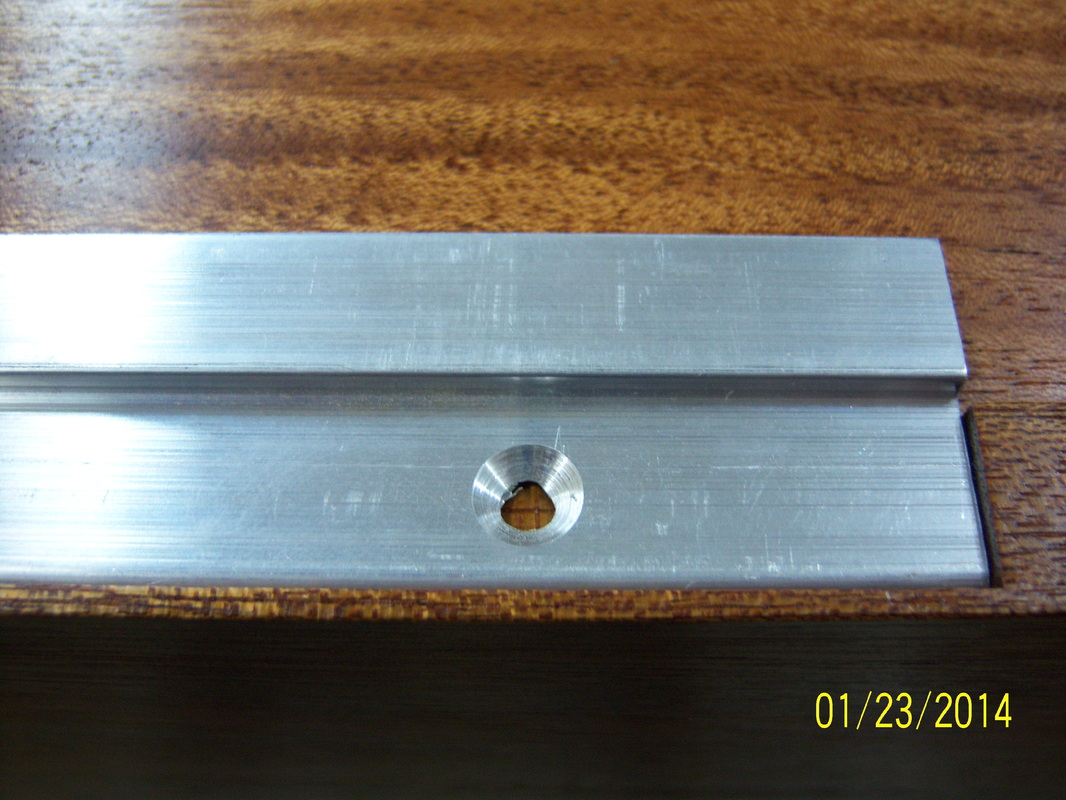
After drilling a 3/16" hole through the aluminum rail on the drill press, I used a inexpensive countersink to create the recess that will allow the screw to sit flush with the surface of the rail.
I used the five dilled holes in the rail to mark the location for each screw as well.
I used the five dilled holes in the rail to mark the location for each screw as well.
Mahogany Saber Case
Never missing an opportunity to use an old tool, I installed a 1/8" drill bit in a hand drill and drilled the pilot holes for the rail screws.
Mahogany Saber Case
Mahogany Saber Case

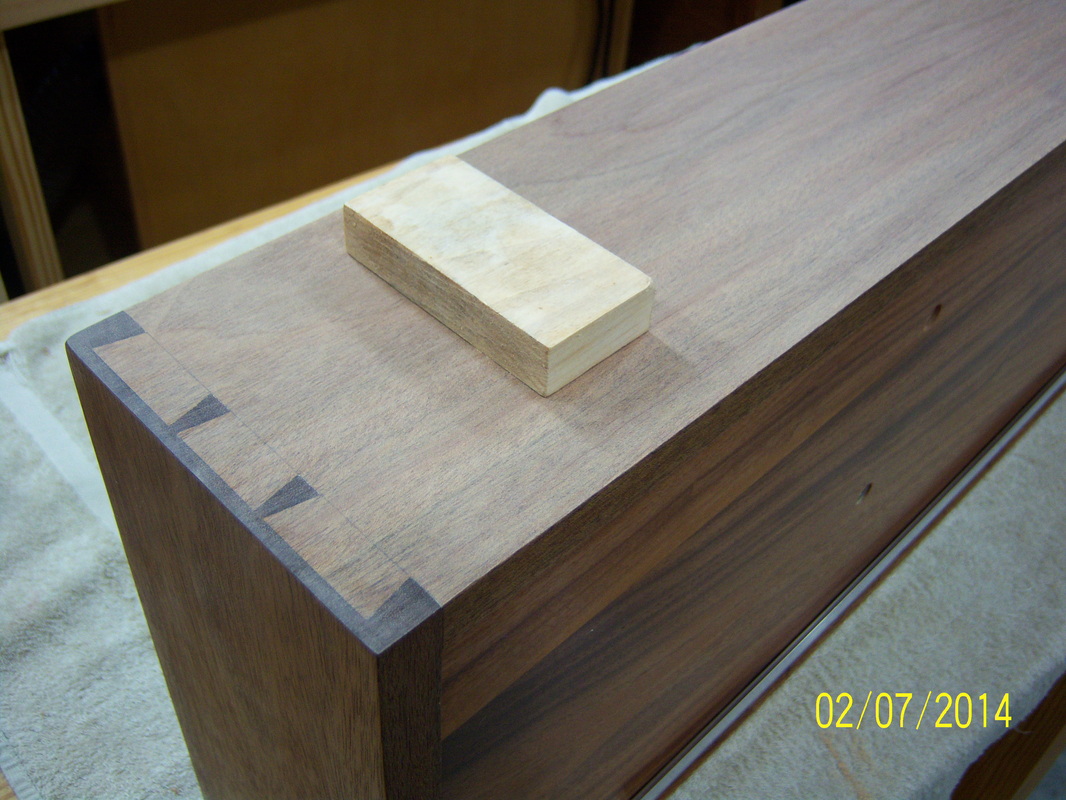
The framed glass door will be held closed using a couple rare earth magnets. Measuring over 3-inches, I used an awl to mark the center of the case edge where a 1/2" recess would be cut.
Mahogany Saber Case
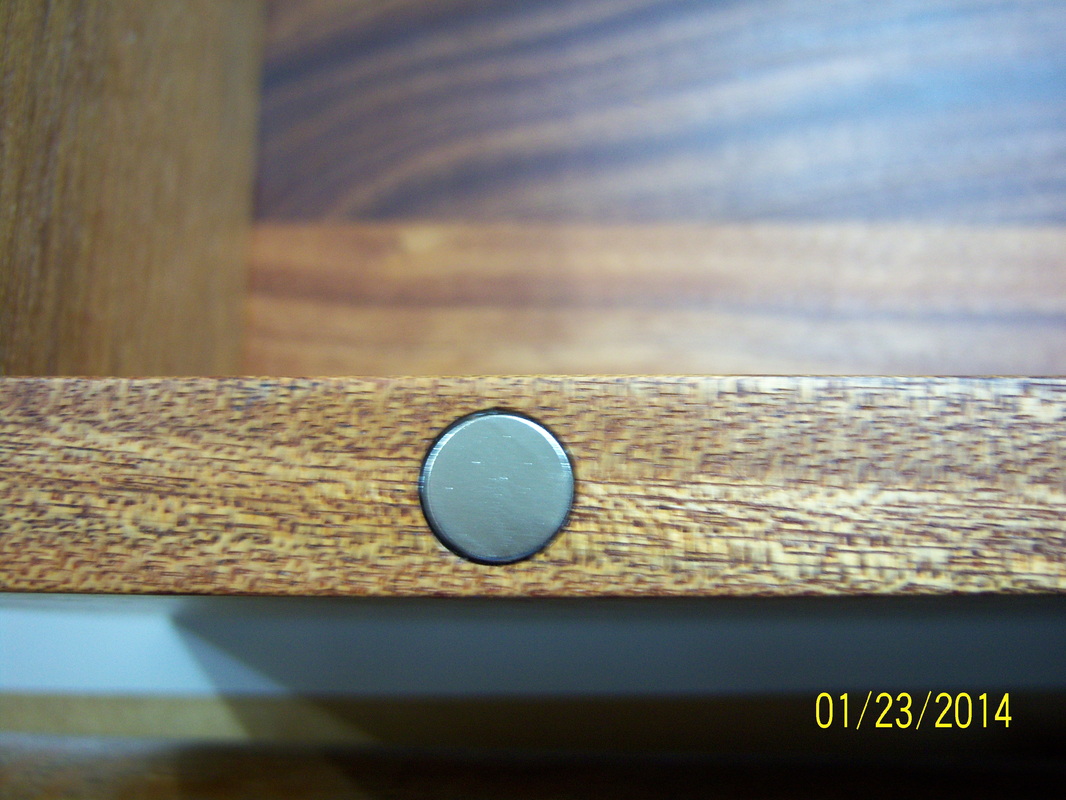
I used a 1/2" forstner bit to remove just enough material to allow the magnet to sit flush with the case edge. The magnet was then held in place with some 5-minute epoxy.
Mahogany Saber Case
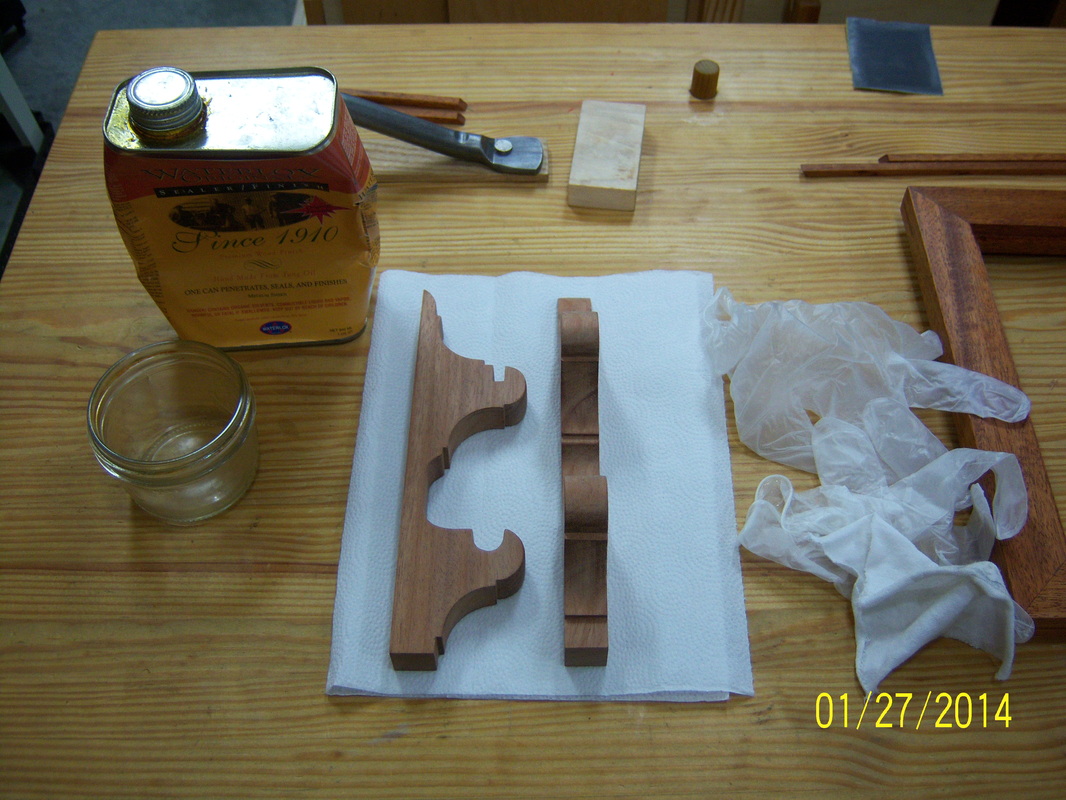
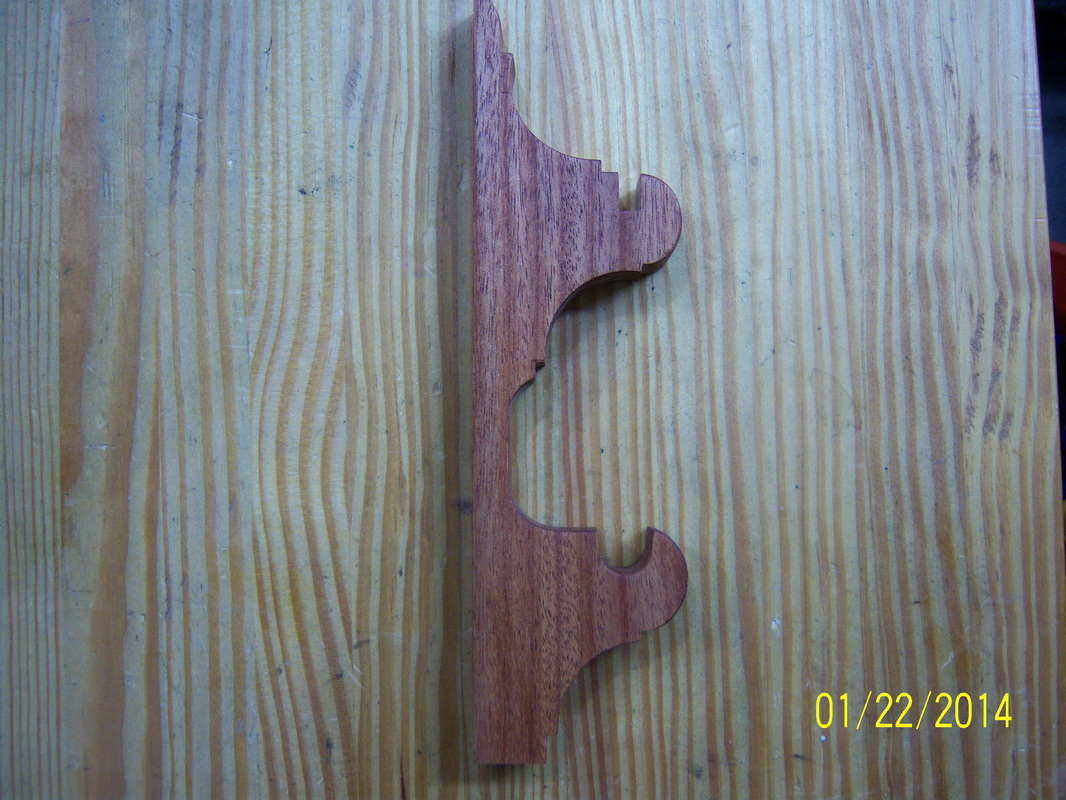
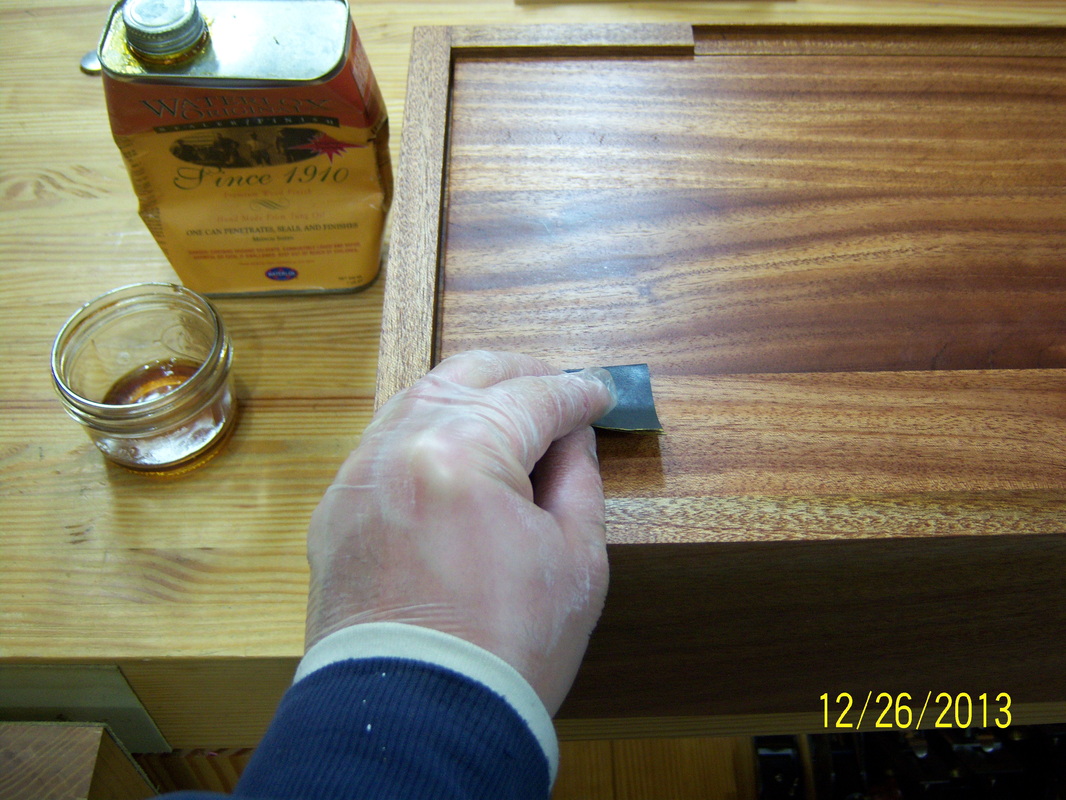
Now that all of the cutting, fitting, drilling, etc. of the vertical supports, hinges, and magnet closures is done, I need to apply a few coats of Waterlox Original for the finish.
Mahogany Saber Case
Here the vertical supports have received two coats of Waterlox and are not as shiny as they will end up being after a few more coats.
Mahogany Saber Case
One area on the supports that seemed to absorb a lot of finish and was slow to develop any kind of sheen was the area of exposed end grain in the concaved sections. I applied a coat of dewaxed amber shellac to those areas to help seal the end grain and to more quickly build up a layer of finish.
Mahogany Saber Case
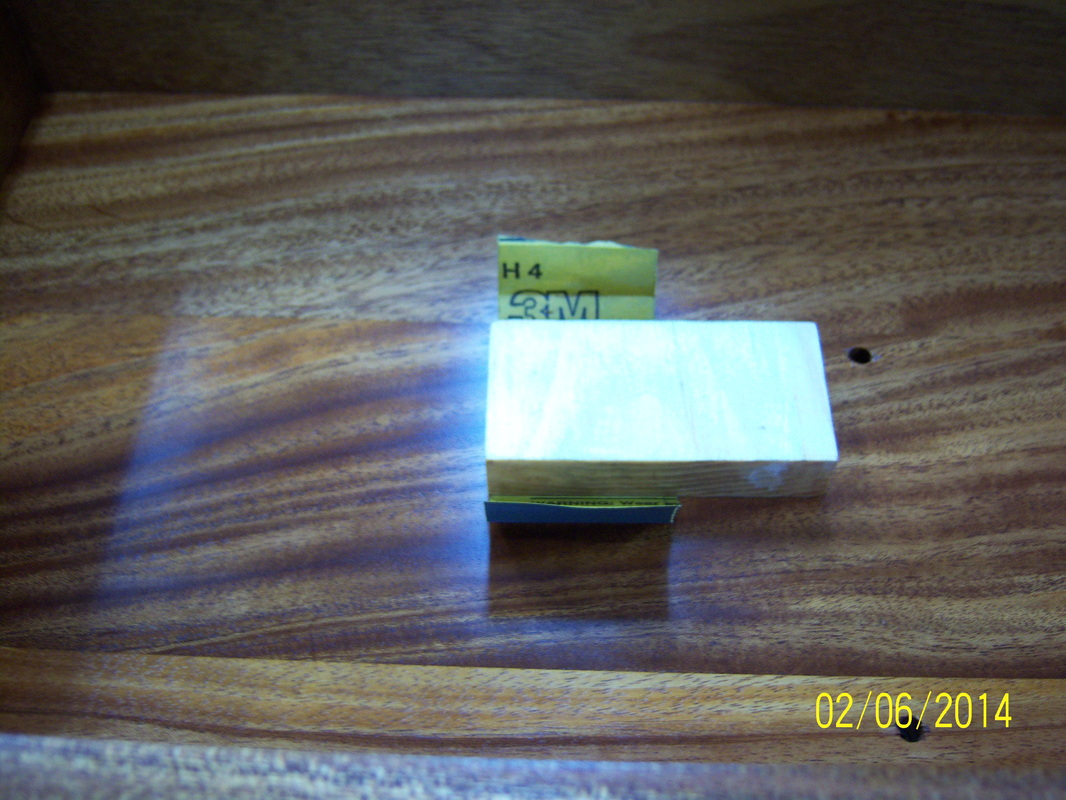
Using a scrap piece of wood as a sanding block, I lightly sanded the exterior of the case with 220-grit sandpaper.
Mahogany Saber Case

I used a rag dampened with mineral spirits to remove the sanding dust.
Mahogany Saber Case

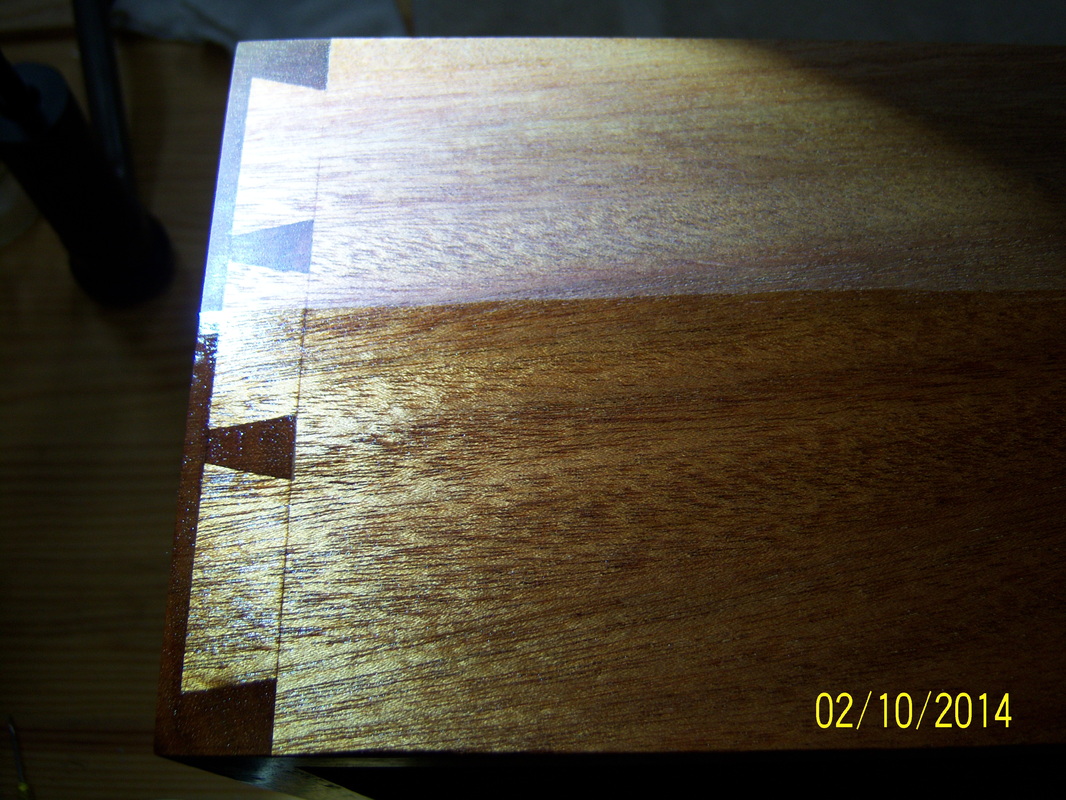
The next two photographs show you the difference between the raw wood and the first coat of Waterlox. This picture is with the normal shop lighting; the picture below has a closer light source added at a slight angle.
Mahogany Saber Case
Mahogany Saber Case
The Waterlox was left heavy on the surface of the case for several minutes prior to wiping off the excess.
Mahogany Saber Case

This is one coat of Waterlox with the excess having been removed. I am striving for a more satin, oil-rubbed appearance to the outside of the case, whereas the interior of the case will have more sheen. With that being said, the outside will receive another coat or two to give it some depth and more sheen.
Mahogany Saber Case

This is the first coat of Waterlox on the interior of the case.
Mahogany Saber Case

Mahogany Saber Case
Following Bob Flexner's advice from his book entitled, "Understanding Wood Finishing: How to Select and Apply the Right Finish", I used 600-grit wet/dry sandpaper to lightly wet sand the third coat on the back of the case. The sanding process removes any nibs in the previous coats of finish. It also left the current coat of finish looking incredibly smooth.
Mahogany Saber Case
This picture was taken prior to a coat of wax being applied. The back of the case will be left a satin sheen.
Mahogany Saber Case
After several coats of Waterlox, I wet sanded the interior portion of the case with 1000-grit and mineral spirits to level out the finish.
Mahogany Saber Case
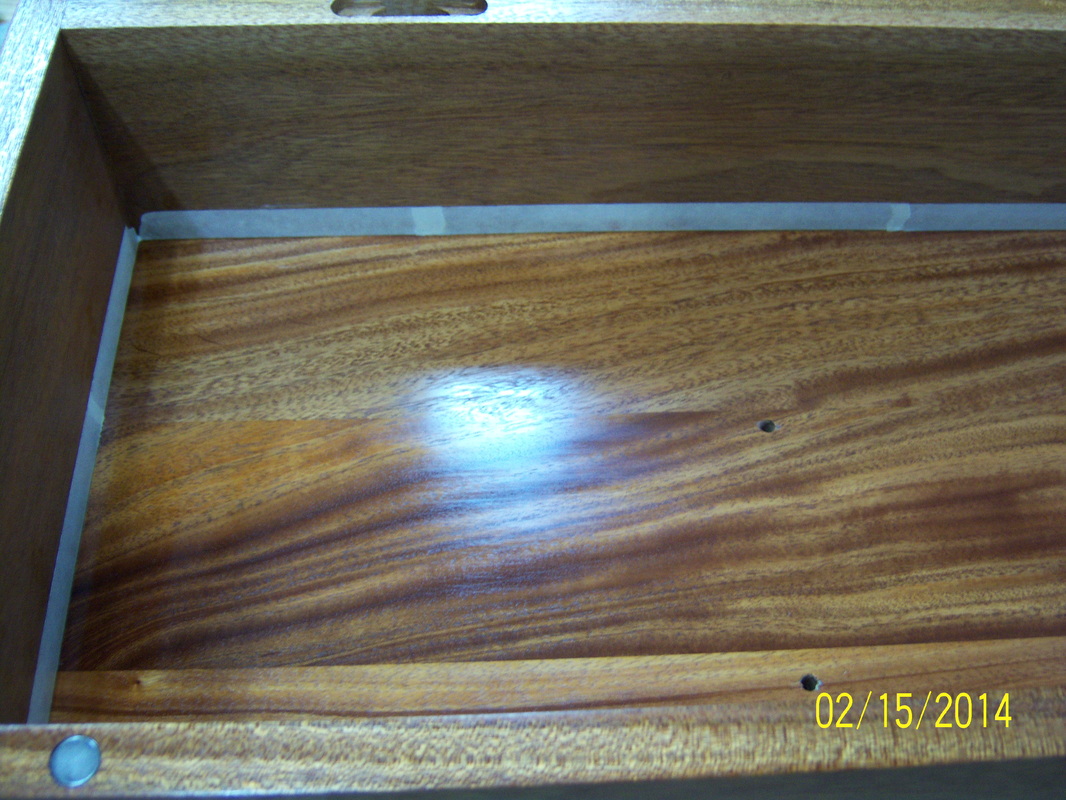
I was a little put-off by the dull streaks that were left behind after wet sanding. You can see the lines in the reflection of the overhead light.
Mahogany Saber Case
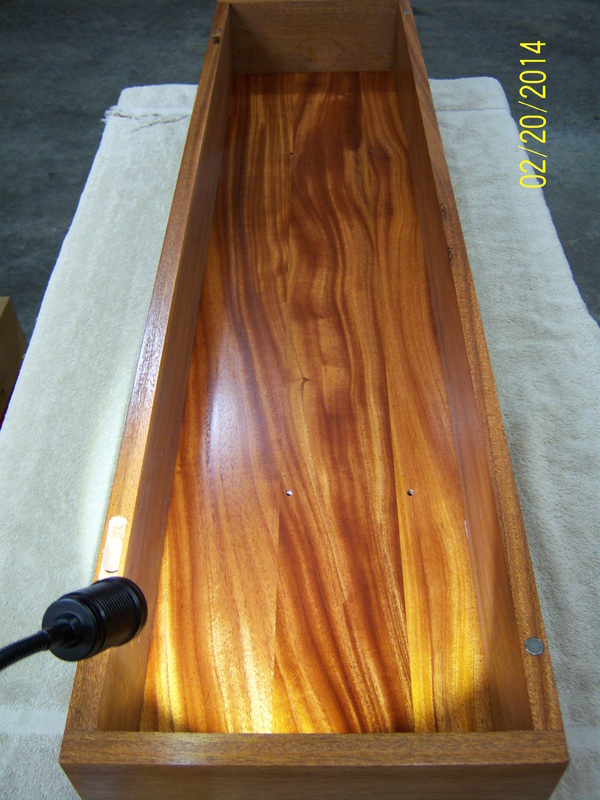
After applying a couple more thin coats of Waterlox the lines disappeared.
This picture does not do the depth of the finish justice. I am amazed at the reflective quality of the mahogany's ribbon striped grain.
This picture does not do the depth of the finish justice. I am amazed at the reflective quality of the mahogany's ribbon striped grain.
Mahogany Saber Case
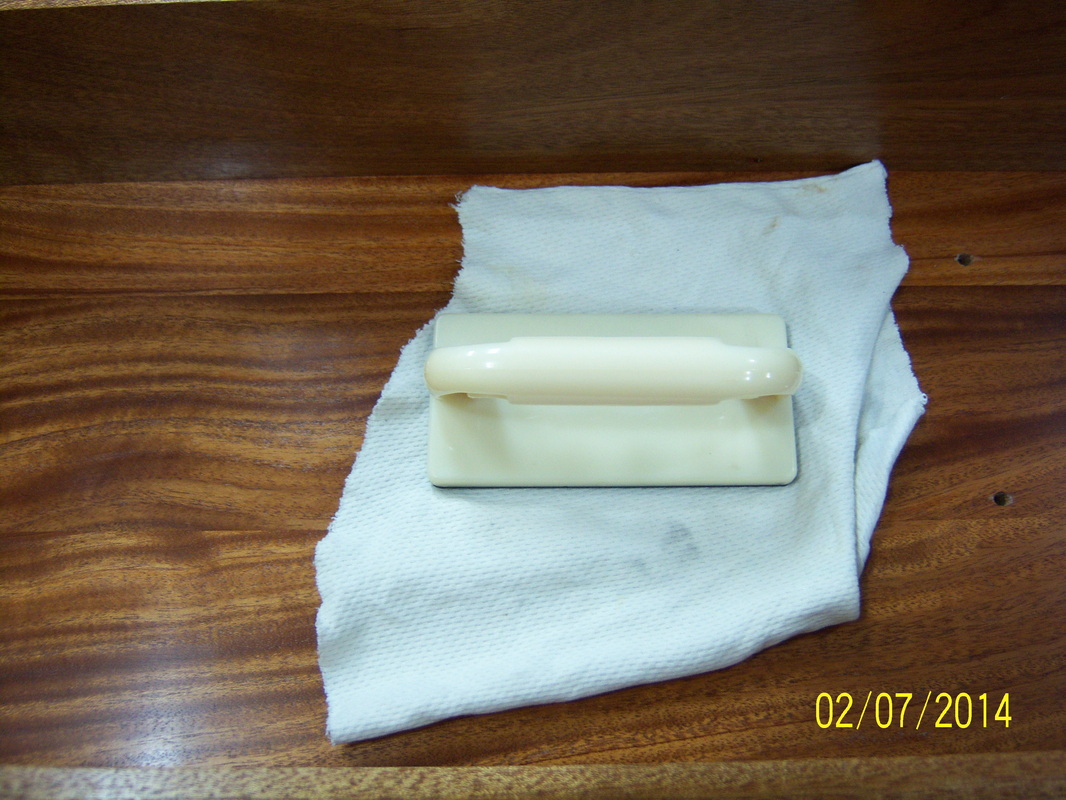
I applied a couple of coats of wax to the inside of the case and buffed the finish with a cotton rag. I used a rubber padded push stick to make sure I had solid contact with the wood's surface which helped make the buffing process easier.
Mahogany Saber Case
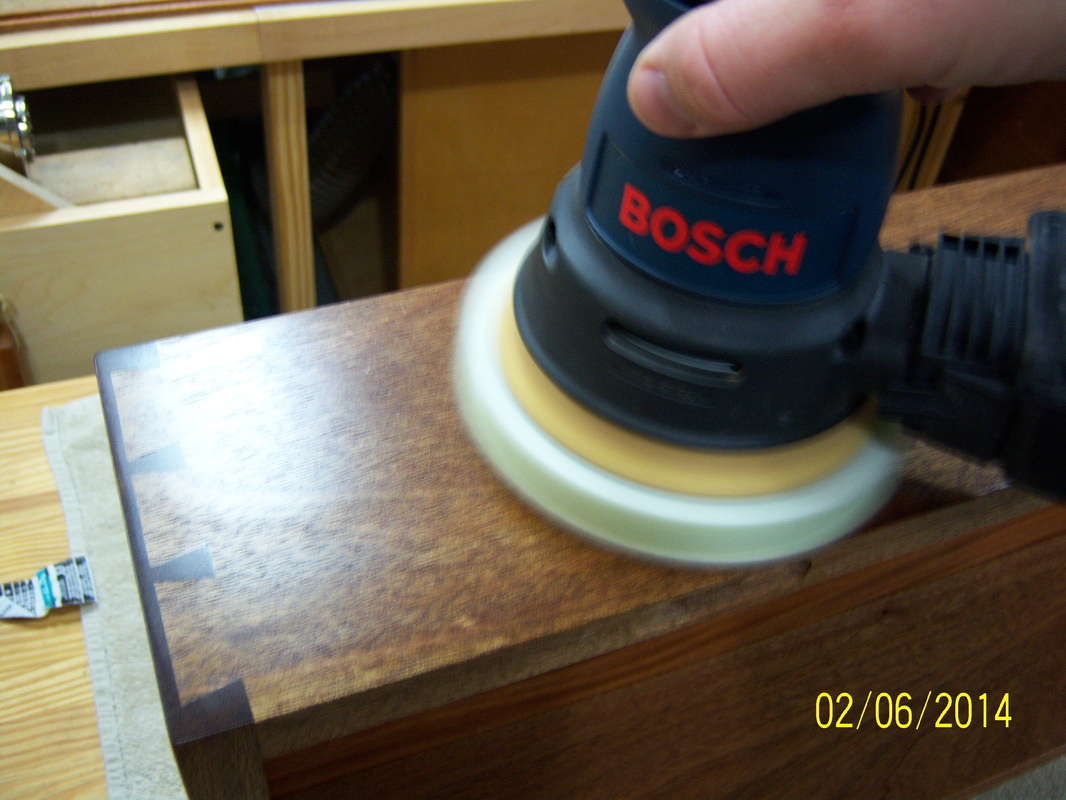
I applied a coat of wax to the outside of the case and used a SurBuf brand microfiber pad (purchased at WoodCraft) for polishing. The random orbital sander makes the work easier, and the pad leaves behind a smooth, slightly satin finish.
Mahogany Saber Case
In this picture I used the flash on the camera which shows a truer version of the color of the mahogany after the Waterlox was applied.
Mahogany Saber Case
Mahogany Saber Case
Finish was also applied to the pieces that will later be used to hold the glass in place.
Mahogany Saber Case
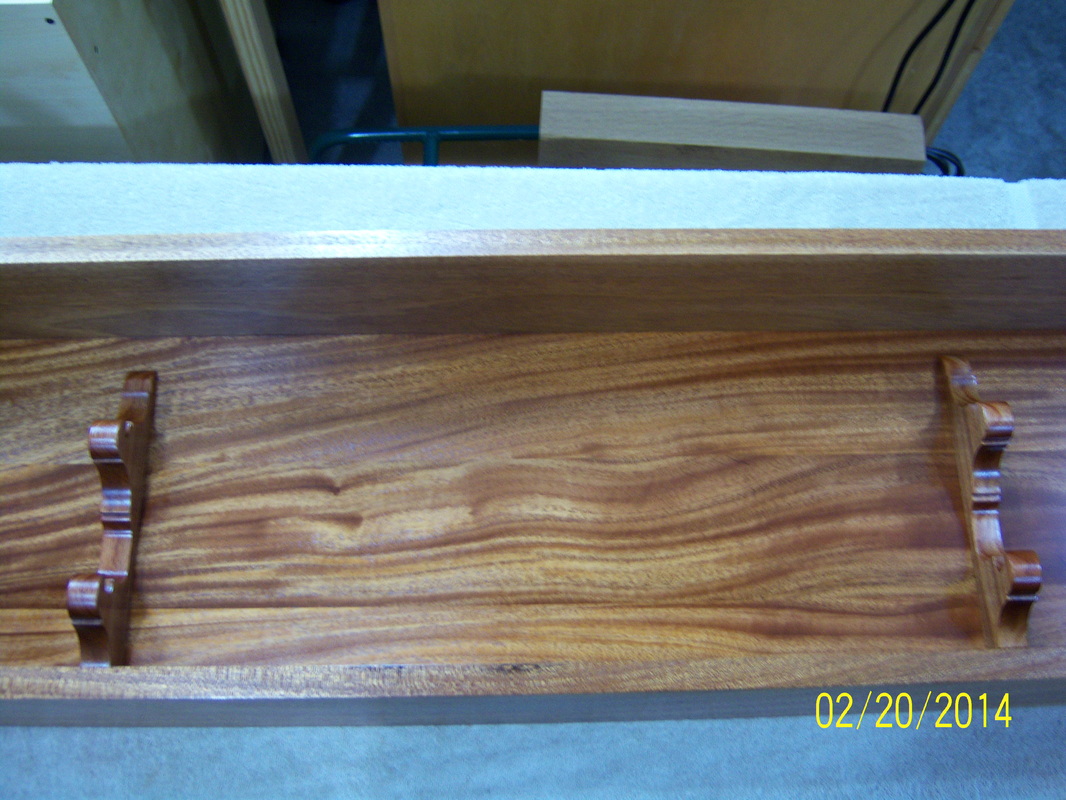
Now that the finishing is done, I have attached the vertical supports.
(The next four photographs were taken without the flash. They are a pretty good representation of the finish's luster.)
(The next four photographs were taken without the flash. They are a pretty good representation of the finish's luster.)
Mahogany Saber Case
Left vertical support.
Mahogany Saber Case

Right vertical support.
Mahogany Saber Case
Mahogany Saber Case
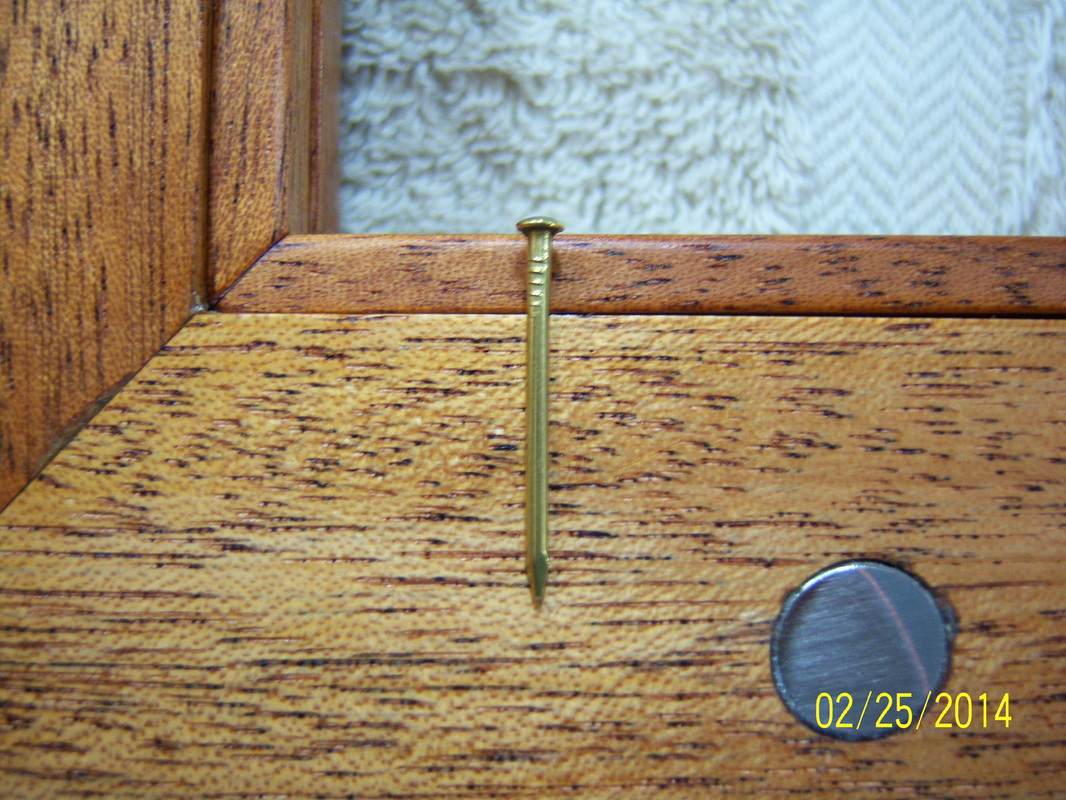
I used 1" brass escutcheon pins to attach the wooden strips that will hold the glass in place. The pins can be easily removed in the even that the glass were to break in the future.
Mahogany Saber Case

I drilled a small pilot hold through the wooden strip and partially into the case to make hammering in the pins a bit easier.
Mahogany Saber Case
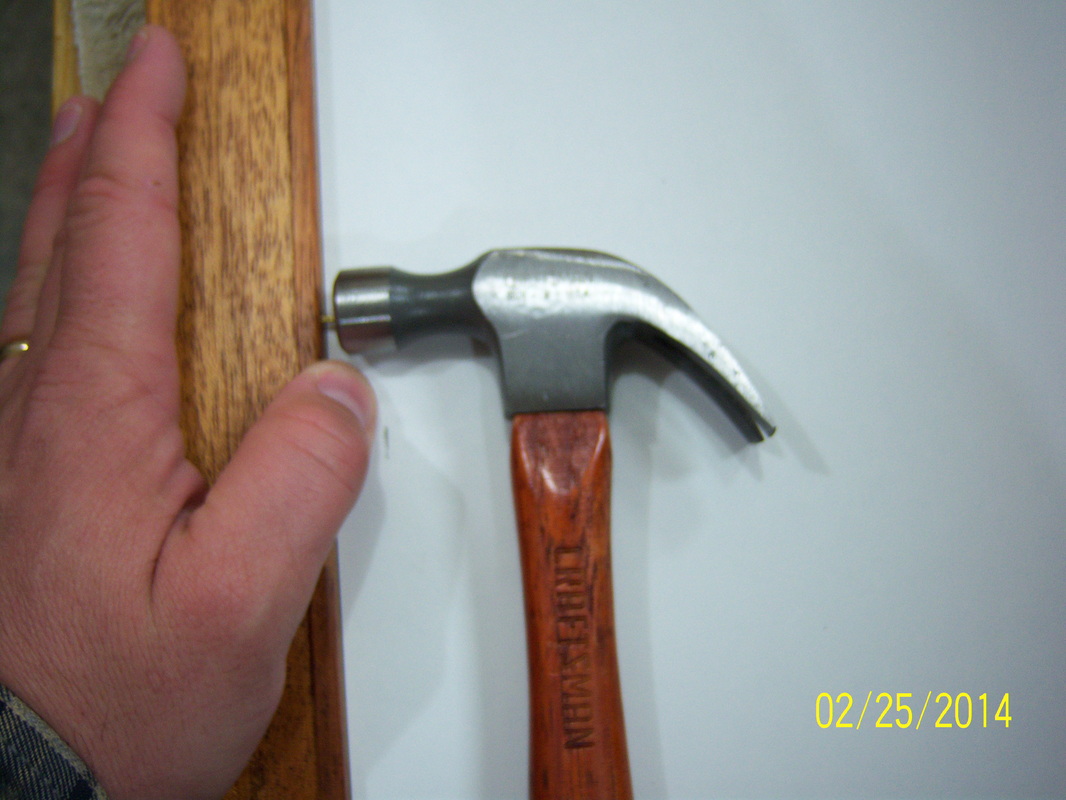
Last pin... The framed glass door was attached to the case and the Mahogany Saber Display Case was finally finished...
Mahogany Saber Case
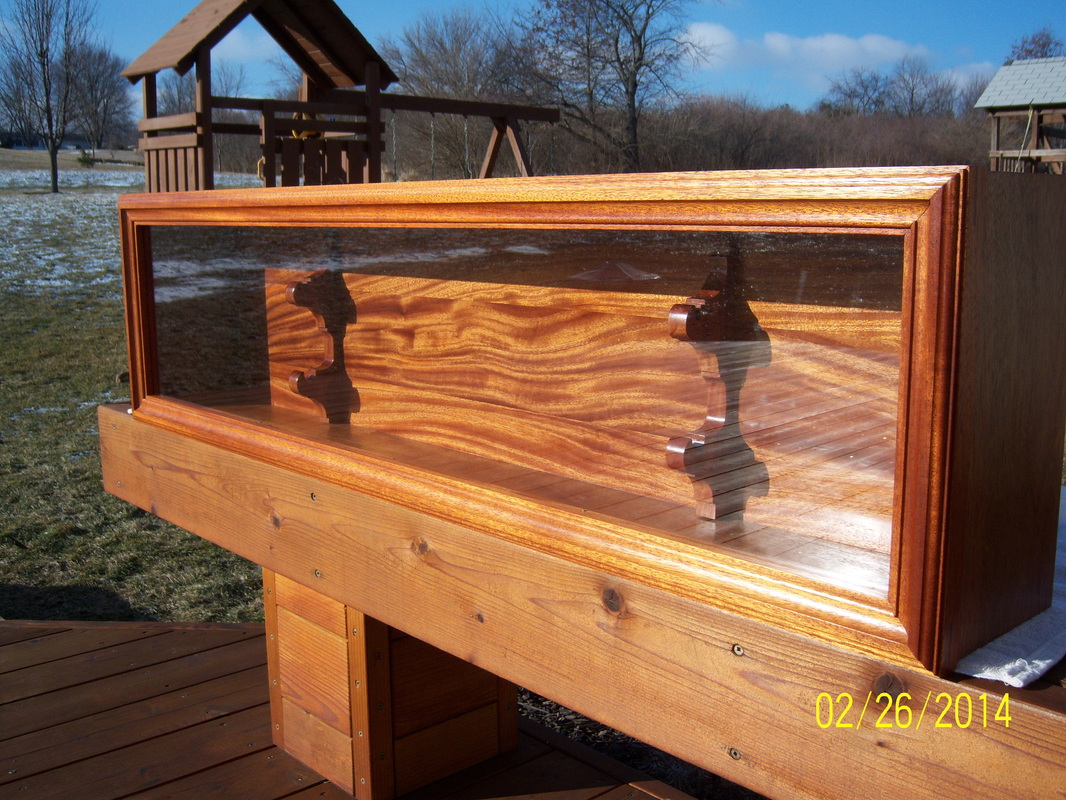
I am very pleased with the outcome of this case - not only in the appearance of the mahogany, but the reason the case was built and the recipient for which the case was built.
Mahogany Saber Case
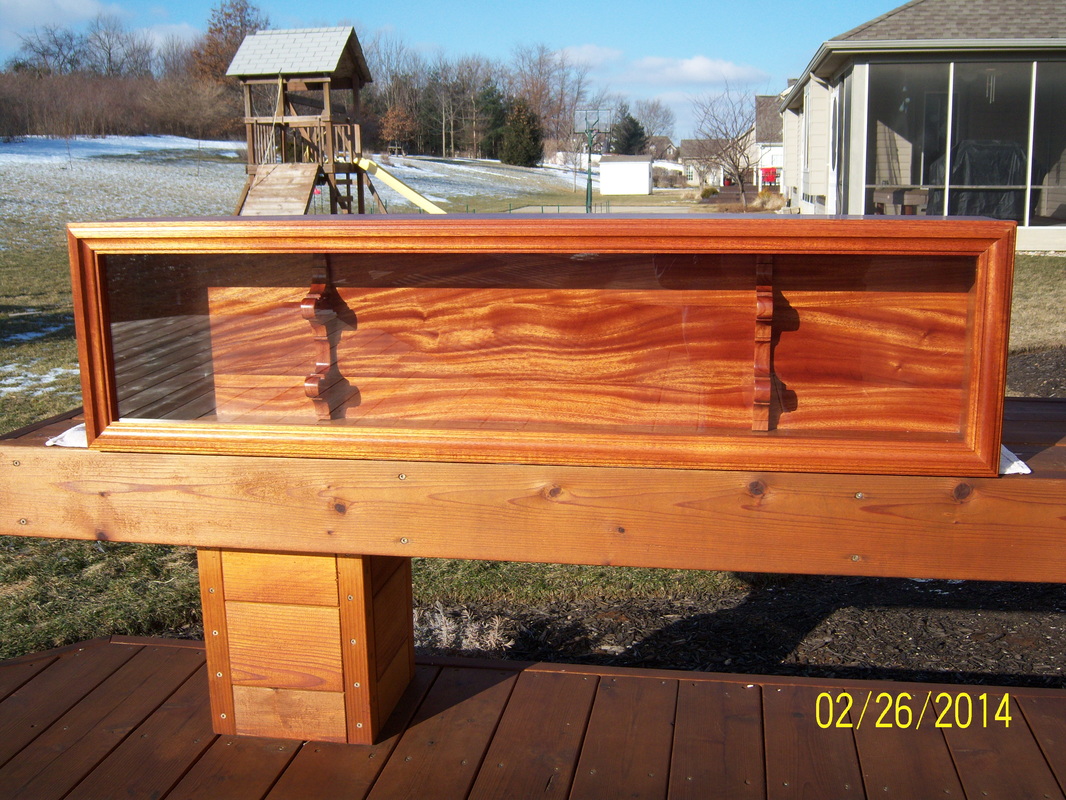
An interesting aspect of the case is how the color of the mahogany changes from a deep red to a dark brown depending on the angle you view the piece.
Mahogany Saber Case

Mahogany Saber Case
Mahogany Saber Case

Mahogany Saber Case
Mahogany Saber Case

Mahogany Saber Case